HP LaserJet Pro M1132s User Guide - Page 137
Use autoreduction for incoming faxes, All Rings, Single, Double, Triple, Double&Triple, Fax setup
 |
View all HP LaserJet Pro M1132s manuals
Add to My Manuals
Save this manual to your list of manuals |
Page 137 highlights
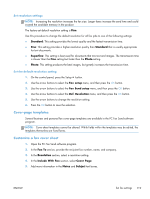
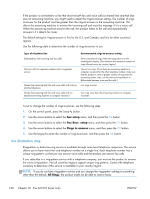
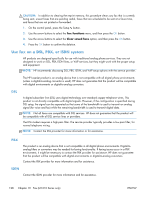
The settings are as follows: ● All Rings: The product answers any calls that come through the telephone line. ● Single: The product answers any calls that produce a single-ring pattern. ● Double: The product answers any calls that produce a double-ring pattern. ● Triple: The product answers any calls that produce a triple-ring pattern. ● Double&Triple: The product answers any calls that produce a double-ring or triple-ring pattern. To change ring patterns for call answering, complete the following steps: 1. On the control panel, press the Setup button. 2. Use the arrow buttons to select the Fax setup menu, and then press the OK button. 3. Use the arrow buttons to select the Fax Recv. setup menu, and then press the OK button. 4. Use the arrow buttons to select the Answer Ring Type menu, and then press the OK button. 5. Use the arrow buttons to select the ring pattern that you want, and then press the OK button. 6. After product installation is complete, ask someone to send a fax to you in order to verify that the ring-pattern service is working correctly. Use autoreduction for incoming faxes If the fit-to-page option is turned on, the product automatically reduces long faxes up to 75% to fit the information on the default paper size (for example, the fax is reduced from legal to letter size). If the fit-to-page option is turned off, long faxes print at full size on multiple pages. The factory-set default for incoming fax autoreduction is On. If you have the Stamp faxes option turned on, you might also want to turn on autoreduction. This reduces the size of the incoming faxes slightly, and prevents the page-stamp from forcing a fax onto two pages. NOTE: Make sure that the default media size setting matches the size of the media that is loaded in the tray. 1. On the control panel, press the Setup button. 2. Use the arrow buttons to select the Fax setup menu, and then press the OK button. 3. Use the arrow buttons to select the Fax Recv. setup menu, and then press the OK button. 4. Use the arrow buttons to select the Fit to page menu, and then press the OK button. 5. Use the arrow buttons to select the On or Off option, and then press the OK button to save the selection. ENWW Set fax settings 123
-
 1
1 -
2
-
3
-
4
-
5
-
6
-
7
-
8
-
9
-
10
-
11
-
12
-
13
-
14
-
15
-
16
-
17
-
18
-
19
-
20
-
21
-
22
-
23
-
24
-
25
-
26
-
27
-
28
-
29
-
30
-
31
-
32
-
33
-
34
-
35
-
36
-
37
-
38
-
39
-
40
-
41
-
42
-
43
-
44
-
45
-
46
-
47
-
48
-
49
-
50
-
51
-
52
-
53
-
54
-
55
-
56
-
57
-
58
-
59
-
60
-
61
-
62
-
63
-
64
-
65
-
66
-
67
-
68
-
69
-
70
-
71
-
72
-
73
-
74
-
75
-
76
-
77
-
78
-
79
-
80
-
81
-
82
-
83
-
84
-
85
-
86
-
87
-
88
-
89
-
90
-
91
-
92
-
93
-
94
-
95
-
96
-
97
-
98
-
99
-
100
-
101
-
102
-
103
-
104
-
105
-
106
-
107
-
108
-
109
-
110
-
111
-
112
-
113
-
114
-
115
-
116
-
117
-
118
-
119
-
120
-
121
-
122
-
123
-
124
-
125
-
126
-
127
-
128
-
129
-
130
-
131
-
 132
132 -
 133
133 -
 134
134 -
 135
135 -
 136
136 -
 137
137 -
 138
138 -
 139
139 -
 140
140 -
 141
141 -
 142
142 -
143
-
144
-
145
-
146
-
147
-
148
-
149
-
150
-
151
-
152
-
153
-
154
-
155
-
156
-
157
-
158
-
159
-
160
-
161
-
162
-
163
-
164
-
165
-
166
-
167
-
168
-
169
-
170
-
171
-
172
-
173
-
174
-
175
-
176
-
177
-
178
-
179
-
180
-
181
-
182
-
183
-
184
-
185
-
186
-
187
-
188
-
189
-
190
-
191
-
192
-
193
-
194
-
195
-
196
-
197
-
198
-
199
-
200
-
201
-
202
-
203
-
204
-
205
-
206
-
207
-
208
-
209
-
210
-
211
-
212
-
213
-
214
-
215
-
216
-
217
-
218
-
219
-
220
-
221
-
222
-
223
-
224
-
225
-
226
-
227
-
228
-
229
-
230
-
231
-
232
-
233
-
234
-
235
-
236
-
237
-
238
-
239
-
240
-
241
-
242
-
243
-
244
-
245
-
246
-
247
-
248
-
249
-
250
-
251
-
252
-
253
-
254
-
255
-
256
-
257
-
258
-
259
-
260
-
261
-
262
-
263
-
264
-
265
-
266
-
267
-
268
-
269
-
270
-
271
-
272
-
273
-
274
-
275
-
276
-
277
-
278
-
279
-
280
-
281
-
282
-
283
-
284
 |
 |