HP Pavilion a1000 Getting Started Guide - Page 54
Start, Programs, HP ImageZone Plus, Backup and Restore, Backup, Print LightScribe label, Layout
 |
View all HP Pavilion a1000 manuals
Add to My Manuals
Save this manual to your list of manuals |
Page 54 highlights
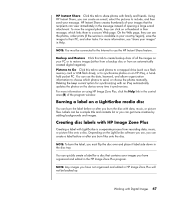
To burn a disc label in HP Image Zone Plus: 1 Click Start, All Programs, HP, HP ImageZone Plus, and then click HP ImageZone Plus again. 2 Select the Backup and Restore tab, and then click Backup on the left side of the window. 3 Click Print LightScribe label. 4 Insert disc, and click OK. The Sonic Express Labeler program opens. 5 Click Text and then enter your text for Title and Subtitle. 6 For each line of content description, click New and enter text for the information you want to include, and then click OK. 7 Click OK again when finished adding all the contents information. 8 Select a label template by clicking Layout and choosing a layout. 9 Select a background, if desired, by clicking Background. Select one of the provided backgrounds or click More to find one of your own images to use as a background. NOTE: LightScribe creates a grayscale image similar to a black and white photograph. 10 When you are satisfied with the appearance of your label design, insert the LightScribe disc (label side down) into the disc drive tray and then click Print. NOTE: If a message is displayed that the disc is not recognized, you may not have the correct media or you may need to flip the disc over to record your label. To record the label, the disc must be placed label side down in the disc tray. 11 From the Disc Label menu, select LightScribe 12cm Disc. 12 Select a Contrast Level and then click OK to begin burning the label. The disc is ejected when the label is complete. The estimated time to complete the label displays, along with a progress bar to show you the time remaining. Printing a label can take up to 40 minutes, depending on how much data is on the label. You can continue to work on your PC while LightScribe is burning the label. NOTE: A sudden bump or vibration of the PC during the labeling process may affect the quality of the label. 48 Getting Started Guide
-
 1
1 -
2
-
3
-
4
-
5
-
6
-
7
-
8
-
9
-
10
-
11
-
12
-
13
-
14
-
15
-
16
-
17
-
18
-
19
-
20
-
21
-
22
-
23
-
24
-
25
-
26
-
27
-
28
-
29
-
30
-
31
-
32
-
33
-
34
-
35
-
36
-
37
-
38
-
39
-
40
-
41
-
42
-
43
-
44
-
45
-
46
-
47
-
48
-
 49
49 -
 50
50 -
 51
51 -
 52
52 -
 53
53 -
 54
54 -
 55
55 -
 56
56 -
 57
57 -
 58
58 -
 59
59 -
60
-
61
-
62
-
63
-
64
-
65
-
66
-
67
-
68
-
69
-
70
-
71
-
72
-
73
-
74
-
75
-
76
-
77
-
78
-
79
-
80
-
81
-
82
-
83
-
84
-
85
-
86
-
87
-
88
-
89
-
90
-
91
-
92
-
93
-
94
-
95
-
96
-
97
-
98
-
99
-
100
 |
 |
