HP Visualize J5000 hp Visualize J5000, J7000 workstations service handbook (a4 - Page 99
CPU Assembly
 |
View all HP Visualize J5000 manuals
Add to My Manuals
Save this manual to your list of manuals |
Page 99 highlights
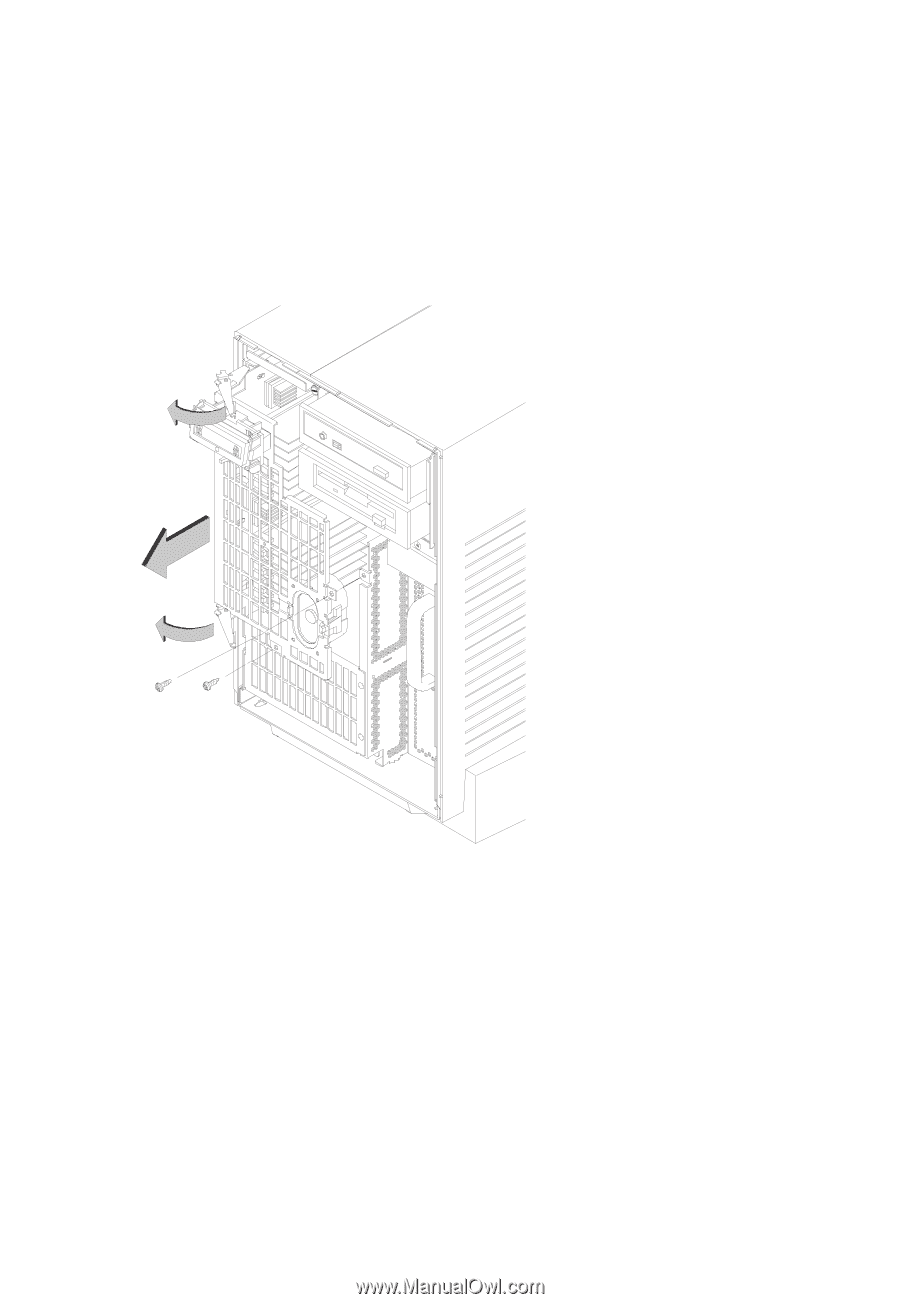
CPU Assembly This section describes how to remove the J Class CPU assembly. To remove the CPU assembly, open the system unit and follow these steps: 1. Remove the two screws in the center of the CPU Assembly. 2. Pull the ejector latches on the left side, top and bottom of the CPU Assembly to release the assembly from the internal connectors. See Figure 5-10. Figure 5-10. Removing the CPU Assembly 3. Pull the CPU Assembly straight out and place on a flat surface. This assembly is heavy. Move it slowly and be sure it is properly supported. Field Replaceable Units 5-17
-
 1
1 -
2
-
3
-
4
-
5
-
6
-
7
-
8
-
9
-
10
-
11
-
12
-
13
-
14
-
15
-
16
-
17
-
18
-
19
-
20
-
21
-
22
-
23
-
24
-
25
-
26
-
27
-
28
-
29
-
30
-
31
-
32
-
33
-
34
-
35
-
36
-
37
-
38
-
39
-
40
-
41
-
42
-
43
-
44
-
45
-
46
-
47
-
48
-
49
-
50
-
51
-
52
-
53
-
54
-
55
-
56
-
57
-
58
-
59
-
60
-
61
-
62
-
63
-
64
-
65
-
66
-
67
-
68
-
69
-
70
-
71
-
72
-
73
-
74
-
75
-
76
-
77
-
78
-
79
-
80
-
81
-
82
-
83
-
84
-
85
-
86
-
87
-
88
-
89
-
90
-
91
-
92
-
93
-
 94
94 -
 95
95 -
 96
96 -
 97
97 -
 98
98 -
 99
99 -
 100
100 -
 101
101 -
 102
102 -
 103
103 -
 104
104 -
105
-
106
-
107
-
108
-
109
-
110
-
111
-
112
-
113
-
114
-
115
-
116
-
117
-
118
-
119
-
120
-
121
-
122
-
123
-
124
-
125
-
126
-
127
-
128
-
129
-
130
-
131
-
132
-
133
-
134
-
135
-
136
-
137
-
138
-
139
-
140
-
141
-
142
-
143
-
144
-
145
-
146
-
147
-
148
-
149
-
150
-
151
-
152
-
153
-
154
-
155
-
156
-
157
-
158
-
159
-
160
-
161
-
162
-
163
-
164
-
165
-
166
-
167
-
168
-
169
-
170
-
171
-
172
 |
 |
Field Replaceable Units
5–17
CPU Assembly
This section describes how to remove the J Class CPU assembly.
To remove the CPU assembly, open the system unit and follow these steps:
1.
Remove the two screws in the center of the CPU Assembly.
2.
Pull the ejector latches on the left side, top and bottom of the CPU Assembly to
release the assembly from the internal connectors. See Figure 5–10.
Figure 5–10.
Removing the CPU Assembly
3.
Pull the CPU Assembly straight out and place on a flat surface. This assembly is
heavy. Move it slowly and be sure it is properly supported.