JVC GY-HM700UXT 132 page operation manual for the GY-HM700 solid state camcord - Page 110
Smoothening the Skin Color (Skin Detail Function), Preparations Before Using the Skin Detail
 |
View all JVC GY-HM700UXT manuals
Add to My Manuals
Save this manual to your list of manuals |
Page 110 highlights
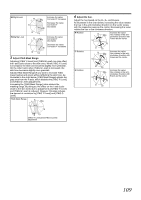
Camera Features Smoothening the Skin Color (Skin Detail Function) The Skin Detail function can be used to reduce the contour enhancement of video signals for only the skin areas so as to produce a smoother skin tone. Preparations Before Using the Skin Detail Function (Skin Adjust Function) 1 Adjust the white balance. (A Page 40) 2 Display the [Skin Color Adjust] screen. (A Page 78) ● Select [Main Menu]B[Camera Process]B[Detail]/ [Adjust]B[Skin Color Adjust], and press the Set button (R). ● The entire image switches to black-and-white display, leaving only the detected skin areas in color. Skin Color Detection Frame Ⅵ Color Range Setting 1 Place the cursor at [Skin Color Range] with the cross- shaped button (JK). 2 Press the Set button (R) or cross-shaped button (I) to move the cursor to a setting value. 2 3 Select a setting value using the cross-shaped button (JK), and press the Set button (R). Select a setting within the [Narrow, -1 to -9, Normal, 9 to 1, Wide] range. 4 Place the cursor at [Back] after setting is complete, and press the Set button (R). The data is saved, and the screen returns to the [Detail] menu. Memo: ● The displays for [Bars], [Zebra], markers ([Aspect Marker]/ [Safety Zone]/[Center Mark]), [Focus Assist] mode, and [B] mode in the [VF Display] menu are temporarily turned AOffB. Ⅵ Hue Range Detection 1 Project the detected object inside the skin color detection frame. 2 Place the cursor at [Skin Color Detect] with the cross- shaped button (JK). 3 Press the Set button (R). Display switches from AStopB to AExecuteB, and detection starts. Memo: ● AErrorB is displayed if the object inside the frame is not within the preset color range. 4 Press the Set button (R) after the desired hue range is detected. ● If no AErrorB is displayed, the data is saved and the process ends. ● If AErrorB appears, the process ends without saving the data. 5 Place the cursor at [Back] after the hue range is detected, and press the Set button (R). Returns to the [Detail] menu screen. Using the Skin Detail Function 1 Set [Skin Detect] to AOnB. (A Page 78) ● Select [Main Menu]B[Camera Process]B[Detail]/ [Adjust]B[Skin Detect] and set to AOnB. ● AS.DTLB appears on the STATUS 0 and 1 Screens of the LCD monitor and viewfinder when the Skin Detail function is activated. AS.DTLB appears 1280x720 30/24 fps 24p HQ OK 00:00:00:00 A 100min B 100min STBY 282min MAX 123% MIN 45% SKIN AREA S.DTL B -3 ND1/16 A STATUS 1 Screen 2 Set the adjustment level for the contour enhancement of the skin tone. (A Page 78) Set using [Main Menu]B[Camera Process]B[Detail]/ [Adjust]B[Skin Color Detect]/[Level]. 106
-
 1
1 -
2
-
3
-
4
-
5
-
6
-
7
-
8
-
9
-
10
-
11
-
12
-
13
-
14
-
15
-
16
-
17
-
18
-
19
-
20
-
21
-
22
-
23
-
24
-
25
-
26
-
27
-
28
-
29
-
30
-
31
-
32
-
33
-
34
-
35
-
36
-
37
-
38
-
39
-
40
-
41
-
42
-
43
-
44
-
45
-
46
-
47
-
48
-
49
-
50
-
51
-
52
-
53
-
54
-
55
-
56
-
57
-
58
-
59
-
60
-
61
-
62
-
63
-
64
-
65
-
66
-
67
-
68
-
69
-
70
-
71
-
72
-
73
-
74
-
75
-
76
-
77
-
78
-
79
-
80
-
81
-
82
-
83
-
84
-
85
-
86
-
87
-
88
-
89
-
90
-
91
-
92
-
93
-
94
-
95
-
96
-
97
-
98
-
99
-
100
-
101
-
102
-
103
-
104
-
 105
105 -
 106
106 -
 107
107 -
 108
108 -
 109
109 -
 110
110 -
 111
111 -
 112
112 -
 113
113 -
 114
114 -
 115
115 -
116
-
117
-
118
-
119
-
120
-
121
-
122
-
123
-
124
-
125
-
126
-
127
-
128
-
129
-
130
-
131
-
132
 |
 |
