Konica Minolta Kodak i780 Image Processing Guide - Page 55
Settings, Preview, Device, Save as, Scanner window. The General
 |
View all Konica Minolta Kodak i780 manuals
Add to My Manuals
Save this manual to your list of manuals |
Page 55 highlights
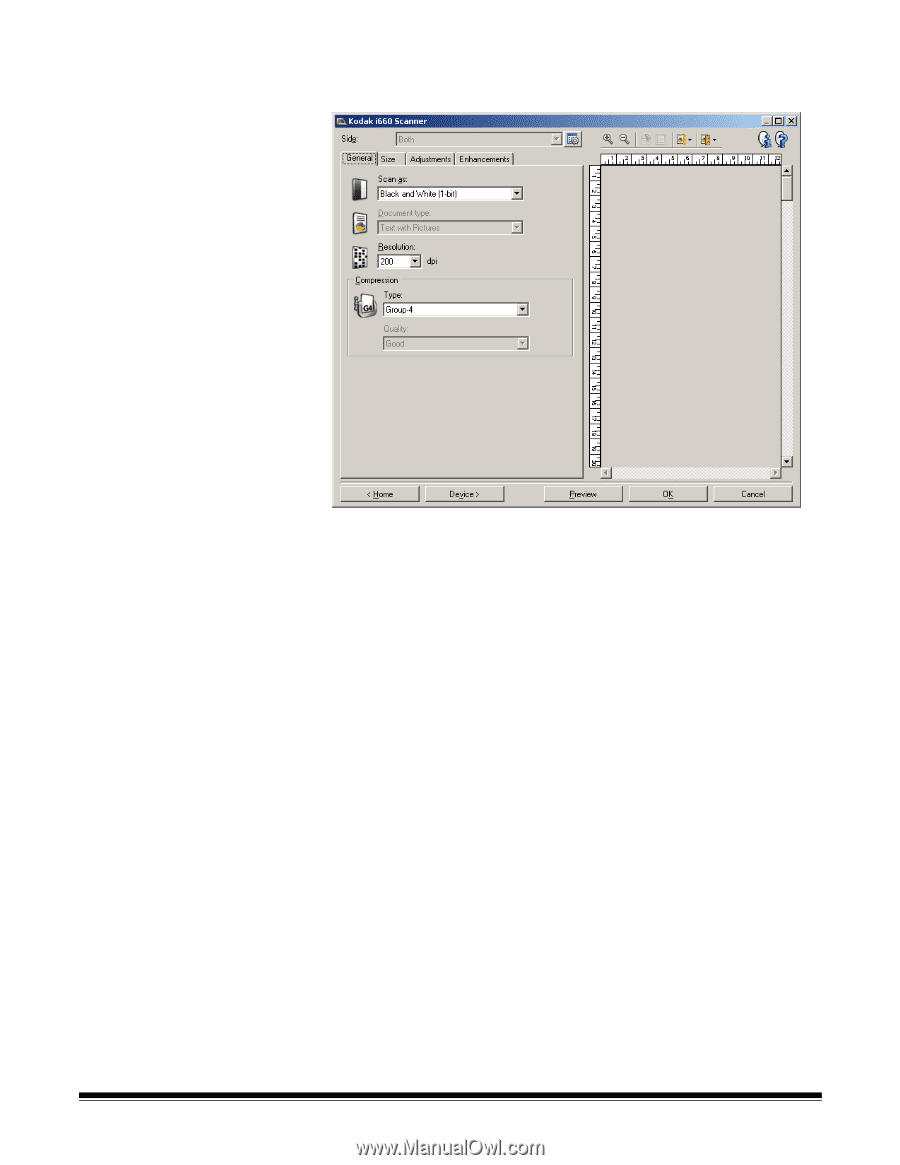
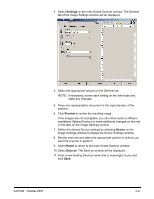
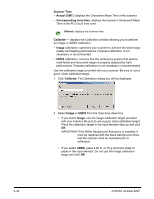
3. Select Settings on the main Kodak Scanner window. The General tab of the Image Settings window will be displayed. 4. Select the appropriate options on the General tab. NOTE: If necessary, review each setting on the other tabs and make any changes. 5. Place one representative document in the input elevator of the scanner. 6. Click Preview to review the resulting image. If the images are not acceptable, you can either select a different predefined Setting Shortcut or make additional changes on the rest of the tabs on the Image Settings window. 7. Define the desired Device settings by selecting Device on the Image Settings window to display the Device Settings window. 8. Review each tab and select the appropriate options or actions you want the scanner to perform. 9. Select Home to return to the main Kodak Scanner window. 10. Select Save as. The Save as window will be displayed. 11. Enter a new Setting Shortcut name that is meaningful to you and click Save. A-61504 October 2007 3-37
-
 1
1 -
2
-
3
-
4
-
5
-
6
-
7
-
8
-
9
-
10
-
11
-
12
-
13
-
14
-
15
-
16
-
17
-
18
-
19
-
20
-
21
-
22
-
23
-
24
-
25
-
26
-
27
-
28
-
29
-
30
-
31
-
32
-
33
-
34
-
35
-
36
-
37
-
38
-
39
-
40
-
41
-
42
-
43
-
44
-
45
-
46
-
47
-
48
-
49
-
 50
50 -
 51
51 -
 52
52 -
 53
53 -
 54
54 -
 55
55 -
 56
56 -
 57
57 -
 58
58 -
 59
59 -
 60
60 -
61
-
62
-
63
-
64
-
65
-
66
-
67
-
68
-
69
-
70
-
71
-
72
-
73
-
74
-
75
-
76
-
77
-
78
-
79
-
80
-
81
-
82
-
83
-
84
-
85
 |
 |