Konica Minolta bizhub C360 bizhub C220/C280/C360 Fax Driver Operations User Ma - Page 50
Configuring the [Stamp/Composition] tab, Item Name, Functions
 |
View all Konica Minolta bizhub C360 manuals
Add to My Manuals
Save this manual to your list of manuals |
Page 50 highlights
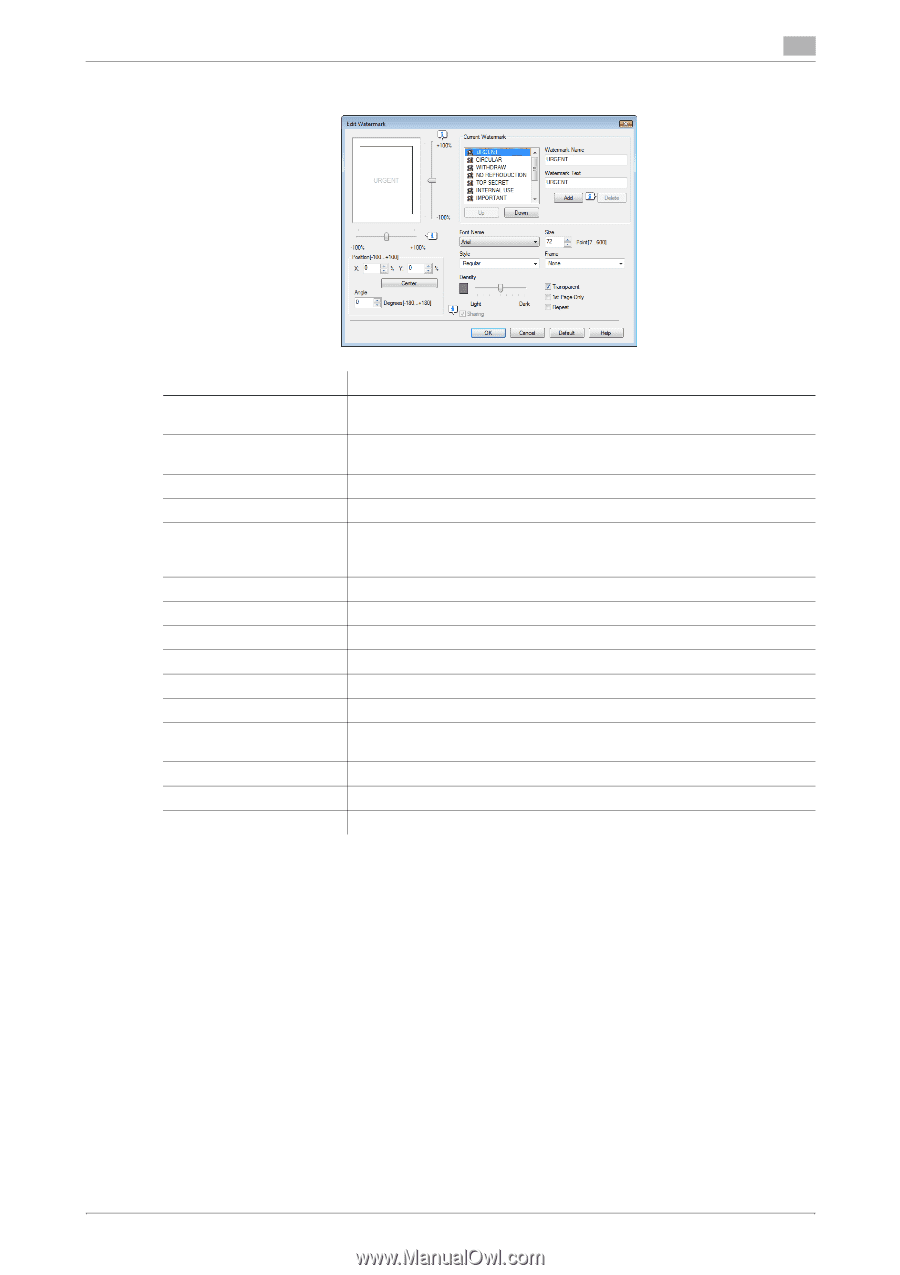
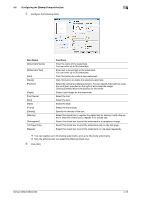
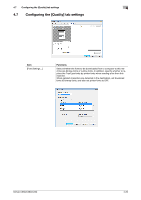
4.6 Configuring the [Stamp/Composition] tab 4 5 Configure the following items. Item Name [Watermark Name] [Watermark Text] [Add] [Delete] [Position] [Angle] [Font Name] [Size] [Style] [Frame] [Density] [Sharing] [Transparent] [1st Page Only] [Repeat] Functions Enter the name of the watermark. You can enter up to 30 characters. Enter text to be printed as the watermark. You can enter up to 30 characters. Click this button to create a new watermark. Click this button to delete the selected watermark. Select the vertical and lateral positions. You can specify the positions using the scroll bars provided on the right of and under the image. Clicking [Center] returns the position to the center. Select a print angle for the watermark. Select the font. Select the size. Select the style. Select the frame style. Specify the density of the text. Select this check box to register the watermark for sharing it with other users or clear this check box to register it for private use. Select this check box to print the watermark in a transparent image. Select this check box to print the watermark only on the first page. Select this check box to print the watermark on one page repeatedly. % You can register up to 30 sharing watermarks, and up to 20 private watermarks. % Only the administrator can select the [Sharing] check box. 6 Click [OK]. bizhub C360/C280/C220 4-19
-
 1
1 -
2
-
3
-
4
-
5
-
6
-
7
-
8
-
9
-
10
-
11
-
12
-
13
-
14
-
15
-
16
-
17
-
18
-
19
-
20
-
21
-
22
-
23
-
24
-
25
-
26
-
27
-
28
-
29
-
30
-
31
-
32
-
33
-
34
-
35
-
36
-
37
-
38
-
39
-
40
-
41
-
42
-
43
-
44
-
 45
45 -
 46
46 -
 47
47 -
 48
48 -
 49
49 -
 50
50 -
 51
51 -
 52
52 -
 53
53 -
 54
54 -
 55
55 -
56
-
57
-
58
-
59
-
60
-
61
-
62
-
63
-
64
-
65
-
66
-
67
-
68
-
69
-
70
-
71
-
72
 |
 |