Konica Minolta bizhub C360 bizhub C220/C280/C360 Fax Driver Operations User Ma - Page 52
Configuring the [Con tab settings
 |
View all Konica Minolta bizhub C360 manuals
Add to My Manuals
Save this manual to your list of manuals |
Page 52 highlights
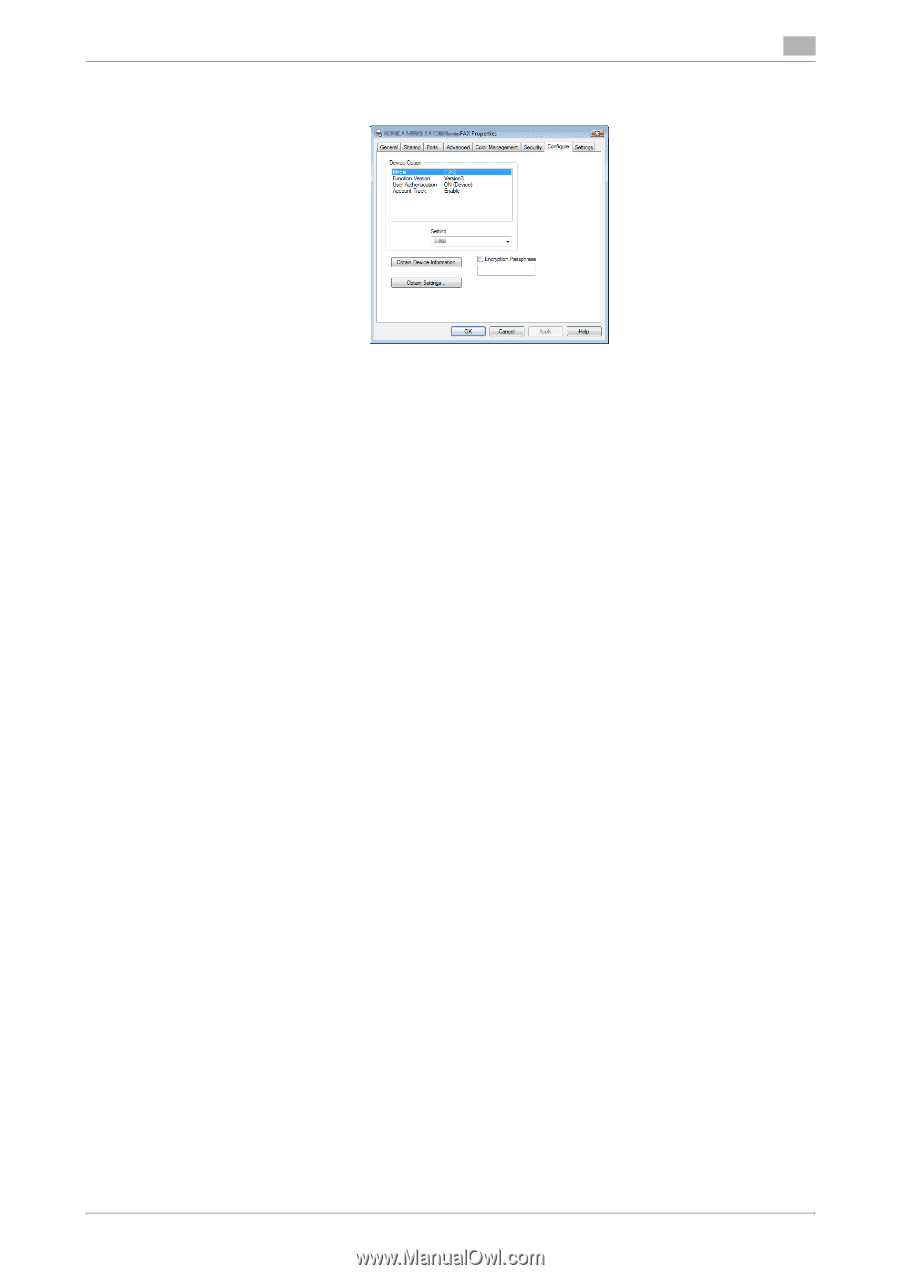
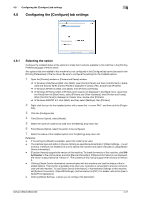
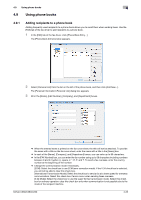
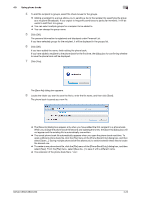
4.8 Configuring the [Configure] tab settings 4 4.8 Configuring the [Configure] tab settings 4.8.1 Selecting the option Configure the installed status of the options to make their functions available to this machine in the [Printing Preferences] page of the fax driver. Any options that are installed in this machine but not configured in the [Configure] tab cannot be used in the [Printing Preferences] of the fax driver. Be sure to configure the settings for the installed options. 1 Open the [Printers] window or [Printers and Faxes] window. % In Windows Vista/Server 2008, click [Start], open [Control Panel], and then click [Printers] in [Hardware and Sound]. When [Control Panel] is displayed in Classic View, double-click [Printers]. % In Windows XP/Server 2003, click [Start], then [Printers and Faxes]. % In Windows XP/Server 2003, if [Printers and Faxes] is not displayed in the [Start] menu, open [Con- trol Panel] from the [Start] menu, select [Printers and Other Hardware], then [Printers and Faxes]. When [Control Panel] is displayed in Classic View, double-click [Printers]. % In Windows 2000/NT 4.0, click [Start], and then select [Settings], then [Printers]. 2 Right-click the icon for the installed printer with a name like "xxxxxxx FAX", and then click the [Proper- ties]. 3 Click the [Configure] tab. 4 From [Device Option], select [Model]. 5 Select the name of model to be used from the [Setting] drop-down list. 6 From [Device Option], select the option to be configured. 7 Select the status of the installed option from the [Setting] drop-down list. Reference - If the setting for [Model] is available, select the model to be used. - The machine type and option in [Device Option] are specified automatically if [Obtain Settings... ] is set to [Auto]. If [Auto] is not enabled, be sure to specify the machine and option manually or using [Obtain Device Information]. - [Function Version] supports the version of this machine. To check the version of this machine, click Utility/Counter in the control panel, and click [Device Information]. If [Device Information] is not displayed, the version is assumed to be "Version 2". The contents of this manual support the functions of Version 3. - Clicking [Obtain Device Information] communicates with this machine and load the status of the installed options. This function is available only when your computer is connected to and can communicate with this machine. To use [Obtain Device Information], in Administrator Settings of this machine, set [System Connection] - [OpenAPI Settings] - [Authentication] to [OFF]. For details, refer to the [User's Guide Print Operations]. - Clicking [Obtain Settings...] allows you to configure the destination. bizhub C360/C280/C220 4-21
-
 1
1 -
2
-
3
-
4
-
5
-
6
-
7
-
8
-
9
-
10
-
11
-
12
-
13
-
14
-
15
-
16
-
17
-
18
-
19
-
20
-
21
-
22
-
23
-
24
-
25
-
26
-
27
-
28
-
29
-
30
-
31
-
32
-
33
-
34
-
35
-
36
-
37
-
38
-
39
-
40
-
41
-
42
-
43
-
44
-
45
-
46
-
 47
47 -
 48
48 -
 49
49 -
 50
50 -
 51
51 -
 52
52 -
 53
53 -
 54
54 -
 55
55 -
 56
56 -
 57
57 -
58
-
59
-
60
-
61
-
62
-
63
-
64
-
65
-
66
-
67
-
68
-
69
-
70
-
71
-
72
 |
 |