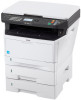
Kyocera FS-1028MFP FS-1028MFP/1128MFP/KM-2810/2820 Driver User Guide Rev-12.1 - Page 22
Printing with Job Accounting, Show Quick Print Tab
 |
View all Kyocera FS-1028MFP manuals
Add to My Manuals
Save this manual to your list of manuals |
Page 22 highlights
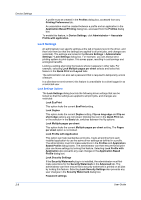
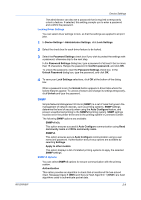
Device Settings descriptions match the user or group with an account ID. After an account ID list is created, the list can be exported as a group by saving it as a text file (.CSV). To import an account ID list, browse for an existing list and open it. Printing with Job Accounting After account IDs are assigned and Job accounting is set to On at the printing system, the number of pages printed is added to the selected account ID total. 1 In Device Settings > Administrator Settings, select Job accounting. 2 Select a Job accounting option: Use specific account ID Prompt for account ID The remaining Job accounting options become available when you create an account ID list. If you select the Use specific account ID or Prompt for account ID option, proceed to step 5. 3 Select Account ID List to create and manage account ID lists. 4 Select from the remaining Job accounting options: Prompt for account ID and validate Display account ID list 5 Click OK in all dialog boxes. 6 Print the document from the application. 7 For some options, when the Print Options dialog box appears, type or select an account ID, and click OK. Show Quick Print Tab This option lets you control the display of the Quick Print tab. You can define basic print options into group profiles that can be accessed quickly and easily. With a cleared Show Quick Print tab check box, the tab does not appear in the Printing Preferences dialog box. To enable this feature, in Device Settings, click Administrator > Show Quick Print tab. With a selected Show Quick Print tab check box, the tab appears in the Printing Preferences dialog box. When you select the Show Quick Print tab check box, you can access additional check boxes: Selecting Hide other tabs displays only the Quick Print tab to the user. Selecting Set Quick Print tab as default opens to this tab when you access Printing Preferences. Selecting Hide Edit Quick Print control prevents users from customizing the Quick Print tab. 2-6 User Guide
-
 1
1 -
2
-
3
-
4
-
5
-
6
-
7
-
8
-
9
-
10
-
11
-
12
-
13
-
14
-
15
-
16
-
 17
17 -
 18
18 -
 19
19 -
 20
20 -
 21
21 -
 22
22 -
 23
23 -
 24
24 -
 25
25 -
 26
26 -
 27
27 -
28
-
29
-
30
-
31
-
32
-
33
-
34
-
35
-
36
-
37
-
38
-
39
-
40
-
41
-
42
-
43
-
44
-
45
-
46
-
47
-
48
-
49
-
50
-
51
-
52
-
53
-
54
-
55
-
56
-
57
-
58
-
59
-
60
-
61
-
62
-
63
-
64
-
65
-
66
-
67
-
68
-
69
-
70
-
71
-
72
-
73
-
74
-
75
-
76
-
77
-
78
-
79
-
80
-
81
-
82
 |
 |