Kyocera FS-6525MFP KM-NET ADMIN Operation Guide for Ver 3.0 - Page 26
Add Tab, Import Default Tab
 |
View all Kyocera FS-6525MFP manuals
Add to My Manuals
Save this manual to your list of manuals |
Page 26 highlights
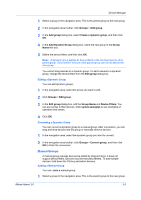
Device Manager Note: Once a user has logged on for the first time, changes to the default list views do not affect that user's saved preferences. If that user chooses to reset all tabs to system defaults, List View displays the new default tabs. Editing Default List View Tabs You can edit default List view tabs. 1 In the navigation area, select Preferences > Edit default list views. 2 Select the Edit Default List View Mode check box, and then click Apply. 3 In the navigation area, select All Devices. 4 Make changes to the default List view tabs. 5 In the navigation area, select Preferences > Edit default list views. 6 Clear the Edit Default List View Mode check box, and then click Apply to end this mode. Add Tab In the Add Tab dialog box, you can create a new tab, or import and edit one of the system default tabs. There is a maximum of 32 tabs. Creating a Tab You can create a new tab. 1 Select Add tab from the Manage tabs list on the toolbar. 2 In the Add Tab dialog box, select the Tab Name text box and type a name for your tab. Do not use invisible Unicode or extended ASCII characters. 3 Click the up and down arrows to the right of the Tab Position table to position the new tab. 4 Under Available Columns, select the items you want to include in the tab and click the right arrow. 5 To remove a column from the tab, select it under Selected Columns, and click the left arrow. 6 Click the up and down arrows to the right of Selected Columns to change the order of the columns in your tab. 7 Click OK or Apply to add the tab. Import Default Tab Each user has a personal list of tabs and tab properties that are not affected by changes to the default list view. If an administrator creates a new tab in the 3-7 User Guide
-
 1
1 -
2
-
3
-
4
-
5
-
6
-
7
-
8
-
9
-
10
-
11
-
12
-
13
-
14
-
15
-
16
-
17
-
18
-
19
-
20
-
 21
21 -
 22
22 -
 23
23 -
 24
24 -
 25
25 -
 26
26 -
 27
27 -
 28
28 -
 29
29 -
 30
30 -
 31
31 -
32
-
33
-
34
-
35
-
36
-
37
-
38
-
39
-
40
-
41
-
42
-
43
-
44
-
45
-
46
-
47
 |
 |