Kyocera TASKalfa 181 181/221 Operation Guide Rev-2 - Page 107
Printing Virtual Mailbox Accumulated Data, Printing Virtual Mailbox List, Printing Functions
 |
View all Kyocera TASKalfa 181 manuals
Add to My Manuals
Save this manual to your list of manuals |
Page 107 highlights
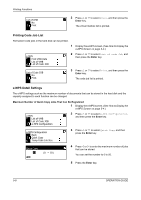
Select User Name Copies : 001 Delete Printing Functions 2 Press U or V to select Delete, and then press the Enter key. Printing Virtual Mailbox Accumulated Data With the virtual mailbox function, a job is stored in the virtual mailbox. If you use the virtual mailbox function to print a document with the printer driver, the job is stored and is not printed until you execute printing from the operation panel. For the method of setting with the printer driver, refer to the KX Printer Driver Operation Guide. e-MPS Quick Copy Private/Stored Print VMB Data 1 Display the e-MPS screen. (See How to Display the e-MPS Screen on page 5-4.) 5 2 Press U or V to select Print VMB Data, and then press the Enter key. Print VMB Data 001: File B 3 Press U or V to select the mailbox to print, and then press the Enter key. 001 :File B Enter User ID 4 Enter the five-digit access code using the numeric keys. The access code has been set with the KM-NET Printer Disk Manager. 5 Press the Enter key. Printing starts. Once printing is complete, the document data in the mailbox is deleted. Printing Virtual Mailbox List A list that includes the currently set virtual mailbox tray numbers (mailbox numbers), presence of accumulated data, data sizes, etc. is printed. e-MPS Private/Stored Print VMB Data List of VMB 1 Display the e-MPS screen. (See How to Display the e-MPS Screen on page 5-4.) 2 Press U or V to select List of VMB Data, and then press the Enter key. OPERATION GUIDE 5-7
-
 1
1 -
2
-
3
-
4
-
5
-
6
-
7
-
8
-
9
-
10
-
11
-
12
-
13
-
14
-
15
-
16
-
17
-
18
-
19
-
20
-
21
-
22
-
23
-
24
-
25
-
26
-
27
-
28
-
29
-
30
-
31
-
32
-
33
-
34
-
35
-
36
-
37
-
38
-
39
-
40
-
41
-
42
-
43
-
44
-
45
-
46
-
47
-
48
-
49
-
50
-
51
-
52
-
53
-
54
-
55
-
56
-
57
-
58
-
59
-
60
-
61
-
62
-
63
-
64
-
65
-
66
-
67
-
68
-
69
-
70
-
71
-
72
-
73
-
74
-
75
-
76
-
77
-
78
-
79
-
80
-
81
-
82
-
83
-
84
-
85
-
86
-
87
-
88
-
89
-
90
-
91
-
92
-
93
-
94
-
95
-
96
-
97
-
98
-
99
-
100
-
101
-
 102
102 -
 103
103 -
 104
104 -
 105
105 -
 106
106 -
 107
107 -
 108
108 -
 109
109 -
 110
110 -
 111
111 -
 112
112 -
113
-
114
-
115
-
116
-
117
-
118
-
119
-
120
-
121
-
122
-
123
-
124
-
125
-
126
-
127
-
128
-
129
-
130
-
131
-
132
-
133
-
134
-
135
-
136
-
137
-
138
-
139
-
140
-
141
-
142
-
143
-
144
-
145
-
146
-
147
-
148
-
149
-
150
-
151
-
152
-
153
-
154
-
155
-
156
-
157
-
158
-
159
-
160
-
161
-
162
-
163
-
164
-
165
-
166
-
167
-
168
-
169
-
170
-
171
-
172
-
173
-
174
-
175
-
176
-
177
-
178
-
179
-
180
-
181
-
182
-
183
-
184
-
185
-
186
-
187
-
188
-
189
-
190
-
191
-
192
-
193
-
194
-
195
-
196
-
197
-
198
-
199
-
200
-
201
-
202
-
203
-
204
-
205
-
206
-
207
-
208
-
209
-
210
-
211
-
212
-
213
-
214
-
215
-
216
-
217
-
218
-
219
-
220
-
221
-
222
-
223
-
224
-
225
-
226
-
227
-
228
-
229
-
230
-
231
-
232
-
233
-
234
-
235
-
236
-
237
-
238
-
239
-
240
-
241
-
242
-
243
-
244
-
245
-
246
-
247
-
248
-
249
-
250
-
251
-
252
-
253
-
254
-
255
-
256
-
257
-
258
-
259
-
260
-
261
-
262
-
263
-
264
-
265
-
266
-
267
-
268
-
269
-
270
-
271
-
272
-
273
-
274
-
275
-
276
 |
 |
