LG 40LV570H INSTALLATION - Page 39
Import Clone File Procedure
 |
View all LG 40LV570H manuals
Add to My Manuals
Save this manual to your list of manuals |
Page 39 highlights
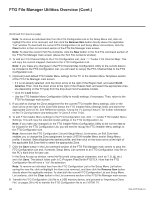
Cloning Procedures (Cont.) (Continued from previous page) • If a Clone (.tlx) file (exported Master TV Setup) contains an FTG Channel Map, the physical RF channels in the FTG Channel Map have been assigned logical channel numbers (see "Exporting a Clone File" above). When you import the Clone file with the FTG Channel Map on the Target TV(s), you will have the option to select either logical or physical channel tuning. Even if you select physical channel tuning, the (list of) physical RF channels in the FTG Channel Map will remain in logical order. • If an FTG Configuration (.tlx) file (created in the FTG File Manager) contains an FTG Channel Map, each logical channel number in the FTG Channel Map has been assigned a physical RF channel or an Aux input (the latter designated by 130-0 through 137-0-see also Reference section, "TV Aux Input Configuration"). Note: When you import the FTG Configuration file on the Target TV(s), you will have the option to select either logical or physical channel tuning. If you select physical channel tuning, the physical RF channels and Aux inputs in the FTG Channel Map will remain in logical order. • If the Target TV EBL is already in FTG Mode, you cannot use this procedure to make changes to the FTG Channel Map and FTG Installer Menu settings. You must use a direct PC-to-TV connection as described in Reference section, "FTG Mode via EBL (Local Configuration)," or an FMA head end device to reconfigure the EBL. • If the preceding condition applies, but you wish to switch the TV to FTG Mode via CPU, see Reference section, "Restoring Factory Defaults on the TV(s)," for further information before proceeding. • If the Clone/Configuration (.tlx) file was edited/created in the FTG File Manager, it may contain multiple zoned FTG Installer Menu profiles for different TV models. Make sure it includes the appropriate Installer Menu profile(s) for the Target TV(s) before performing the procedure below. Caution: Do not unplug the TV power cord or remove the USB memory device while importing is in progress, as doing so may cause the TV to malfunction or harm the USB device, respectively. Import Clone File Procedure 1. Turn ON the Target TV. 2. The next step depends on whether the EZ-Manager Wizard appears on the screen when you turn ON the TV: • If the wizard is displayed, you can complete the import procedure via the wizard, as indicated above (see "Before You Begin"). However, to continue with this procedure and access the "Import Clone File" option from the TV menus, exit the EZ-Manager Wizard. Then, continue with step 3. • If the wizard is not displayed, go directly to step 3. 3. If applicable (see also "Before You Begin" above), make sure to assign the appropriate Zone designation in the Target TV at this time. Note: In order for the proper location-specific TV Zone profile data to be applied, the Zone designation must be assigned in the Target TV(s) BEFORE importing is initiated. 4. Insert the USB memory device with the Clone/Configuration (.tlx) file into the USB port on the Target TV. (Continued on next page) 206-4317 Draft A.2 39
-
 1
1 -
2
-
3
-
4
-
5
-
6
-
7
-
8
-
9
-
10
-
11
-
12
-
13
-
14
-
15
-
16
-
17
-
18
-
19
-
20
-
21
-
22
-
23
-
24
-
25
-
26
-
27
-
28
-
29
-
30
-
31
-
32
-
33
-
 34
34 -
 35
35 -
 36
36 -
 37
37 -
 38
38 -
 39
39 -
 40
40 -
 41
41 -
 42
42 -
 43
43 -
 44
44 -
45
-
46
-
47
-
48
-
49
-
50
-
51
-
52
-
53
-
54
-
55
-
56
-
57
-
58
-
59
-
60
-
61
-
62
-
63
-
64
-
65
-
66
-
67
-
68
-
69
-
70
-
71
-
72
-
73
 |
 |
