Lexmark MS310 User's Guide - Page 159
Step 2, Action
 |
View all Lexmark MS310 manuals
Add to My Manuals
Save this manual to your list of manuals |
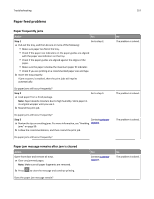
Page 159 highlights
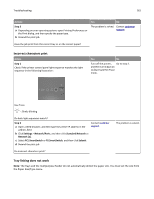
Troubleshooting 159 Action Step 2 a Check if the printer is plugged in and turned on, and if the printer control panel light sequence matches the light sequence in the following illustration: Yes No The problem is solved. Go to step 3. Ready ‑ On b Resend the print job. Do the jobs print? Step 3 If printer control panel light sequence indicates an error, then clear the message. For more information on printer control panel error light sequences, see "Understanding the printer messages" on page 108. Note: The printer continues to print after clearing the message. The problem is solved. Go to step 4. Do the jobs print? Step 4 a Check if the ports (USB, serial, or Ethernet) are working and if the cables are securely connected to the computer and the printer. Note: For more information, see the setup documentation that came with the printer. b Resend the print job. The problem is solved. Go to step 5. Do the jobs print? Step 5 a Turn off the printer, then wait for about 10 seconds, and then turn the printer back on. b Resend the print job. The problem is solved. Go to step 6. Do the jobs print?
-
 1
1 -
2
-
3
-
4
-
5
-
6
-
7
-
8
-
9
-
10
-
11
-
12
-
13
-
14
-
15
-
16
-
17
-
18
-
19
-
20
-
21
-
22
-
23
-
24
-
25
-
26
-
27
-
28
-
29
-
30
-
31
-
32
-
33
-
34
-
35
-
36
-
37
-
38
-
39
-
40
-
41
-
42
-
43
-
44
-
45
-
46
-
47
-
48
-
49
-
50
-
51
-
52
-
53
-
54
-
55
-
56
-
57
-
58
-
59
-
60
-
61
-
62
-
63
-
64
-
65
-
66
-
67
-
68
-
69
-
70
-
71
-
72
-
73
-
74
-
75
-
76
-
77
-
78
-
79
-
80
-
81
-
82
-
83
-
84
-
85
-
86
-
87
-
88
-
89
-
90
-
91
-
92
-
93
-
94
-
95
-
96
-
97
-
98
-
99
-
100
-
101
-
102
-
103
-
104
-
105
-
106
-
107
-
108
-
109
-
110
-
111
-
112
-
113
-
114
-
115
-
116
-
117
-
118
-
119
-
120
-
121
-
122
-
123
-
124
-
125
-
126
-
127
-
128
-
129
-
130
-
131
-
132
-
133
-
134
-
135
-
136
-
137
-
138
-
139
-
140
-
141
-
142
-
143
-
144
-
145
-
146
-
147
-
148
-
149
-
150
-
151
-
152
-
153
-
 154
154 -
 155
155 -
 156
156 -
 157
157 -
 158
158 -
 159
159 -
 160
160 -
 161
161 -
 162
162 -
 163
163 -
 164
164 -
165
-
166
-
167
-
168
-
169
-
170
-
171
-
172
-
173
-
174
-
175
-
176
-
177
-
178
-
179
-
180
-
181
-
182
-
183
-
184
-
185
-
186
-
187
-
188
-
189
-
190
-
191
-
192
-
193
-
194
-
195
-
196
-
197
-
198
-
199
-
200
-
201
-
202
-
203
-
204
-
205
 |
 |
