Lexmark MS310 User's Guide - Page 166
Step 1, Settings, Paper Menu, Warning-Potential Damage
 |
View all Lexmark MS310 manuals
Add to My Manuals
Save this manual to your list of manuals |
Page 166 highlights
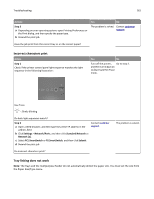
Troubleshooting 166 Action Yes Step 1 Go to step 2. a Move the width and length guides in the tray to the correct positions for the paper loaded. b Resend the print job. Is the page or image clipped? Step 2 Go to step 3. From the Paper menu, set the paper size and type to match the paper loaded in the tray. To access the Paper menu, do either of the following: • If the printer is on a network, then open a Web browser and type the printer IP address in the address field. Then, navigate to Settings > Paper Menu. Note: If you do not know the IP address of the printer, then print a network setup page and locate the IP address in the TCP/IP section. • If the printer is connected to a computer by a USB or parallel cable, then open the Local Printer Settings Utility for Windows or Printer Settings for Macintosh. Do the paper size and type settings match the paper loaded in the tray? Step 3 Go to step 4. a Depending on your operating system, specify the paper size and type from Printing Preferences or the Print dialog. b Resend the print job. Is the page or image clipped? Step 4 a Reinstall the imaging unit. Contact customer support. 1 Remove the toner cartridge. 2 Remove the imaging unit. Warning-Potential Damage: Do not expose the imaging unit to direct light for more than 10 minutes. Extended exposure to light may cause print quality problems. 3 Install the imaging unit, and then the cartridge. b Resend the print job. Is the page or image clipped? No The problem is solved. Do one or more of the following: • Specify the correct paper size and type from the tray settings to match the paper loaded in the tray. • Change the paper loaded in the tray to match the paper size and type specified in the tray settings. The problem is solved. The problem is solved.
-
 1
1 -
2
-
3
-
4
-
5
-
6
-
7
-
8
-
9
-
10
-
11
-
12
-
13
-
14
-
15
-
16
-
17
-
18
-
19
-
20
-
21
-
22
-
23
-
24
-
25
-
26
-
27
-
28
-
29
-
30
-
31
-
32
-
33
-
34
-
35
-
36
-
37
-
38
-
39
-
40
-
41
-
42
-
43
-
44
-
45
-
46
-
47
-
48
-
49
-
50
-
51
-
52
-
53
-
54
-
55
-
56
-
57
-
58
-
59
-
60
-
61
-
62
-
63
-
64
-
65
-
66
-
67
-
68
-
69
-
70
-
71
-
72
-
73
-
74
-
75
-
76
-
77
-
78
-
79
-
80
-
81
-
82
-
83
-
84
-
85
-
86
-
87
-
88
-
89
-
90
-
91
-
92
-
93
-
94
-
95
-
96
-
97
-
98
-
99
-
100
-
101
-
102
-
103
-
104
-
105
-
106
-
107
-
108
-
109
-
110
-
111
-
112
-
113
-
114
-
115
-
116
-
117
-
118
-
119
-
120
-
121
-
122
-
123
-
124
-
125
-
126
-
127
-
128
-
129
-
130
-
131
-
132
-
133
-
134
-
135
-
136
-
137
-
138
-
139
-
140
-
141
-
142
-
143
-
144
-
145
-
146
-
147
-
148
-
149
-
150
-
151
-
152
-
153
-
154
-
155
-
156
-
157
-
158
-
159
-
160
-
 161
161 -
 162
162 -
 163
163 -
 164
164 -
 165
165 -
 166
166 -
 167
167 -
 168
168 -
 169
169 -
 170
170 -
 171
171 -
172
-
173
-
174
-
175
-
176
-
177
-
178
-
179
-
180
-
181
-
182
-
183
-
184
-
185
-
186
-
187
-
188
-
189
-
190
-
191
-
192
-
193
-
194
-
195
-
196
-
197
-
198
-
199
-
200
-
201
-
202
-
203
-
204
-
205
 |
 |
