Lexmark MS310 User's Guide - Page 163
Large jobs do not collate, Settings, Paper Menu, Step 1, Print Settings, Finishing Menu
 |
View all Lexmark MS310 manuals
Add to My Manuals
Save this manual to your list of manuals |
Page 163 highlights
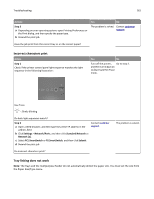
Troubleshooting 163 Action Yes No a From the Paper menu, set the paper size and type to match the paper The problem is solved. Contact customer loaded in the trays to be linked. To access the Paper menu, do either support. of the following: • If the printer is on a network, then open a Web browser and type the printer IP address in the address field. Then navigate to Settings > Paper Menu. Note: If you do not know the IP address of the printer, then print a network setup page and locate the IP address in the TCP/IP section. • If the printer is connected to a computer by a USB or parallel cable, then open the Local Printer Settings Utility for Windows or Printer Settings for Macintosh. Note: The paper size and type must match for trays to be linked. b Resend the print job. Do the trays link correctly? Large jobs do not collate Action Yes No Step 1 The problem is solved. Go to step 2. a From the Finishing menu, set Collate to On. To access the Finishing menu, do either of the following: • If the printer is on a network, then open a Web browser and type the printer IP address in the address field. Then, navigate to Settings > Print Settings > Finishing Menu. Note: If you do not know the IP address of the printer, then print a network setup page and locate the IP address in the TCP/IP section. • If the printer is connected to a computer by a USB or parallel cable, then open the Local Printer Settings Utility for Windows or Printer Settings for Macintosh. b Resend the print job. Does the job print and collate correctly? Step 2 a From the printer software, set Collate to On. Note: Setting Collate to Off in the software overrides the setting in the Finishing menu. b Resend the print job. The problem is solved. Go to step 3. Does the job print and collate correctly?
-
 1
1 -
2
-
3
-
4
-
5
-
6
-
7
-
8
-
9
-
10
-
11
-
12
-
13
-
14
-
15
-
16
-
17
-
18
-
19
-
20
-
21
-
22
-
23
-
24
-
25
-
26
-
27
-
28
-
29
-
30
-
31
-
32
-
33
-
34
-
35
-
36
-
37
-
38
-
39
-
40
-
41
-
42
-
43
-
44
-
45
-
46
-
47
-
48
-
49
-
50
-
51
-
52
-
53
-
54
-
55
-
56
-
57
-
58
-
59
-
60
-
61
-
62
-
63
-
64
-
65
-
66
-
67
-
68
-
69
-
70
-
71
-
72
-
73
-
74
-
75
-
76
-
77
-
78
-
79
-
80
-
81
-
82
-
83
-
84
-
85
-
86
-
87
-
88
-
89
-
90
-
91
-
92
-
93
-
94
-
95
-
96
-
97
-
98
-
99
-
100
-
101
-
102
-
103
-
104
-
105
-
106
-
107
-
108
-
109
-
110
-
111
-
112
-
113
-
114
-
115
-
116
-
117
-
118
-
119
-
120
-
121
-
122
-
123
-
124
-
125
-
126
-
127
-
128
-
129
-
130
-
131
-
132
-
133
-
134
-
135
-
136
-
137
-
138
-
139
-
140
-
141
-
142
-
143
-
144
-
145
-
146
-
147
-
148
-
149
-
150
-
151
-
152
-
153
-
154
-
155
-
156
-
157
-
 158
158 -
 159
159 -
 160
160 -
 161
161 -
 162
162 -
 163
163 -
 164
164 -
 165
165 -
 166
166 -
 167
167 -
 168
168 -
169
-
170
-
171
-
172
-
173
-
174
-
175
-
176
-
177
-
178
-
179
-
180
-
181
-
182
-
183
-
184
-
185
-
186
-
187
-
188
-
189
-
190
-
191
-
192
-
193
-
194
-
195
-
196
-
197
-
198
-
199
-
200
-
201
-
202
-
203
-
204
-
205
 |
 |
