Lexmark MS818 Embedded Web Server Administrator s Guide - Page 33
Creating a PIN building block for advanced security setup
 |
View all Lexmark MS818 manuals
Add to My Manuals
Save this manual to your list of manuals |
Page 33 highlights
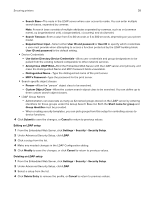
Securing printers 33 Note: For simple authorization‑level security, which uses no individual authentication, administrators can control access to functions by assigning only a password or PIN to a security template. Users are required to enter the correct code to access any function controlled by the password or PIN. Step 3: Assign security templates to access controls After assigning a security template, users are required to provide the appropriate credentials to access any functions assigned with a security template. 1 From the Embedded Web Server, click Settings > Security > Security Setup > Access Controls. Note: If necessary, click Expand All to view all access controls, or select a folder to view specific access controls for the selected access control group. 2 For each function you want to protect, select a security template from the drop‑down menu next to the name of that function. 3 Click Submit to save the changes, or Reset Form to cancel all changes. Notes: • To help prevent unauthorized access, log out from the printer after each session. • For a list of individual access controls, see "Appendix D: Access controls" on page 84. Editing or deleting a security template 1 From the Embedded Web Server, click Settings > Security > Security Setup. 2 Under Advanced Security Setup, click Security Template. 3 Select a security template from the list. 4 Edit the fields if necessary. 5 Click Modify to save the changes. Notes: • To retain previously configured values, click Cancel. • To delete the selected security template, click Delete Entry. • To delete all security templates on the device, from Manage Security Templates screen, click Delete List. • You can delete a security template only if it is not in use, but you can edit a security template that is in use. Creating a PIN building block for advanced security setup PINs are used to control access to specific device menus or to a device itself. PINs can also be required when retrieving a held print, copy, or fax job. 1 From the Embedded Web Server, click Settings > Security > Security Setup. 2 Under Advanced Security Setup, click PIN > Add a PIN. 3 In the Setup Name field, type the name of the PIN configuration. Note: Each PIN must have a unique name containing up to 128 UTF‑8 characters. 4 Type, and then confirm the PIN in the appropriate fields.
-
 1
1 -
2
-
3
-
4
-
5
-
6
-
7
-
8
-
9
-
10
-
11
-
12
-
13
-
14
-
15
-
16
-
17
-
18
-
19
-
20
-
21
-
22
-
23
-
24
-
25
-
26
-
27
-
 28
28 -
 29
29 -
 30
30 -
 31
31 -
 32
32 -
 33
33 -
 34
34 -
 35
35 -
 36
36 -
 37
37 -
 38
38 -
39
-
40
-
41
-
42
-
43
-
44
-
45
-
46
-
47
-
48
-
49
-
50
-
51
-
52
-
53
-
54
-
55
-
56
-
57
-
58
-
59
-
60
-
61
-
62
-
63
-
64
-
65
-
66
-
67
-
68
-
69
-
70
-
71
-
72
-
73
-
74
-
75
-
76
-
77
-
78
-
79
-
80
-
81
-
82
-
83
-
84
-
85
-
86
-
87
-
88
-
89
-
90
-
91
-
92
-
93
-
94
-
95
-
96
-
97
-
98
 |
 |
