Lexmark MS818 Embedded Web Server Administrator s Guide - Page 48
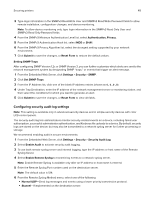
Configuring security audit log settings
 |
View all Lexmark MS818 manuals
Add to My Manuals
Save this manual to your list of manuals |
Page 48 highlights
Securing printers 48 3 Type login information in the SNMPv3 Read/Write User and SNMPv3 Read/Write Password fields to allow remote installation, configuration changes, and device monitoring. Note: To allow device monitoring only, type login information in the SNMPv3 Read Only User and SNMPv3 Read Only Password fields. 4 From the SNMPv3 Minimum Authentication Level list, select Authentication, Privacy. 5 From the SNMPv3 Authentication Hash list, select MD5 or SHA1. 6 From the SNMPv3 Privacy Algorithm list, select the strongest setting supported by your network environment. 7 Click Submit to save the changes, or Reset Form to restore the default values. Setting SNMP Traps After configuring SNMP Version 1,2c or SNMP Version 3, you can further customize which alerts are sent to the network management system by designating SNMP "traps," or events that trigger an alert message. 1 From the Embedded Web Server, click Settings > Security > SNMP. 2 Click Set SNMP Traps. 3 From the IP Address list, click one of the blank IP address entries (shown as 0.0.0.0). 4 Under Trap Destination, enter the IP address of the network management server or monitoring station, and then select the conditions for which you want to generate an alert. 5 Click Submit to save the changes, or Reset Form to clear all fields. Configuring security audit log settings Note: This setting is available only in advanced‑security devices and in simple‑security devices with color LCD control panels. The security audit log lets administrators monitor security‑related events on a device, including failed user authorization, successful administrator authentication, and Kerberos file uploads to a device. By default, security logs are stored on the device, but may also be transmitted to a network syslog server for further processing or storage. We recommend enabling audit in secure environments. 1 From the Embedded Web Server, click Settings > Security > Security Audit Log. 2 Select Enable Audit to activate security audit logging. 3 To use both remote syslog server and internal logging, type the IP address or host name of the Remote Syslog Server. 4 Select Enable Remote Syslog to transmit log events to a network syslog server. Note: Enable Remote Syslog is available only after an IP address or host name is entered. 5 Enter the Remote Syslog Port number used on the destination server. Note: The default value is 514. 6 From the Remote Syslog Method menu, select one of the following: • Normal UDP-Send log messages and events using a lower‑priority transmission protocol. • Stunnel-If implemented on the destination server.
-
 1
1 -
2
-
3
-
4
-
5
-
6
-
7
-
8
-
9
-
10
-
11
-
12
-
13
-
14
-
15
-
16
-
17
-
18
-
19
-
20
-
21
-
22
-
23
-
24
-
25
-
26
-
27
-
28
-
29
-
30
-
31
-
32
-
33
-
34
-
35
-
36
-
37
-
38
-
39
-
40
-
41
-
42
-
 43
43 -
 44
44 -
 45
45 -
 46
46 -
 47
47 -
 48
48 -
 49
49 -
 50
50 -
 51
51 -
 52
52 -
 53
53 -
54
-
55
-
56
-
57
-
58
-
59
-
60
-
61
-
62
-
63
-
64
-
65
-
66
-
67
-
68
-
69
-
70
-
71
-
72
-
73
-
74
-
75
-
76
-
77
-
78
-
79
-
80
-
81
-
82
-
83
-
84
-
85
-
86
-
87
-
88
-
89
-
90
-
91
-
92
-
93
-
94
-
95
-
96
-
97
-
98
 |
 |
