Lexmark Prestige Pro800 SmartSolutions User's Guide - Page 17
Printing and editing photos, SmartSolutions, Email, Print, Accept, Continue, Change Settings
 |
View all Lexmark Prestige Pro800 manuals
Add to My Manuals
Save this manual to your list of manuals |
Page 17 highlights
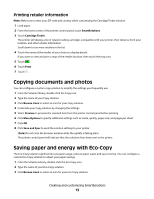
7 From the home screen of the printer control panel, touch SmartSolutions. 8 Touch the Photo Viewer icon to send links to photos using your pre-configured e-mail settings. 9 Touch or to view the photo of your choice. 10 Touch and then Email. If you want to return to the previous display, then touch . 11 Touch . Printing and editing photos Note: Only photos in JPEG format are supported. 1 Load photo paper. 2 From the home screen of the printer control panel, touch SmartSolutions. 3 Touch the photo viewer solution icon that you created. Wait for the printer to load the photos. 4 Touch or to view the photo you want to edit or print. 5 Touch and then Print. The photo appears in edit view. Tips: • If you want to clear the selected photo, then touch . • If you want to rotate the photo, then touch or . • If you want to increase the number of photos on a page, then touch x 1 and then Accept. 6 To edit the photo, touch . Touch Accept each time you make a selection. To clear all edits to the photo, touch . From here You can Crop Crop a photo. Brightness Adjust the brightness of a photo. Red Eye Reduce the red-eye effect caused by light reflection. Auto Fix Enhance a photo automatically. Color Effects Select to print a photo in black and white, sepia, antique brown, or antique gray. 7 When you are finished editing the photo, touch Done. 8 Touch Continue to preview. 9 If you want to change the print settings, such as the size of the photo, then touch Change Settings. If necessary, touch Accept each time you make a selection. 10 Touch . Note: For best results, allow the prints to dry at least 24 hours before stacking, displaying, or storing. Creating and customizing SmartSolutions 17
-
 1
1 -
2
-
3
-
4
-
5
-
6
-
7
-
8
-
9
-
10
-
11
-
 12
12 -
 13
13 -
 14
14 -
 15
15 -
 16
16 -
 17
17 -
 18
18 -
 19
19 -
 20
20 -
 21
21 -
 22
22 -
23
-
24
-
25
-
26
-
27
-
28
-
29
-
30
-
31
-
32
-
33
-
34
-
35
-
36
-
37
-
38
-
39
-
40
-
41
-
42
-
43
-
44
-
45
-
46
-
47
-
48
-
49
-
50
-
51
 |
 |