Oki ML591 Troy Etherwind 802.11b Print Server Users Guide - Page 42
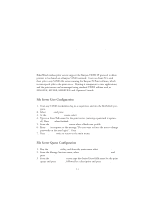
TCP/IP-based mail packages and dial-up Internet Service Providers., SMTP E-Mail Server SMTP users only
 |
View all Oki ML591 manuals
Add to My Manuals
Save this manual to your list of manuals |
Page 42 highlights
TCP/IP-based mail packages and dial-up Internet Service Providers. If you do not know which method you are using, consult your system manager. 2. Make sure that your E-mail server is capable of sending messages across the Internet. Alternatively, if you are communicating directly from the PC via a modem to an Internet Service Provider, make sure that you have an Internet mail account on the ISP, and that the PC is configured to send E-mail using this account. 3. Start the PrintraNet installation program from the CD ROM and follow the step-by-step instructions. You will need to know the following: - The mail transport protocol: MAPI or WINSOCK - The port name you wish to assign to the PrintraNet port (this port is used to access the remote TROY print server): The name must start with "PNET" and end with a number (for example, PNET3"). Note that each remote EtherWind print server must have a unique port name associated with it. - E-Mail Address: Enter any unique legal Internet E-mail address for the remote EtherWind print server (for example, [email protected]). Note: Internet E-mail addresses cannot have spaces in them. - Service Name: Enter the service name on the remote EtherWind print server that you wish to use for printing. This is normally XCD_xxxxxx_P1 for the first parallel port, XCD_xxxxxx_S1 for the first serial port, XCD_xxxxxx_P2 for the second parallel port, or XCD_xxxxxx_S2 for the second serial port., where "xxxxxx" is the last six digits of the Ethernet address (the exact service names can be found by running the print server self-test). If you do not know the service name, you may leave this field blank and the default binary service will be used. - Your E-Mail Address (WINSOCK users only): enter your E-mail address (for example, [email protected]). - SMTP E-Mail Server (SMTP users only): Enter the IP address of your SMTP E-mail server (consult your network administrator if you do not know this address). - Desired Notification: You may optionally have the remote EtherWind print server notify you when the job is complete or when the job fails or both when the job is complete and if it fails. Select the desired option and then enter the E-mail address where you want the notification sent (generally you would want the notification sent to your own E-mail address). 4. You must now create a printer on your Windows system using the standard Windows printer setup procedure. To do this, go the Start button, select Settings and then Printers. Select Add Printer to begin the printer installation and follow the instructions on the screen. 10-2
-
 1
1 -
2
-
3
-
4
-
5
-
6
-
7
-
8
-
9
-
10
-
11
-
12
-
13
-
14
-
15
-
16
-
17
-
18
-
19
-
20
-
21
-
22
-
23
-
24
-
25
-
26
-
27
-
28
-
29
-
30
-
31
-
32
-
33
-
34
-
35
-
36
-
 37
37 -
 38
38 -
 39
39 -
 40
40 -
 41
41 -
 42
42 -
 43
43 -
 44
44 -
 45
45 -
 46
46 -
 47
47 -
48
-
49
-
50
-
51
-
52
-
53
-
54
-
55
-
56
-
57
-
58
-
59
-
60
 |
 |
