Olympus E620 E-620 Instruction Manual (English) - Page 111
Direct printing PictBridge
 |
UPC - 050332167322
View all Olympus E620 manuals
Add to My Manuals
Save this manual to your list of manuals |
Page 111 highlights
Resetting the print reservation data You can reset all print reservation data or just the data for selected pictures. 1 MENU [q] [
-
 1
1 -
2
-
3
-
4
-
5
-
6
-
7
-
8
-
9
-
10
-
11
-
12
-
13
-
14
-
15
-
16
-
17
-
18
-
19
-
20
-
21
-
22
-
23
-
24
-
25
-
26
-
27
-
28
-
29
-
30
-
31
-
32
-
33
-
34
-
35
-
36
-
37
-
38
-
39
-
40
-
41
-
42
-
43
-
44
-
45
-
46
-
47
-
48
-
49
-
50
-
51
-
52
-
53
-
54
-
55
-
56
-
57
-
58
-
59
-
60
-
61
-
62
-
63
-
64
-
65
-
66
-
67
-
68
-
69
-
70
-
71
-
72
-
73
-
74
-
75
-
76
-
77
-
78
-
79
-
80
-
81
-
82
-
83
-
84
-
85
-
86
-
87
-
88
-
89
-
90
-
91
-
92
-
93
-
94
-
95
-
96
-
97
-
98
-
99
-
100
-
101
-
102
-
103
-
104
-
105
-
 106
106 -
 107
107 -
 108
108 -
 109
109 -
 110
110 -
 111
111 -
 112
112 -
 113
113 -
 114
114 -
 115
115 -
 116
116 -
117
-
118
-
119
-
120
-
121
-
122
-
123
-
124
-
125
-
126
-
127
-
128
-
129
-
130
-
131
-
132
-
133
-
134
-
135
-
136
-
137
-
138
-
139
-
140
-
141
-
142
-
143
-
144
-
145
-
146
-
147
-
148
-
149
-
150
-
151
-
152
-
153
-
154
-
155
-
156
 |
 |
111
EN
9
Printing
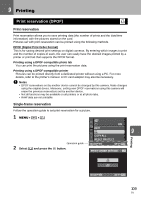
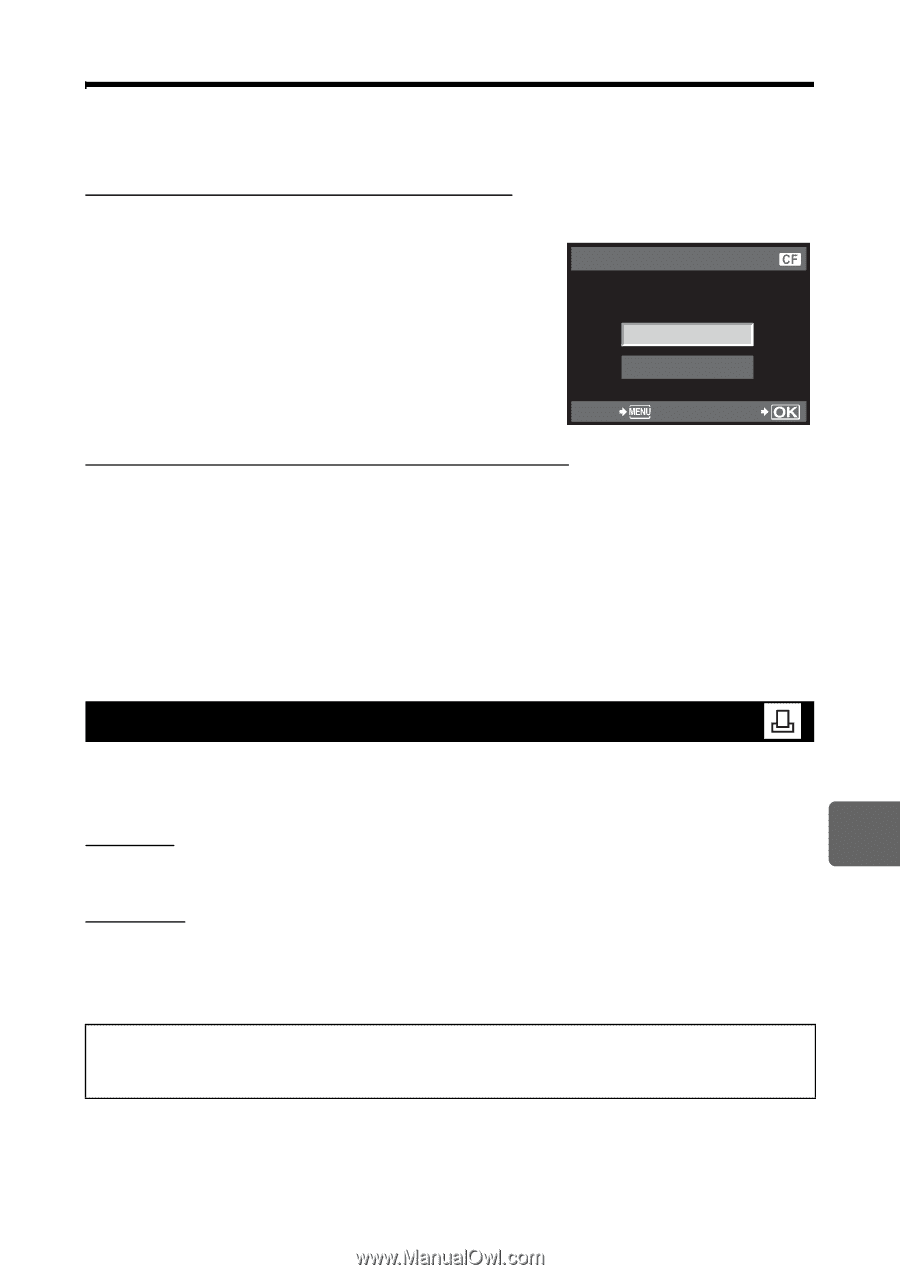
Resetting the print reservation data
You can reset all print reservation data or just the data for selected pictures.
1
MENU
±
[
q
]
±
[
<
]
Resetting the print reservation data for all pictures
2
Select [
<
] or [
U
] and press the
i
button.
3
Select [RESET] and press the
i
button.
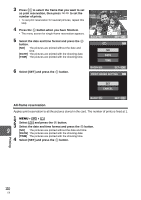
Resetting the print reservation data for a selected picture
2
Select [
<
] and press the
i
button.
3
Select [KEEP] and press the
i
button.
4
Use
hi
to select the frame with print reservation data you want to reset, then
press
g
to set the number of prints to 0.
5
Press the
i
button when you have finished.
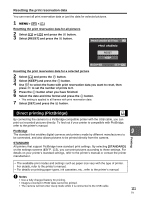
6
Select the date and time format and press the
i
button.
•
This setting is applied to all frames with print reservation data.
7
Select [SET] and press the
i
button.
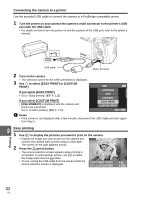
By connecting the camera to a PictBridge-compatible printer with the USB cable, you can
print out recorded pictures directly. To find out if your printer is compatible with PictBridge,
refer to the printer’s manual.
PictBridge
The standard that enables digital cameras and printers made by different manufacturers to
be connected, and also allows pictures to be printed directly from the camera.
STANDARD
All printers that support PictBridge have standard print settings. By selecting
[STANDARD]
on the settings screens (
g
P. 113), you can print pictures according to these settings. For
details on your printer’s standard settings, refer to the printer’s manual or contact the printer
manufacturer.
x
Notes
•
Use a fully charged battery for printing.
•
Images recorded in RAW data cannot be printed.
•
The camera will not enter sleep mode while it is connected to the USB cable.
Direct printing (PictBridge)
•
The available print modes and settings such as paper size vary with the type of printer.
For details, refer to the printer’s manual.
•
For details on printing paper types, ink cassettes, etc., refer to the printer’s manual.
RESET
KEEP
PRINT ORDERED
PRINT ORDER SETTING
BACK
SET