Olympus E620 E-620 Instruction Manual (English) - Page 32
High Key], Low Key], Noise Reduct.], Auto], Noise Filter], High], Live View Boost], Dis Mode]
 |
UPC - 050332167322
View all Olympus E620 manuals
Add to My Manuals
Save this manual to your list of manuals |
Page 32 highlights
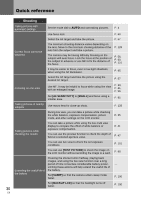
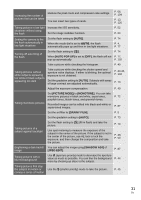
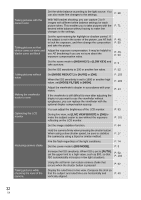
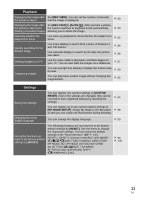
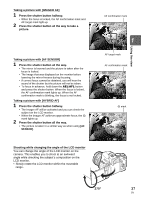
Set the white balance according to the light source. You can also make fine changes to the settings. P. 68 Taking pictures with the correct color With WB bracket shooting, you can capture 3 to 9 images with different white balance settings for each picture taken. This enables you to take pictures with the desired white balance without having to make fine changes to the settings. P. 71 Taking pictures so that whites come out white and blacks come out black Set the spot metering for highlight or shadow control. If the subject is not in the center of the picture, use AE lock to lock the exposure, and then change the composition and take the picture. Adjust the exposure compensation. It may be helpful to use AE bracketing if you are not sure about the exposure compensation value. P. 48, P. 50 P. 49, P. 50 Set the scene mode to [HIGH KEY] or [LOW KEY] and take a picture. P. 5 Set the ISO sensitivity to 200 or another low value. P. 52 Taking pictures without noise Set [NOISE REDUCT.] to [AUTO] or [ON]. When the ISO sensitivity is set to 1600 or another high value, set [NOISE FILTER] to [HIGH]. P. 103 P. 103 Making the viewfinder easier to view Adjust the viewfinder's diopter in accordance with your vision. P. 14 If the viewfinder is still difficult to view after adjusting the diopter or you want to use the viewfinder without eyeglasses, you can replace the viewfinder with the k optional diopter compensation eyecup. Optimizing the LCD monitor You can adjust the brightness of the LCD monitor. During live view, set [LIVE VIEW BOOST] to [ON] to make the subject easier to see without the exposure reflecting on the LCD monitor. P. 93 P. 101 Set the image stabilizer function. P. 64 Hold the camera firmly when pressing the shutter button. When using a slow shutter speed, be sure to stabilize P. 17 the camera by using a tripod or similar method. Reducing camera shake Fire the flash regardless of the light conditions. Set the scene mode to [DIS MODE]. P. 74 P. 5 Increase the ISO sensitivity. When ISO is set to [AUTO], set the upper limit to a high value, such as 800, so that ISO automatically increases in low light situations. P. 52, P. 102 Using the self-timer can reduce camera shake that occurs when the shutter button is pressed. P. 62 Taking pictures while checking the level of the camera Display the ruled lines in live view. Compose the shot so that the subject and ruled lines are horizontally and P. 40 vertically aligned. 32 EN
-
 1
1 -
2
-
3
-
4
-
5
-
6
-
7
-
8
-
9
-
10
-
11
-
12
-
13
-
14
-
15
-
16
-
17
-
18
-
19
-
20
-
21
-
22
-
23
-
24
-
25
-
26
-
 27
27 -
 28
28 -
 29
29 -
 30
30 -
 31
31 -
 32
32 -
 33
33 -
 34
34 -
 35
35 -
 36
36 -
 37
37 -
38
-
39
-
40
-
41
-
42
-
43
-
44
-
45
-
46
-
47
-
48
-
49
-
50
-
51
-
52
-
53
-
54
-
55
-
56
-
57
-
58
-
59
-
60
-
61
-
62
-
63
-
64
-
65
-
66
-
67
-
68
-
69
-
70
-
71
-
72
-
73
-
74
-
75
-
76
-
77
-
78
-
79
-
80
-
81
-
82
-
83
-
84
-
85
-
86
-
87
-
88
-
89
-
90
-
91
-
92
-
93
-
94
-
95
-
96
-
97
-
98
-
99
-
100
-
101
-
102
-
103
-
104
-
105
-
106
-
107
-
108
-
109
-
110
-
111
-
112
-
113
-
114
-
115
-
116
-
117
-
118
-
119
-
120
-
121
-
122
-
123
-
124
-
125
-
126
-
127
-
128
-
129
-
130
-
131
-
132
-
133
-
134
-
135
-
136
-
137
-
138
-
139
-
140
-
141
-
142
-
143
-
144
-
145
-
146
-
147
-
148
-
149
-
150
-
151
-
152
-
153
-
154
-
155
-
156
 |
 |