Olympus E620 E-620 Instruction Manual (English) - Page 114
Printing, Setting printing data, Once you have set the pictures for printing and, printing data,
 |
UPC - 050332167322
View all Olympus E620 manuals
Add to My Manuals
Save this manual to your list of manuals |
Page 114 highlights
Setting printing data Select whether to print printing data such as the date and time or file name on the picture when printing. When the print mode is set to [ALL PRINT] and [OPTION SET] is selected, the following screen appears. [
-
 1
1 -
2
-
3
-
4
-
5
-
6
-
7
-
8
-
9
-
10
-
11
-
12
-
13
-
14
-
15
-
16
-
17
-
18
-
19
-
20
-
21
-
22
-
23
-
24
-
25
-
26
-
27
-
28
-
29
-
30
-
31
-
32
-
33
-
34
-
35
-
36
-
37
-
38
-
39
-
40
-
41
-
42
-
43
-
44
-
45
-
46
-
47
-
48
-
49
-
50
-
51
-
52
-
53
-
54
-
55
-
56
-
57
-
58
-
59
-
60
-
61
-
62
-
63
-
64
-
65
-
66
-
67
-
68
-
69
-
70
-
71
-
72
-
73
-
74
-
75
-
76
-
77
-
78
-
79
-
80
-
81
-
82
-
83
-
84
-
85
-
86
-
87
-
88
-
89
-
90
-
91
-
92
-
93
-
94
-
95
-
96
-
97
-
98
-
99
-
100
-
101
-
102
-
103
-
104
-
105
-
106
-
107
-
108
-
 109
109 -
 110
110 -
 111
111 -
 112
112 -
 113
113 -
 114
114 -
 115
115 -
 116
116 -
 117
117 -
 118
118 -
 119
119 -
120
-
121
-
122
-
123
-
124
-
125
-
126
-
127
-
128
-
129
-
130
-
131
-
132
-
133
-
134
-
135
-
136
-
137
-
138
-
139
-
140
-
141
-
142
-
143
-
144
-
145
-
146
-
147
-
148
-
149
-
150
-
151
-
152
-
153
-
154
-
155
-
156
 |
 |
114
EN
Printing
9
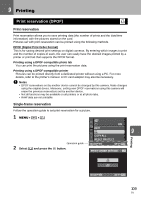
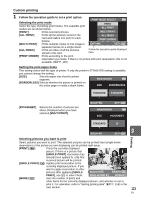
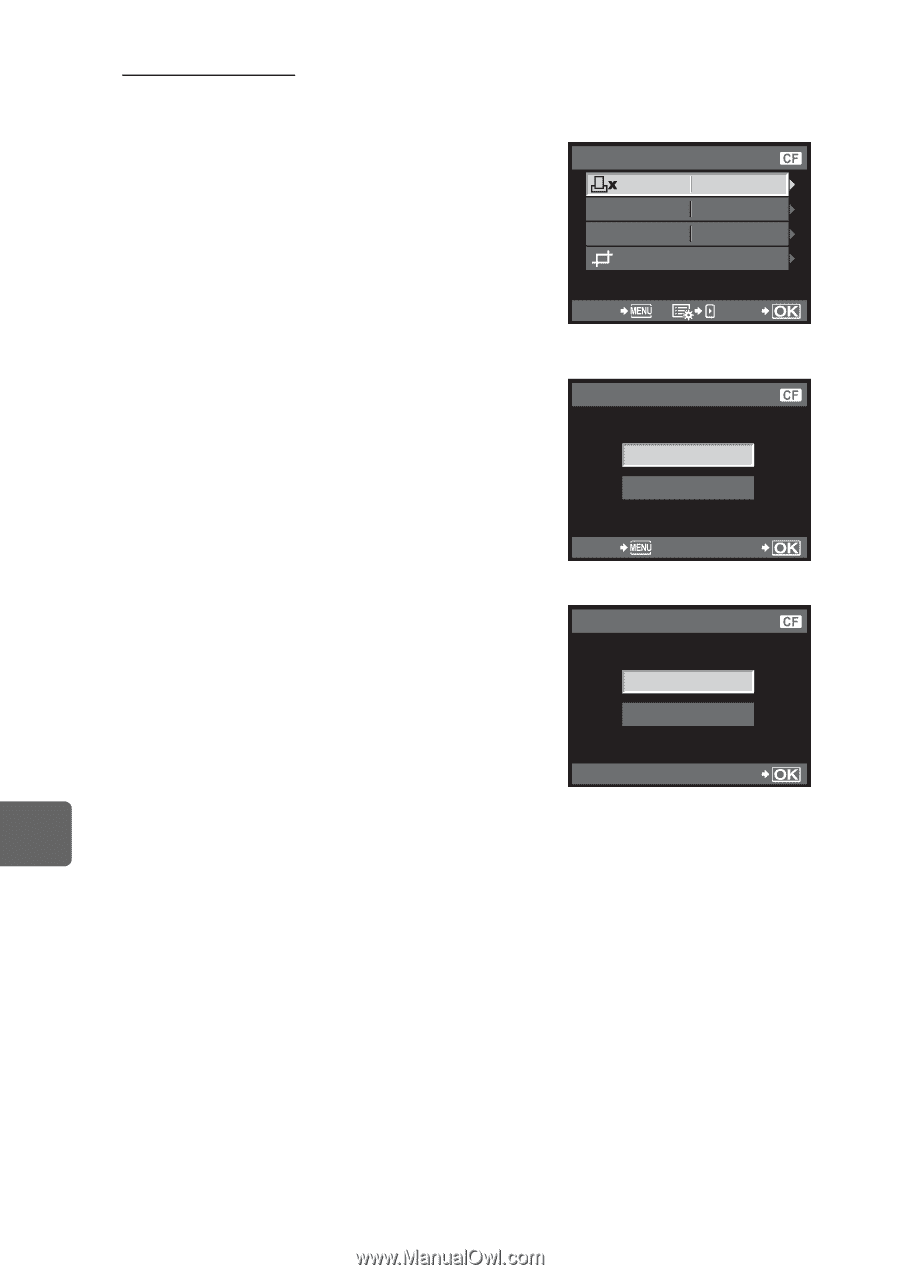
Setting printing data
Select whether to print printing data such as the date and time or file name on the picture when
printing. When the print mode is set to
[ALL PRINT]
and
[OPTION SET]
is selected, the
following screen appears.
[
<
×]
Sets the number of prints.
[DATE]
Prints the date and time recorded on the
picture.
[FILE NAME]
Prints the file name recorded on the picture.
[
P
]
Trims the picture for printing. Set the
trimming size with the control dial and the
trimming position with the arrow pad.
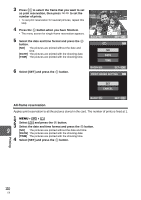
2
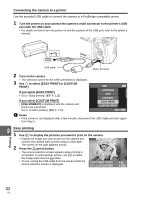
Once you have set the pictures for printing and
printing data, select [PRINT], then press the
i
button.
[PRINT]
Transfers images you print to the printer.
[CANCEL]
Resets the settings. All print reservation
data will be lost. If you want to keep the
print reservation data and make other
settings, press the
MENU
button. This
returns you to the previous setting.
•
To stop and cancel printing, press the
i
button.
[CONTINUE]
Continues printing.
[CANCEL]
Cancels printing. All print reservation data
will be lost.
DATE
FILE NAME
1
WITHOUT
WITHOUT
PRINT INFO
BACK
SET
PRINT
PRINT
CANCEL
BACK
SET
CONTINUE
CANCEL
SET
PRINT