Panasonic WVNP472 WVNP472 User Guide - Page 14
Prior To Setup, Buttons Used For Setup Menus, Camera Setup Menus
 |
View all Panasonic WVNP472 manuals
Add to My Manuals
Save this manual to your list of manuals |
Page 14 highlights
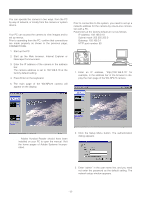
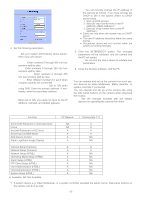
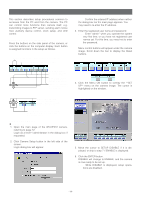
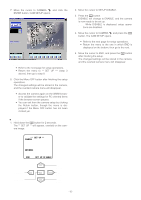
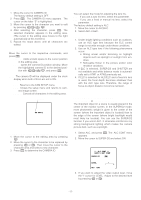
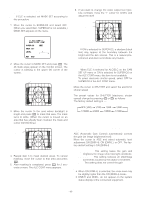
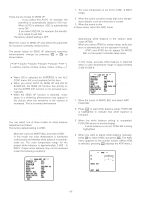
PRIOR TO SETUP This section describes setup procedures common to accesses from the PC and from the camera. The PC can control more functions than camera itself, e.g. transmitting images to FTP server, sending alarm notice mail, auxiliary device control, clock setup, and LED control. Buttons Used for Setup Menus Press the buttons on the side panel of the camera, or click the buttons on the computer display. Each button is assigned functions in the setup as follows. Menu ON/OFF button: Opens or closes the setup menu. ESC button: Returns to the previous menu (one layer higher) . UP/DOWN button: Moves up and down the cursor (pointer). RIGHT/LEFT button: Selects parameters, adjusts some levels. SET button: Validates the selection, opens a detailed menu. Note: Confirm the entered IP address when neither the dialog box nor the main page appears. You may need to re-enter the IP address. 3. Enter the registered user name and password. Note: Enter "admin" when you operate the system very first time, or you have not registered user names yet. For this time, you need not to enter the password. Menu control buttons will appear under the camera image. Scroll down the bar to display the Reset buttons. 4. Click the Menu ON button to overlay the **SET UP** menu on the camera image. The cursor is highlighted on the window. Pressing RIGHT, SET, LEFT or clicking ALL RESET: Resets all settings to the factory default. Pressing RIGHT and LEFT, or clicking RESET: Resets the selected settings to the factory default. Camera Setup Menus ¡From the PC 1. Open the main page of the WV-NP472 camera, referring to page 12. Login as a level-1 administrator in the dialog box if requested. 2. Click Camera Setup button in the left side of the screen. Login dialog box will appear. 5. Move the cursor to SETUP DISABLE if it is displayed, or skip to step 7 if ENABLE is displayed. 6. Click the ENTER button. DISABLE will change to ENABLE, and the camera is now ready to be set up. Note: While DISABLE is displayed, setup operations are disabled. -14-
-
 1
1 -
2
-
3
-
4
-
5
-
6
-
7
-
8
-
 9
9 -
 10
10 -
 11
11 -
 12
12 -
 13
13 -
 14
14 -
 15
15 -
 16
16 -
 17
17 -
 18
18 -
 19
19 -
20
-
21
-
22
-
23
-
24
-
25
-
26
-
27
-
28
-
29
-
30
-
31
-
32
-
33
-
34
-
35
-
36
-
37
-
38
-
39
-
40
-
41
-
42
-
43
-
44
-
45
-
46
-
47
 |
 |