Panasonic WVNP472 WVNP472 User Guide - Page 16
Setting Procedures, Setup Selection, Camera Setup Menu, 1. Camera Identification (camera Id) Setting
 |
View all Panasonic WVNP472 manuals
Add to My Manuals
Save this manual to your list of manuals |
Page 16 highlights
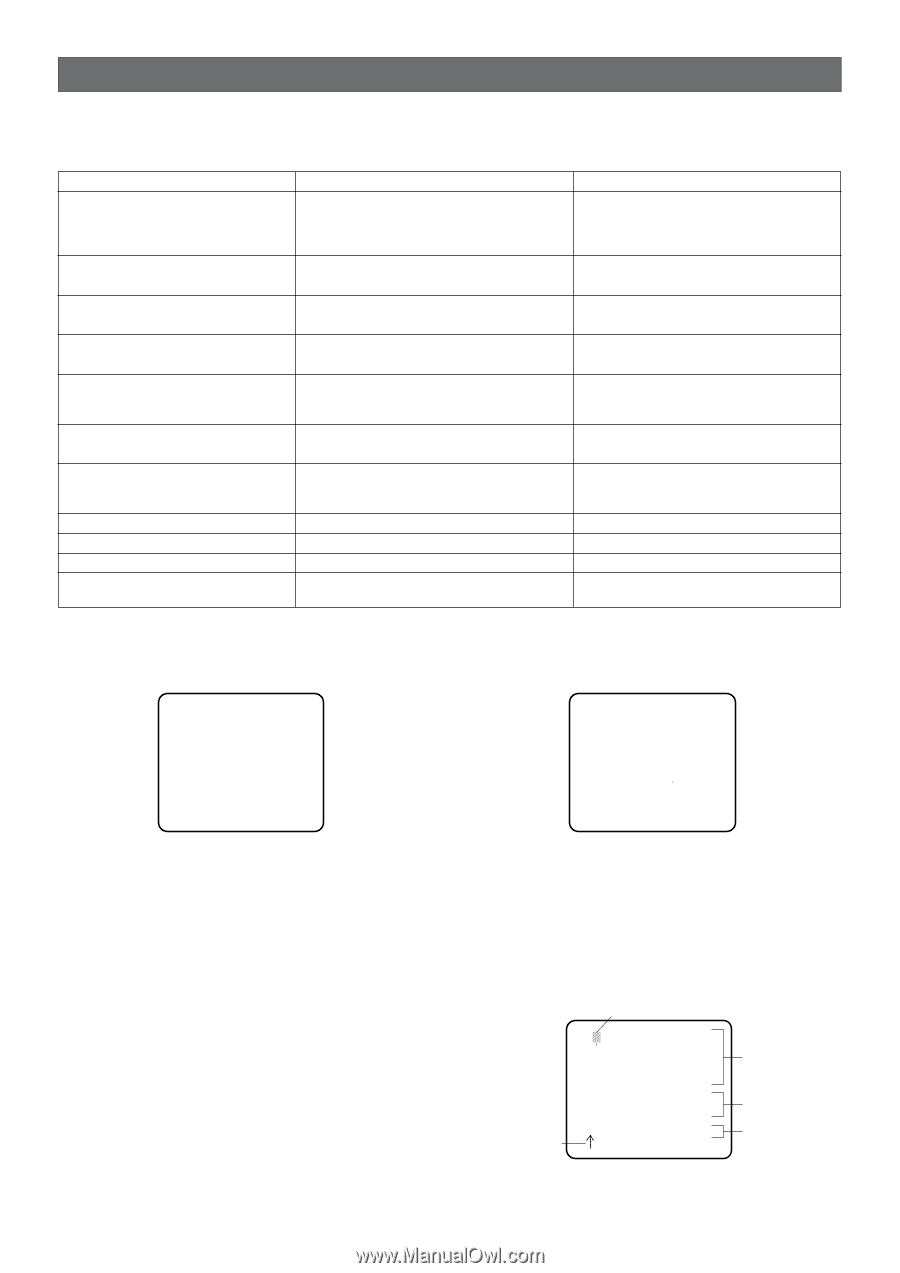
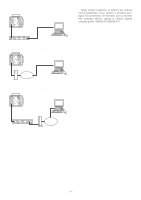
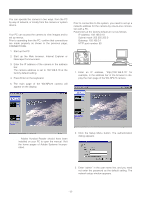
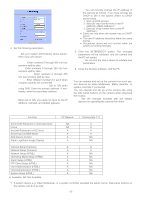
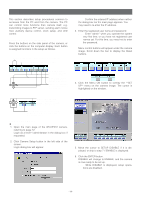
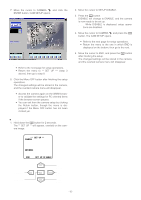
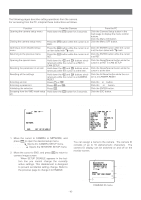
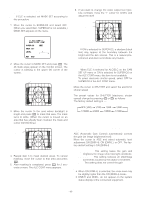
SETTING PROCEDURES The following pages describe setting operations from the camera. For accessing from the PC, interpret these instructions as follows. Function Opening the camera setup menu Closing the camera setup menu From the Camera Hold down the I button for 2 seconds. Press the I button while the cursor is at END. From the PC Click the Camera Setup button in the main page to display the menu control buttons. Click the Menu ON button. Click the Menu OFF button. Opening a more detailed setup menu Press the I button while the cursor is at Click the ENTER button while the cursor an item tailed with O mark. is at the item tailed with O mark. Returning to the previous menu Press the I button while the cursor is at Click the ENTER button while the cursor RET. is at RET. Opening the special menu Resetting the parameter of an item Hold down the L and M buttons simultaneously while the cursor is at RET in CAM SETUP. Hold down the L and M buttons simultaneously while the cursor is at the item. Click the Reset/Special button while the cursor is at RET in CAM SETUP. Click the Reset/Special button while the cursor is at the item. Resetting all the settings Selecting an item Selecting a parameter Validating the selection Escaping from the VMD mask setup etc. Hold down the L and M buttons simultaneously while the cursor is at CAMERA RESET. Press J or K. Press L and M. Press I. Hold down the I button for 2 seconds. Click the All Reset button while the cursor is at CAMERA RESET. Click the ↑ or ↓ button. Click the ← or → button. Click the ENTER button. Click the ESC button. SETUP SELECTION ** SET UP ** CAMERA ↵ ↵ NETWORK END SET UP DISABLE CAMERA SETUP MENU ** CAM SET UP ** ↵↵ CAMERA ID OFF ALC/ELC ALC SHUTTER --- AGC ON(DNR-H) SENS UP OFF SYNC INT ↵ WHITE BAL ATW1 MOTION DET OFF LENS DRIVE DC CLOCK OFF RET 1. Move the cursor to CAMERA or NETWORK, and press I to open the desired setup menu. CAMERAN: Opens the CAMERA SETUP menu. NETWORKN: Opens the NETWORK SETUP menu. 2. Move the cursor to END, and press I to return to camera image screen. Note: When SETUP DISABLE appears in the bottom line you cannot change the currently active settings. This disablement is designed to prevent accidental setting change. Refer to the previous page to change it to ENABLE. 1. Camera Identification (CAMERA ID) Setting You can assign a name to the camera. The camera ID consists of up to 16 alphanumeric characters. The camera ID display can be switched on and off on the monitor screen. Cursor Character Cursor 0123456789 ABCDEFGHIJKLM NOPQRSTUVWXYZ SPACE POSI RET END RESET CAMERA ID menu Character Area Command Editing Area -16-
-
 1
1 -
2
-
3
-
4
-
5
-
6
-
7
-
8
-
9
-
10
-
 11
11 -
 12
12 -
 13
13 -
 14
14 -
 15
15 -
 16
16 -
 17
17 -
 18
18 -
 19
19 -
 20
20 -
 21
21 -
22
-
23
-
24
-
25
-
26
-
27
-
28
-
29
-
30
-
31
-
32
-
33
-
34
-
35
-
36
-
37
-
38
-
39
-
40
-
41
-
42
-
43
-
44
-
45
-
46
-
47
 |
 |