Panasonic WVNP472 WVNP472 User Guide - Page 22
NETWORK SETUP, To reset to the factory settings CAMERA RESET, Notes, IP ADDRESS, NETMASK, GATE WAY - digital camera
 |
View all Panasonic WVNP472 manuals
Add to My Manuals
Save this manual to your list of manuals |
Page 22 highlights
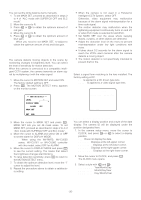
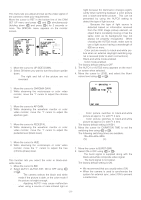
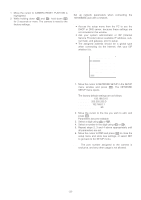
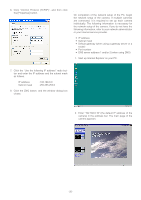
To reset to the factory settings (CAMERA RESET) 1. Move the cursor to CAMERA RESET. PUSH SW is highlighted. 2. While holding down L and M, hold down I for 2 seconds or more. The camera is reset to the factory settings. NETWORK SETUP Set up network parameters when connecting the 10/100BASE jack with a network. Notes: • Access the setup menu from the PC to use the DHCP or DNS server, because these settings are not included in this window. • Ask your system administrator or ISP (Internet Service Provider) about available IP address, subnet mask, and gateway, prior to setup. • The assigned address should be a global type when connecting via the Internet. Ask your ISP whether it is. ** NETWORK SET UP ** IP ADDRESS 192.168. 0. 10 NETMASK 255.255.255. 0 GATEWAY 192.168. 0. 1 HTTP PORT NO. 80 RET END 1. Move the cursor to NETWORK SETUP in the SETUP menu window and press I. The NETWORK SETUP menu opens. The factory default settings are as follows. IP ADDRESS: 192.168.0.10 NETMASK: 255.255.255.0 GATE WAY: 192.168.0.1 HTTP Port Number: 80 2. Move the cursor to the line you wish to edit, and press I. Parameters become editable. 3. Select a digit using J or K. 4. Select a number in the digit using L or M. 5. Repeat steps 2, 3 and 4 above appropriately until all parameters are set. 6. Move the cursor to END and press I to close the setup menu and store new settings, or select RET to go back to the SETUP menu. Note: The port number assigned to the camera is exclusive, and any other usage is not allowed. -22-
-
 1
1 -
2
-
3
-
4
-
5
-
6
-
7
-
8
-
9
-
10
-
11
-
12
-
13
-
14
-
15
-
16
-
 17
17 -
 18
18 -
 19
19 -
 20
20 -
 21
21 -
 22
22 -
 23
23 -
 24
24 -
 25
25 -
 26
26 -
 27
27 -
28
-
29
-
30
-
31
-
32
-
33
-
34
-
35
-
36
-
37
-
38
-
39
-
40
-
41
-
42
-
43
-
44
-
45
-
46
-
47
 |
 |