Panasonic WVNP472 WVNP472 User Guide - Page 35
HOST SETUP, SYSTEM SETUP, Open the Host Setup window.
 |
View all Panasonic WVNP472 manuals
Add to My Manuals
Save this manual to your list of manuals |
Page 35 highlights
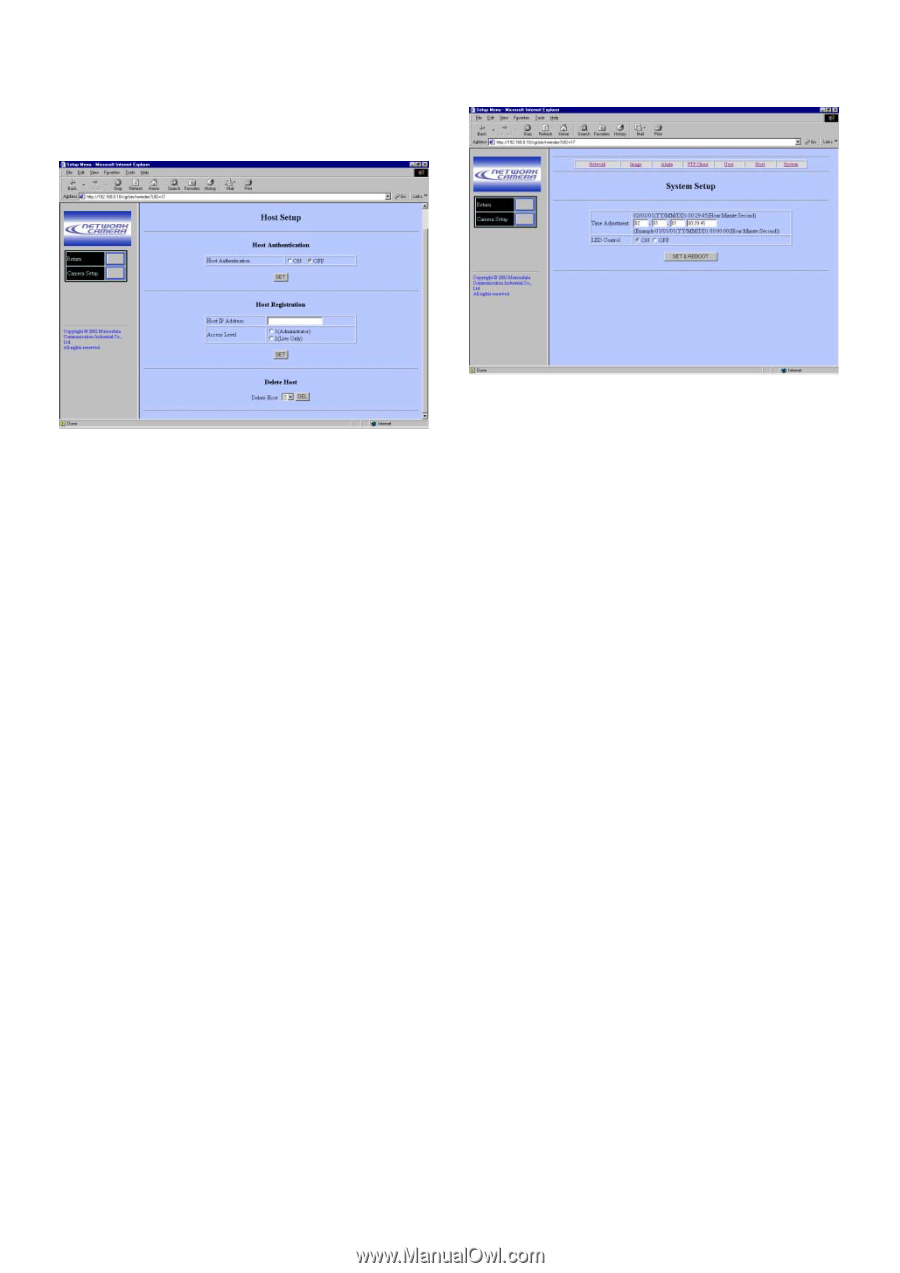
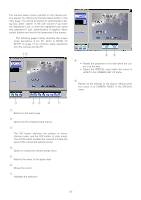
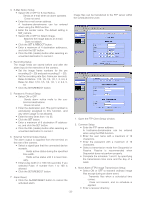
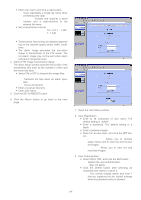
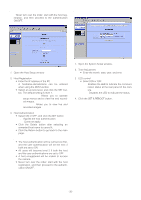
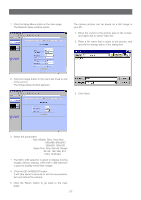
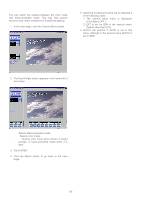
■ Host Setup Note: Never turn over the order: start with the host registration, and then proceed to the authentication ON/OFF. ■ System Setup 1. Open the Host Setup window. 2. Host Registration • Enter the IP address of the PC. A hostname.domainname can be entered when using the DNS function. • Select an access level, and click the SET button. The default setting is level 1. 1 (Administrator): Allows you to operate setup menus and to view live and recorded images. 2 (Live Only): Allows you to view live and recorded images. 3. Host Authentication • Select ON or OFF, and click the SET button. ON: Applies the host authentication. OFF: Does not apply. • Click the Delete button after selecting an unwanted host name to cancel it. • Click the Return button to go back to the main page. Notes: • The host authentication will be carried out first, and the user authentication will be the next if both are set to ON. • All users will become level 2 if both the host and the user authentications are set to OFF. • A host unregistered will be unable to access the camera. • Never turn over the order: start with the host registration, and then proceed to the authentication ON/OFF. 1. Open the System Setup window. 2. Time Adjustment • Enter the month, date, year, and time. 3. LED control • Select ON or OFF. ON: Enables the LED to indicate the communication status at the rear panel of the camera. OFF: Disables the LED to indicate the status. 4. Click the SET & REBOOT button. -35-
-
 1
1 -
2
-
3
-
4
-
5
-
6
-
7
-
8
-
9
-
10
-
11
-
12
-
13
-
14
-
15
-
16
-
17
-
18
-
19
-
20
-
21
-
22
-
23
-
24
-
25
-
26
-
27
-
28
-
29
-
 30
30 -
 31
31 -
 32
32 -
 33
33 -
 34
34 -
 35
35 -
 36
36 -
 37
37 -
 38
38 -
 39
39 -
 40
40 -
41
-
42
-
43
-
44
-
45
-
46
-
47
 |
 |