Panasonic WVNP472 WVNP472 User Guide - Page 15
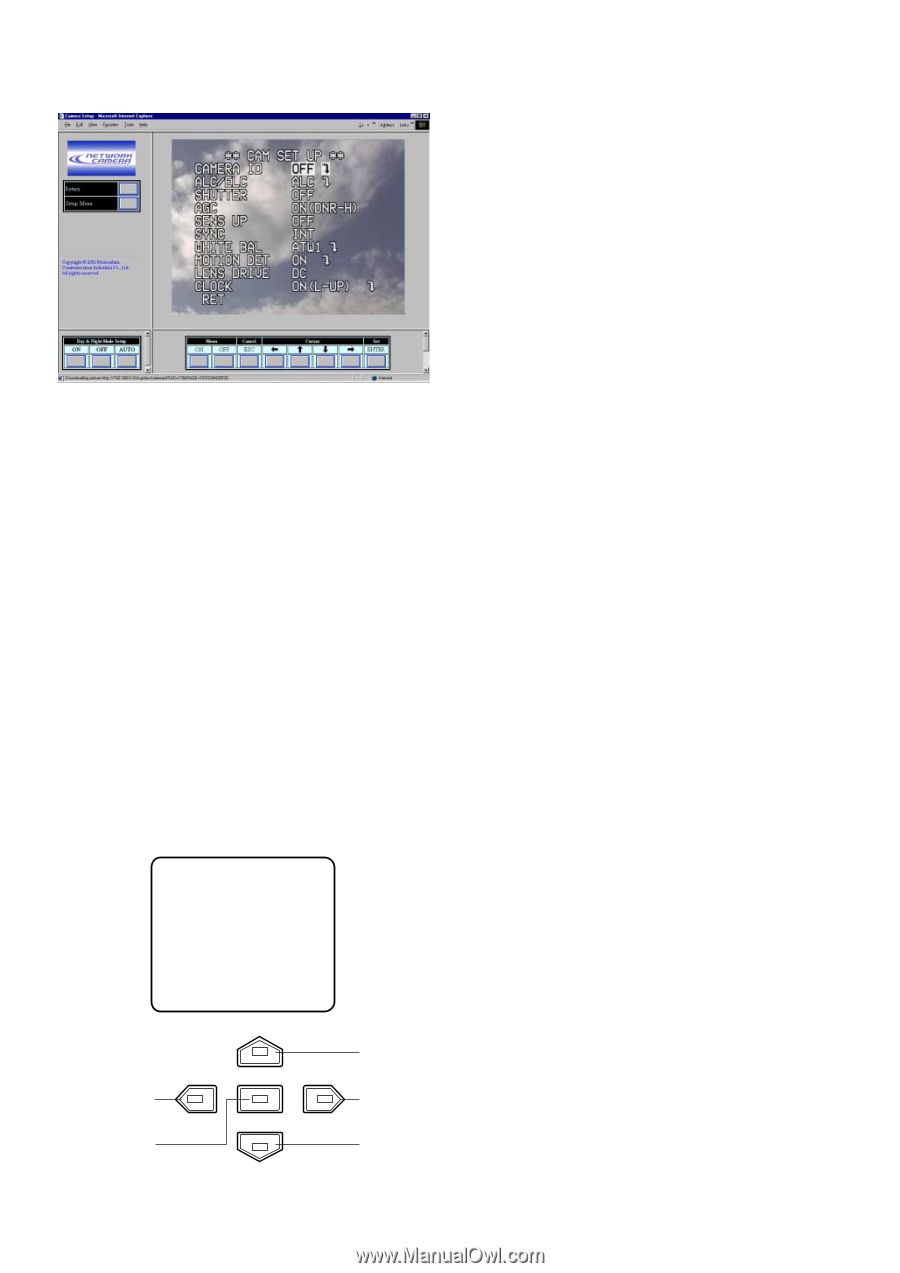
ENTER button. CAM SETUP opens., button. The CAM SETUP opens.
 |
View all Panasonic WVNP472 manuals
Add to My Manuals
Save this manual to your list of manuals |
Page 15 highlights
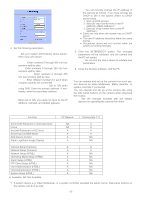
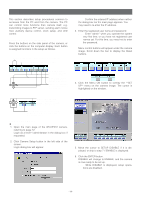
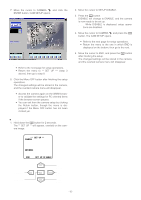
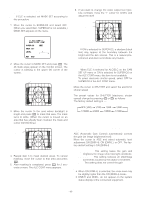
7. Move the cursor to CAMERA O, and click the ENTER button. CAM SETUP opens. Notes: • Refer to the next page for setup operations. • Return the menu to ** SET UP *** (step 3 above), then go to step 8. 8. Click the Menu OFF button after finishing the setup operations. The changed settings will be stored in the camera, and the overlaid camera menu will disappear. Notes: • Access the camera again on the WWW-browser to validate the settings for PC oriented items if the browser screen pauses. • You can exit from the camera setup by clicking the Return button, though the menu is displayed if the Menu OFF button has not been clicked yet. ¡From the Camera 1. Hold down the I button for 2 seconds. The ** SET UP ** will appear, overlaid on the camera image. 2. Move the cursor to SETUP DISABLE. 3. Press the I button. DISABLE will change to ENABLE, and the camera is now ready to be set up. Note: While DISABLE is displayed, setup operations are disabled. 4. Move the cursor to CAMERA O, and press the I button. The CAM SETUP opens. Notes: • Refer to the next page for setup operations. • Return the menu to the one in which END is displayed on the bottom, then go to the next. 5. Move the cursor to END, and press the I button after finishing the setup. The changed settings will be stored in the camera, and the overlaid camera menu will disappear. ** SET UP ** CAMERA ↵ ↵ NETWORK END SET UP DISABLE Left Button Set Button Up Button Right Button Down Button -15-
-
 1
1 -
2
-
3
-
4
-
5
-
6
-
7
-
8
-
9
-
 10
10 -
 11
11 -
 12
12 -
 13
13 -
 14
14 -
 15
15 -
 16
16 -
 17
17 -
 18
18 -
 19
19 -
 20
20 -
21
-
22
-
23
-
24
-
25
-
26
-
27
-
28
-
29
-
30
-
31
-
32
-
33
-
34
-
35
-
36
-
37
-
38
-
39
-
40
-
41
-
42
-
43
-
44
-
45
-
46
-
47
 |
 |