Panasonic WVNP472 WVNP472 User Guide - Page 24
NETWORK SETUP OF THE PC, Click Local Area Communication, and then click
 |
View all Panasonic WVNP472 manuals
Add to My Manuals
Save this manual to your list of manuals |
Page 24 highlights
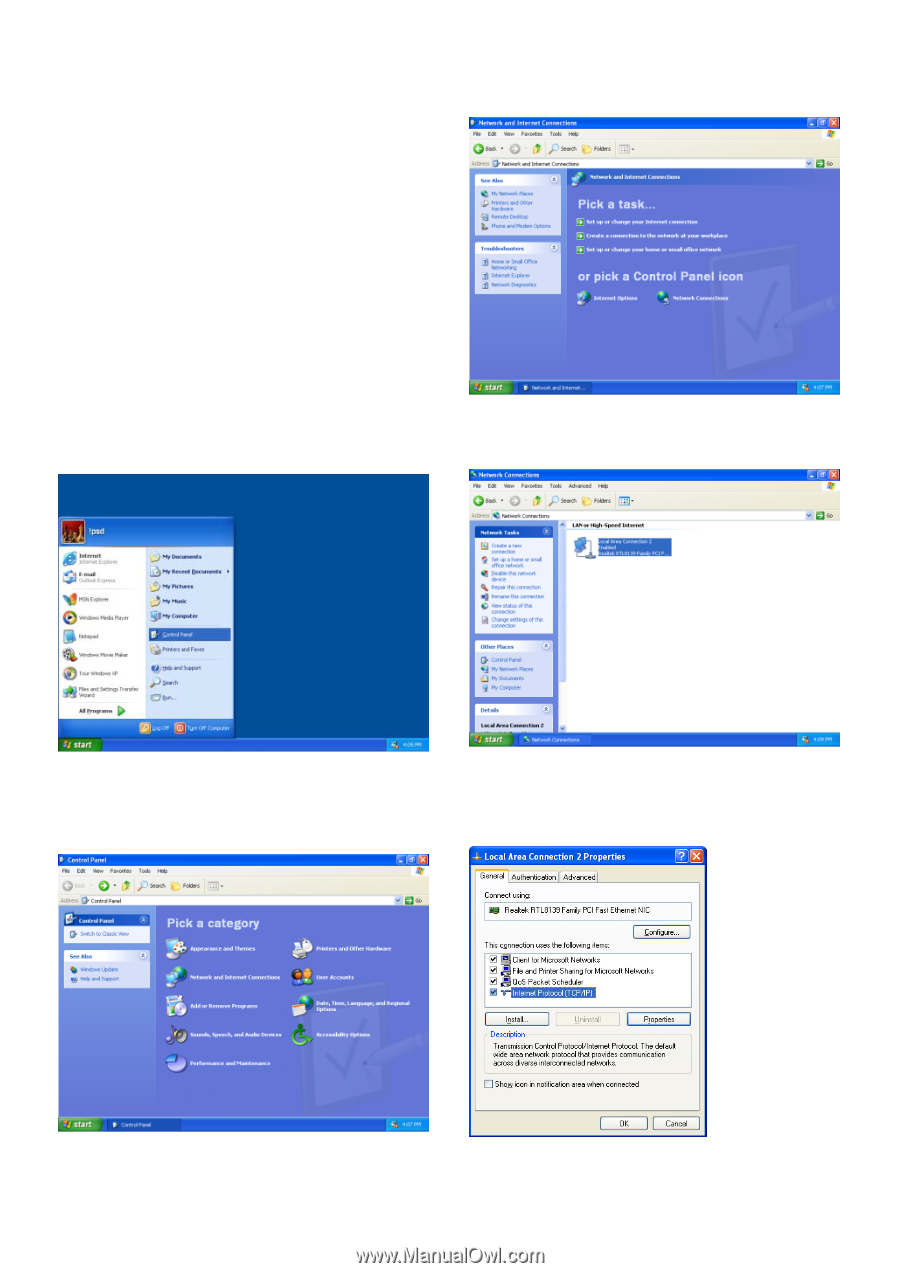
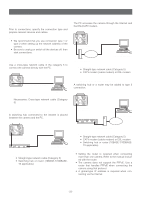
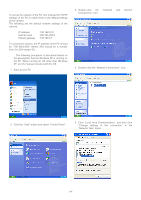
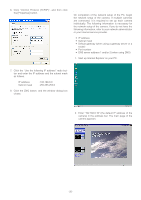
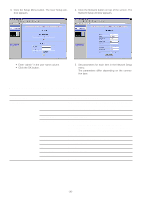
■ Network Setup of the PC To set up the network of the PC, first change the TCP/IP settings of the PC to match them to the default settings of the camera. The following are the default network settings of the camera. IP address Subnet mask Default gateway : 192.168.0.10 : 255.255.255.0 : 192.168.0.1 To access the camera, the IP address of the PC should be "192.168.0.XXX" (where XXX should be a number from 2 to 254 except 10). Note: The following procedure is described based on the assumption that the Windows XP is running on the PC. When running an OS other than Windows XP, see the manual included with the OS. 1. Start up your PC. 3. Double-click the "Network and Internet Connections" icon. 4. Double-click the "Network Connections" icon. 2. Click the "Start" button and select "Control Panel". 5. Click "Local Area Communication", and then click "Change settings of this connection" in the "Network Task" menu. -24-
-
 1
1 -
2
-
3
-
4
-
5
-
6
-
7
-
8
-
9
-
10
-
11
-
12
-
13
-
14
-
15
-
16
-
17
-
18
-
 19
19 -
 20
20 -
 21
21 -
 22
22 -
 23
23 -
 24
24 -
 25
25 -
 26
26 -
 27
27 -
 28
28 -
 29
29 -
30
-
31
-
32
-
33
-
34
-
35
-
36
-
37
-
38
-
39
-
40
-
41
-
42
-
43
-
44
-
45
-
46
-
47
 |
 |