Panasonic WVNP472 WVNP472 User Guide - Page 41
REVIEWING ALARM PICTURES, Transparency, Blink, Highlight, Stripe
 |
View all Panasonic WVNP472 manuals
Add to My Manuals
Save this manual to your list of manuals |
Page 41 highlights
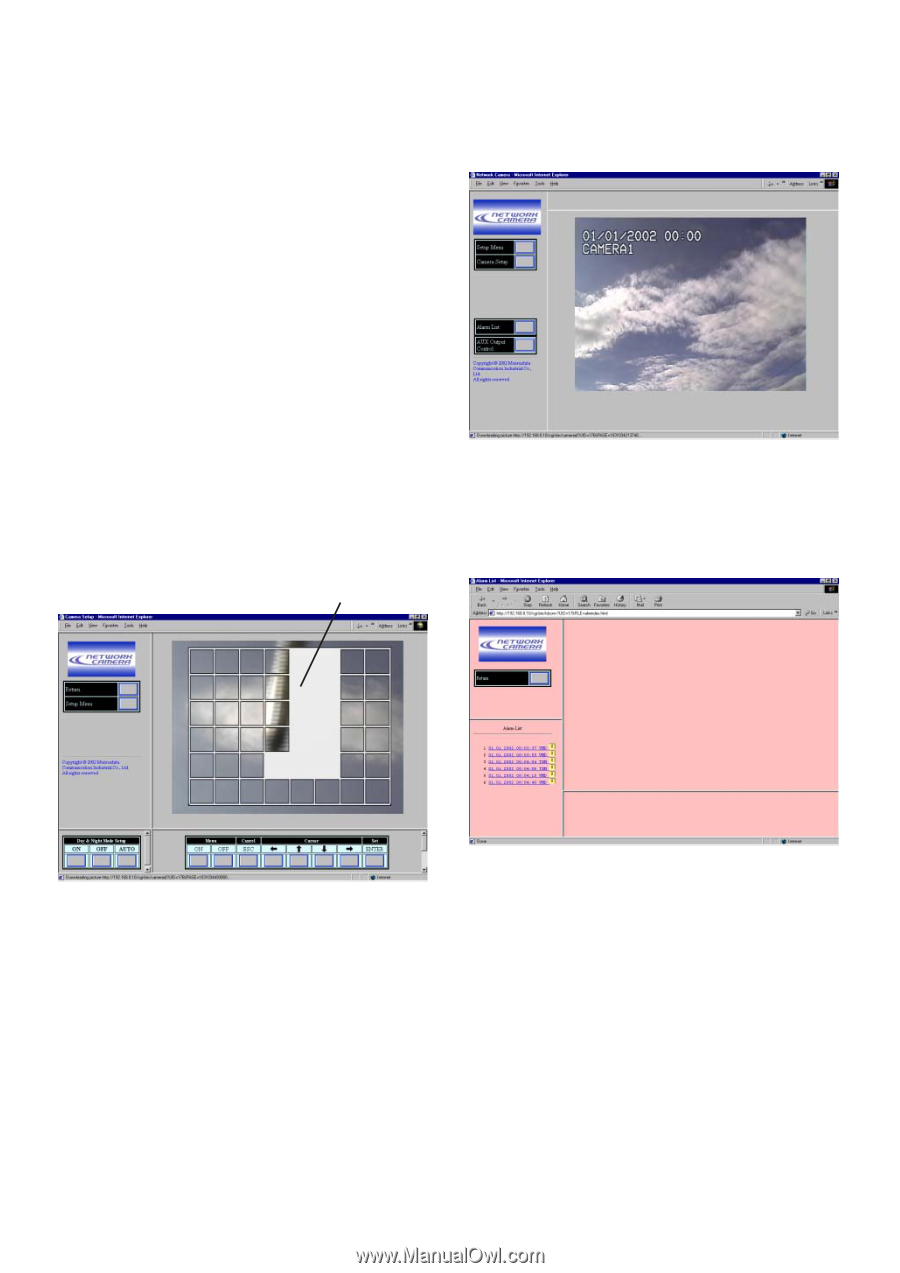
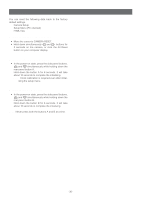
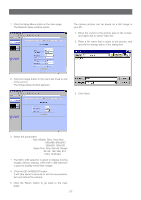
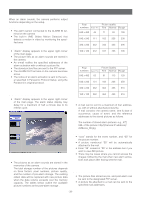
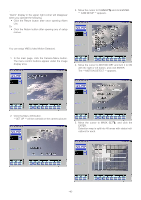
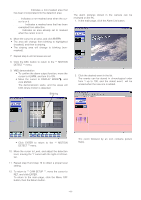
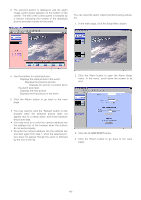
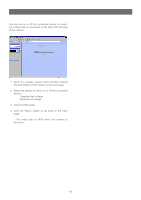
Transparency: Indicates a non-masked area that has been incorporated into the detection area. Blink: Indicates a non-masked area when the cursor is on it. Highlight: Indicates a masked area that has been exempted from detection. Stripe: Indicates an area already set to masked when the cursor is on it. 6. Move the cursor to an area, and click ENTER. • The area will change from blinking to highlighted (masked), and then to striping. • The striping area will change to blinking (non- masked). 7. Repeat step 6 until all areas are set. 8. Click the ESC button to return to the ** MOTION DETECT ** menu. 9. VMD demonstration • To confirm the alarm output function, move the cursor to ALARM, and turn it to ON. • Move the cursor to DISPLAY MODEO, and click ENTER. The demonstration starts, and the areas will blink where motion is detected. Blinking ■ Reviewing Alarm Pictures The alarm pictures stored in the camera can be reviewed on the PC. 1. In the main page, click the Alarm List button. 2. Click the desired event in the list. The events can be stored in chronological order from 1 up to 100, and the oldest event will be erased when the new one is added. • Click ENTER to return to the ** MOTION DETECT ** menu. 10. Move the cursor to Level, and adjust the detection level, moving the "I" cursor with the right or left button. 11. Repeat step 9 and step 10 to obtain a proper level setting. 12. To return to ** CAM SETUP **, move the cursor to RET, and click ENTER. To return to the main page, click the Menu OFF button, then the Return button. The event followed by an icon contains picture file(s). -41-
-
 1
1 -
2
-
3
-
4
-
5
-
6
-
7
-
8
-
9
-
10
-
11
-
12
-
13
-
14
-
15
-
16
-
17
-
18
-
19
-
20
-
21
-
22
-
23
-
24
-
25
-
26
-
27
-
28
-
29
-
30
-
31
-
32
-
33
-
34
-
35
-
 36
36 -
 37
37 -
 38
38 -
 39
39 -
 40
40 -
 41
41 -
 42
42 -
 43
43 -
 44
44 -
 45
45 -
 46
46 -
47
 |
 |