Panasonic WVNP472 WVNP472 User Guide - Page 34
USER SETUP, Date & Time, Available time seconds, Notes, Administrator, Live Only
 |
View all Panasonic WVNP472 manuals
Add to My Manuals
Save this manual to your list of manuals |
Page 34 highlights
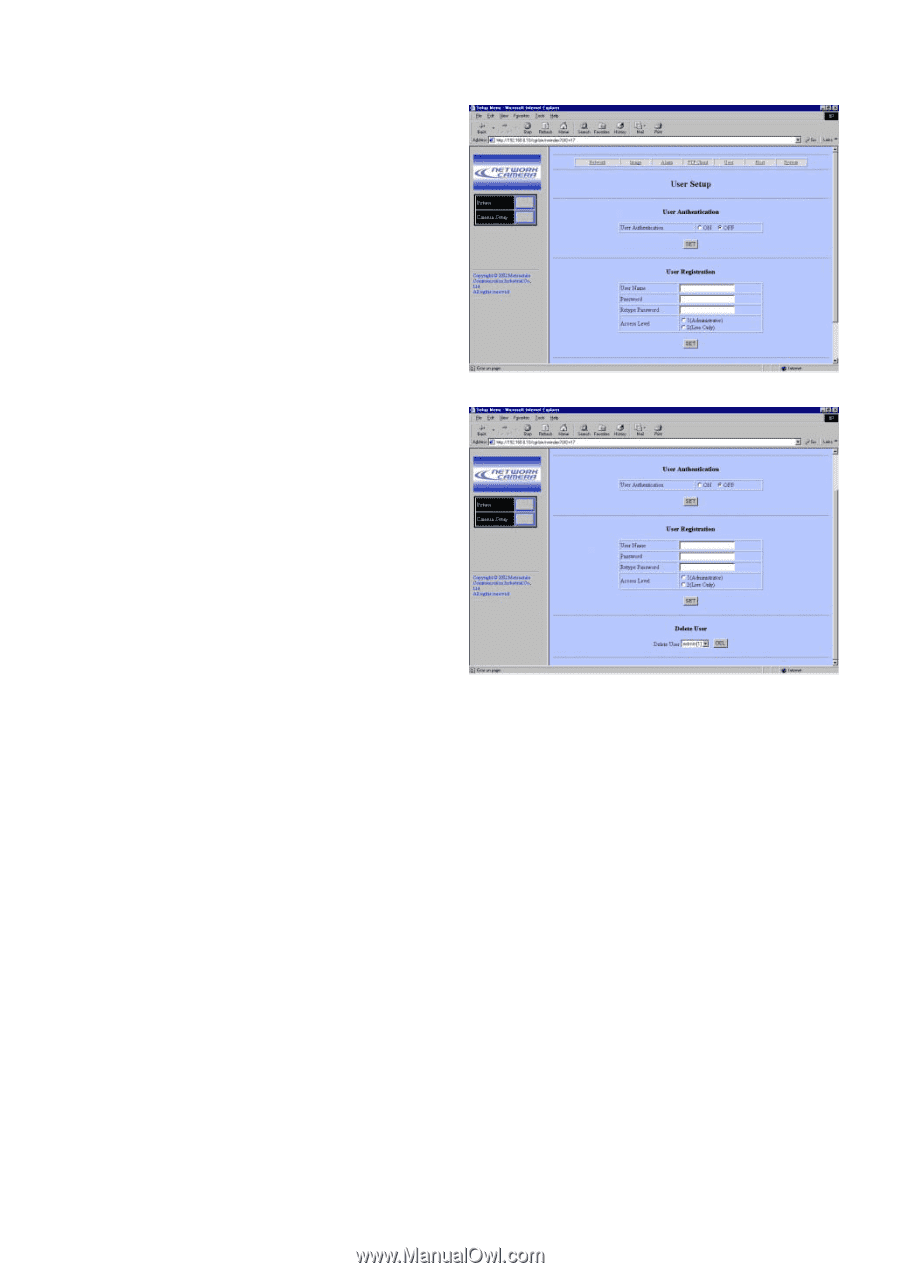
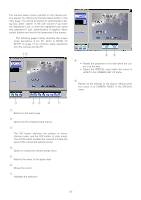
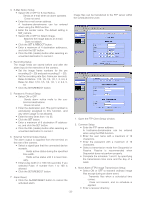
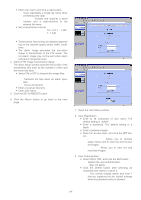
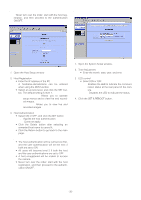
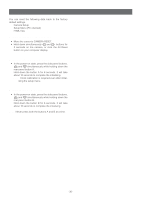
• Enter a file name and click a radio button. Fix: Uses repeatedly a single file name when overwriting new data. Date & Time: Creates and attaches a serial number and a date-and-time to the entered file name. • Set a transmission interval. Available time (seconds): 0.2 - 0.9, 1 - 1 440 Available time (minutes): 1 - 1 440 Notes: • Transmission interval may be delayed depending on the network speed and/or traffic conditions. • The alarm image precedes the non-alarm image in transmission to the FTP server. The non-alarm image may not be sent when alarm activations frequently arise. 4. Alarm (FTP) Image Transmission Setup The alarm setup window specifies the profile of the transmitting files such as the numbers of files and the frame rate (fps). • Select ON or OFF to transmit the image files. ON: Transmits the files when an alarm operates. OFF: Does not transmit. • Enter a receiver directory. • Enter a file name. 5. Click the SET & REBOOT button. 6. Click the Return button to go back to the main page. ■ User Setup 1. Open the User Setup window. 2. User Registration • Enter to 16 characters of user name. The default setting is "admin". • Enter a password. The default setting is a blank. • Enter a password again. • Select an access level, and click the SET button. 1 (Administrator): Allows you to operate setup menus and to view live and recorded images. 2 (Live Only): Allows you to view live and recorded images. 3. User Authentication • Select ON or OFF, and click the SET button. ON: applies the user authentication. OFF: does not apply. • Click the Delete button after selecting an unwanted user name to cancel it. Note: You cannot change admin and level 1 that are registered as the default settings while the password entry is allowed. -34-
-
 1
1 -
2
-
3
-
4
-
5
-
6
-
7
-
8
-
9
-
10
-
11
-
12
-
13
-
14
-
15
-
16
-
17
-
18
-
19
-
20
-
21
-
22
-
23
-
24
-
25
-
26
-
27
-
28
-
 29
29 -
 30
30 -
 31
31 -
 32
32 -
 33
33 -
 34
34 -
 35
35 -
 36
36 -
 37
37 -
 38
38 -
 39
39 -
40
-
41
-
42
-
43
-
44
-
45
-
46
-
47
 |
 |