Panasonic WVNP472 WVNP472 User Guide - Page 8
Installations, Mounting And Adjusting The Lens
 |
View all Panasonic WVNP472 manuals
Add to My Manuals
Save this manual to your list of manuals |
Page 8 highlights
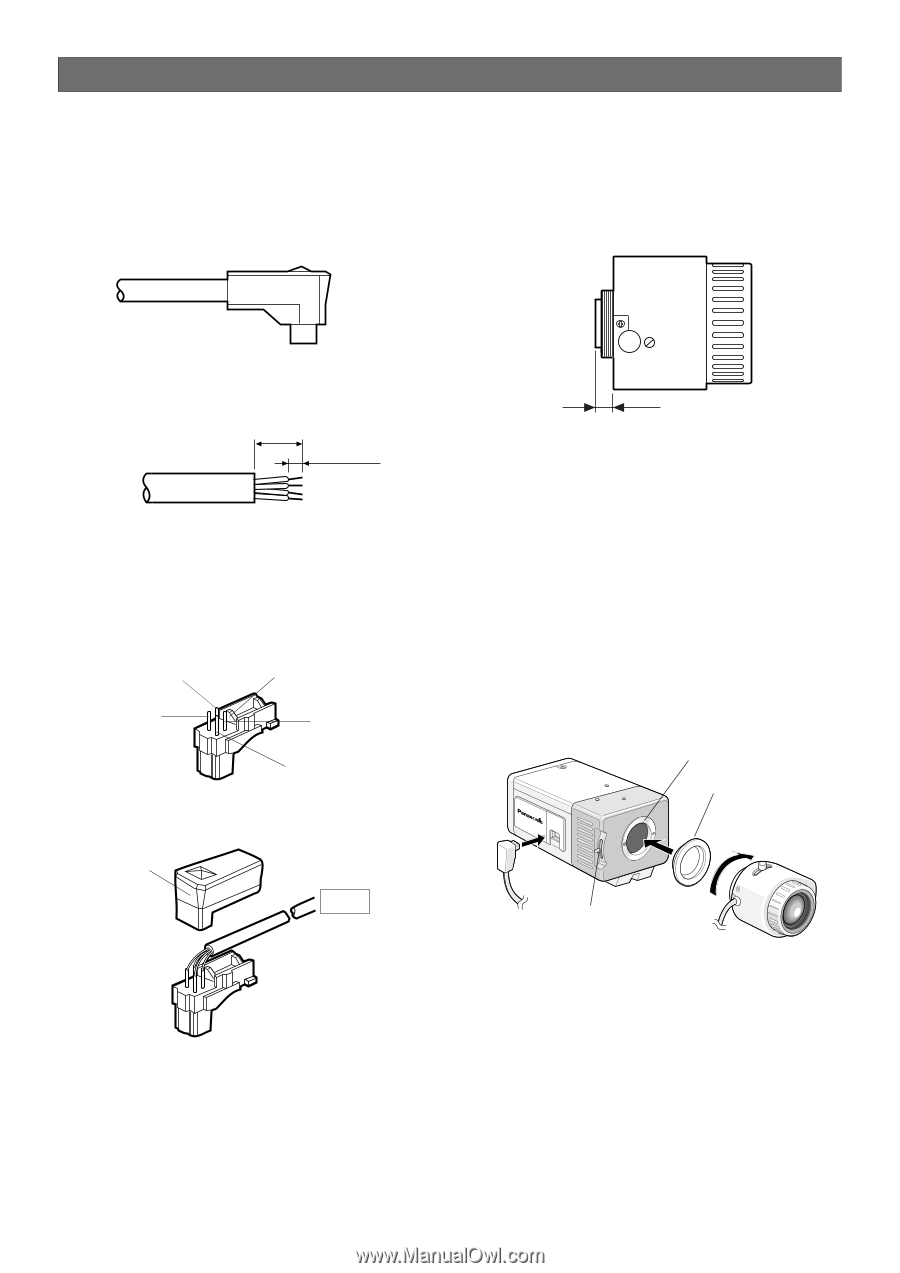
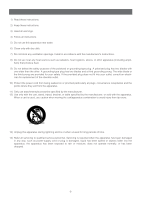
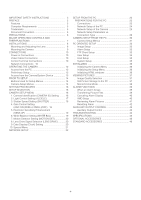
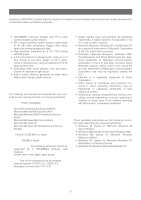
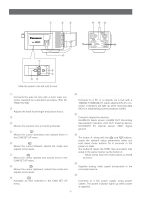
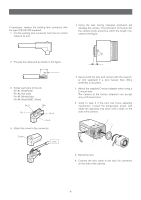
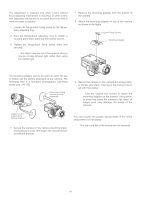
INSTALLATIONS Mounting and Adjusting the Lens • Replacement of Auto Iris Lens Connector If necessary, replace the existing lens connector with the type YFE419J100 supplied. 1. Cut the existing lens connector from the iris control cable at its end. • Mounting the Lens Notes: • Using the lens having improper protrusion will damage the camera. The protrusion of the lens into the camera body should be within the length indicated in the figure. 2. Process the cable end as shown in the figure. 8 mm (5/8") 2 mm (1/16") 3. Solder each wire to the pin. Pin #1: Red/Power Pin #2: Not used Pin #3: White/Video Pin #4: Black/GND, Shield Pin 3 Rib Pin 1 Pin 4 Pin 2 4. Attach the cover to the connector. Cover Lens C-mount: Less than 13 mm (1/2") CS-mount: Less than 8 mm (5/16") • Secure both the lens and camera with the supporter (not supplied) if a lens heavier than 450 g (0.99 lbs) is mounted. 1. Attach the supplied C-mount adapter when using a C-mount lens. The camera at the factory shipment can accept only a CS-mount lens. 2. Jump to step 3 if the lens has focus adjusting mechanism. Loosen the flange-back screw, and rotate the adjusting ring down until it stops on the side of the camera. Lens Mount C-mount Adapter WV-NP472 Flange-back Adjusting Ring & Screw 3. Mount the lens. 4. Connect the lens cable to the auto iris connector on the side of the camera. NP472 -8-
-
 1
1 -
2
-
 3
3 -
 4
4 -
 5
5 -
 6
6 -
 7
7 -
 8
8 -
 9
9 -
 10
10 -
 11
11 -
 12
12 -
 13
13 -
14
-
15
-
16
-
17
-
18
-
19
-
20
-
21
-
22
-
23
-
24
-
25
-
26
-
27
-
28
-
29
-
30
-
31
-
32
-
33
-
34
-
35
-
36
-
37
-
38
-
39
-
40
-
41
-
42
-
43
-
44
-
45
-
46
-
47
 |
 |