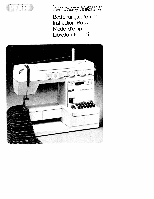
Pfaff hobbymatic 917 Owner's Manual - Page 6
Pfaff hobbymatic 917 Manual
 |
View all Pfaff hobbymatic 917 manuals
Add to My Manuals
Save this manual to your list of manuals |
Page 6 highlights
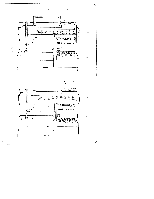
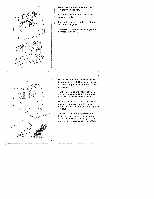
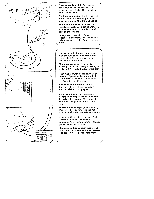
Elektrischer Anschlul3: Anlasser auf den Boden stellen. Stecker N in die Maschine, und Stecker 0 in die Wand steckdose stecken. Electrical connection: Set the foot con trol on the floor. Insert plug N in the machine and plug 0 in the wall socket. Branchement electrique: Placer le rheostat a pedale sur le sol. Brancher Ia fiche N dans a machine et Ia fiche 0 dans Ia prise murale. Collegamento elettrico: Porre il reostato sul pavirnento. Inserire spina N nella macchina. e spina 0 nella presa a muro. 4 Hauptschalter P drücken, wobei das Nählicht aufleuchtet. Anlasser nieder treten. Je tiefer man drückt, urn so schneller näht die Pfaff. Electronic-Anlasser (Schalter 0) Stellung = halbe Endgeschwindigkeit Stellung 41 = voIle Endgeschwindigkeit Push master switch P; the sewing light goes on. Operating the foot control: The farther you press the pedal down the faster the machine runs. Electronic foot control (slide 0) Position = half the top speed Position 44 = full top speed Enfoncer le bouton de linterrupteur general P; Ia lampe s'allume. Abaisser Ia pédale du rheostat. Plus Ia pédale sera abaissée, plus Ia Pfaff" coudra vite. Rheostat electronlque (interrupteur Q) Position = derni-vitesse rnaximale Position 11 = vitesse maximale integrale Prernendo l'interruttore principale P si accende il ritlettore. Premere II reostato: Piü a fondo si preme il pedale, piU veloce cucirà Ia "Pfaff". Reostato elettronico (commutatore Q) Posizione = velocitá finale dirnezzata Posizione 44 = velocità finale intera
-
 1
1 -
 2
2 -
 3
3 -
 4
4 -
 5
5 -
 6
6 -
 7
7 -
 8
8 -
 9
9 -
 10
10 -
 11
11 -
 12
12 -
13
-
14
-
15
-
16
-
17
-
18
-
19
-
20
-
21
-
22
-
23
-
24
-
25
-
26
-
27
-
28
-
29
-
30
-
31
-
32
-
33
-
34
-
35
-
36
-
37
-
38
-
39
-
40
-
41
-
42
-
43
-
44
-
45
-
46
-
47
-
48
-
49
-
50
-
51
-
52
-
53
-
54
-
55
-
56
-
57
-
58
-
59
-
60
-
61
-
62
-
63
-
64
-
65
-
66
-
67
-
68
-
69
-
70
-
71
-
72
-
73
-
74
-
75
-
76
-
77
-
78
-
79
-
80
-
81
-
82
-
83
-
84
-
85
-
86
-
87
-
88
 |
 |
