Ricoh Aficio MP 7000 Copy/Document Server Reference - Page 114
Border Erase (different width), Sided Set, Start, Edit / Stamp, Erase, Erase Center / Border
 |
View all Ricoh Aficio MP 7000 manuals
Add to My Manuals
Save this manual to your list of manuals |
Page 114 highlights
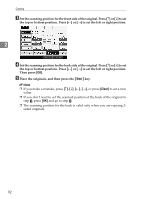
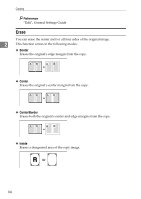
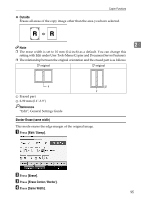
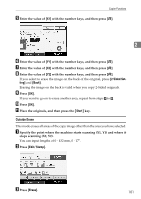
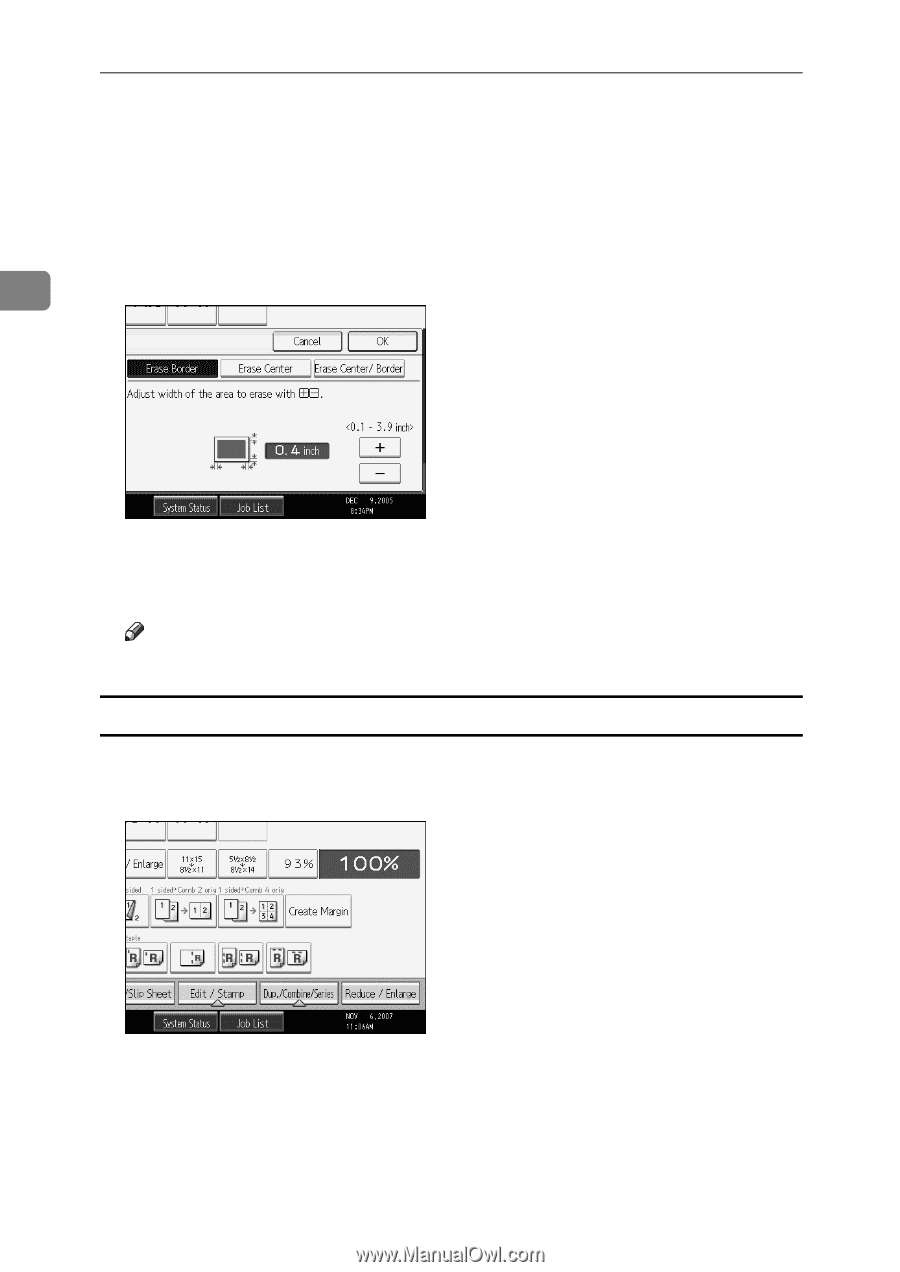
Copying E Set an erase border width with [n] or [o]. Pressing [n] or [o] changes the width in increments of 1 mm (0.1 inch). Pressing and holding down the relevant key changes the width in increments of 10 mm (1 inch). If you select to erase the image on the back of the original, press [2 Sided Setting] and [Back]. 2 Erasing the image on the back is valid when you copy 2-Sided originals. F Press [OK] twice. G Place the originals, and then press the {Start} key. Note ❒ To change the value entered in step E, press [n] and [o] to set a new value. Border Erase (different width) This mode erases the edge margin of the original image. A Press [Edit / Stamp]. B Press [Erase]. C Press [Erase Center / Border]. D Press [Different Width]. 96
-
 1
1 -
2
-
3
-
4
-
5
-
6
-
7
-
8
-
9
-
10
-
11
-
12
-
13
-
14
-
15
-
16
-
17
-
18
-
19
-
20
-
21
-
22
-
23
-
24
-
25
-
26
-
27
-
28
-
29
-
30
-
31
-
32
-
33
-
34
-
35
-
36
-
37
-
38
-
39
-
40
-
41
-
42
-
43
-
44
-
45
-
46
-
47
-
48
-
49
-
50
-
51
-
52
-
53
-
54
-
55
-
56
-
57
-
58
-
59
-
60
-
61
-
62
-
63
-
64
-
65
-
66
-
67
-
68
-
69
-
70
-
71
-
72
-
73
-
74
-
75
-
76
-
77
-
78
-
79
-
80
-
81
-
82
-
83
-
84
-
85
-
86
-
87
-
88
-
89
-
90
-
91
-
92
-
93
-
94
-
95
-
96
-
97
-
98
-
99
-
100
-
101
-
102
-
103
-
104
-
105
-
106
-
107
-
108
-
 109
109 -
 110
110 -
 111
111 -
 112
112 -
 113
113 -
 114
114 -
 115
115 -
 116
116 -
 117
117 -
 118
118 -
 119
119 -
120
-
121
-
122
-
123
-
124
-
125
-
126
-
127
-
128
-
129
-
130
-
131
-
132
-
133
-
134
-
135
-
136
-
137
-
138
-
139
-
140
-
141
-
142
-
143
-
144
-
145
-
146
-
147
-
148
-
149
-
150
-
151
-
152
-
153
-
154
-
155
-
156
-
157
-
158
-
159
-
160
-
161
-
162
-
163
-
164
-
165
-
166
-
167
-
168
-
169
-
170
-
171
-
172
-
173
-
174
-
175
-
176
-
177
-
178
-
179
-
180
-
181
-
182
-
183
-
184
-
185
-
186
-
187
-
188
-
189
-
190
-
191
-
192
-
193
-
194
-
195
-
196
-
197
-
198
-
199
-
200
-
201
-
202
-
203
-
204
-
205
-
206
-
207
-
208
-
209
-
210
-
211
-
212
-
213
-
214
-
215
-
216
-
217
-
218
-
219
-
220
-
221
-
222
 |
 |
Copying
96
2
E
Set an erase border width with
[
n
]
or
[
o
]
.
Pressing
[
n
]
or
[
o
]
changes the width in increments of 1 mm (0.1 inch).
Pressing and holding down the relevant key changes the width in increments
of 10 mm (1 inch).
If you select to erase the image on the back of the original, press
[
2 Sided Set-
ting
]
and
[
Back
]
.
Erasing the image on the back is valid when you copy 2-Sided originals.
F
Press
[
OK
]
twice.
G
Place the originals, and then press the
{
Start
}
key.
Note
❒
To change the value entered in step
E
, press
[
n
]
and
[
o
]
to set a new value.
Border Erase (different width)
This mode erases the edge margin of the original image.
A
Press
[
Edit / Stamp
]
.
B
Press
[
Erase
]
.
C
Press
[
Erase Center / Border
]
.
D
Press
[
Different Width
]
.