Ricoh Aficio MP 7000 Copy/Document Server Reference - Page 118
Inside Erase, Different Width, Sided Set, Start, Edit / Stamp, Erase, Erase Inside 1
 |
View all Ricoh Aficio MP 7000 manuals
Add to My Manuals
Save this manual to your list of manuals |
Page 118 highlights
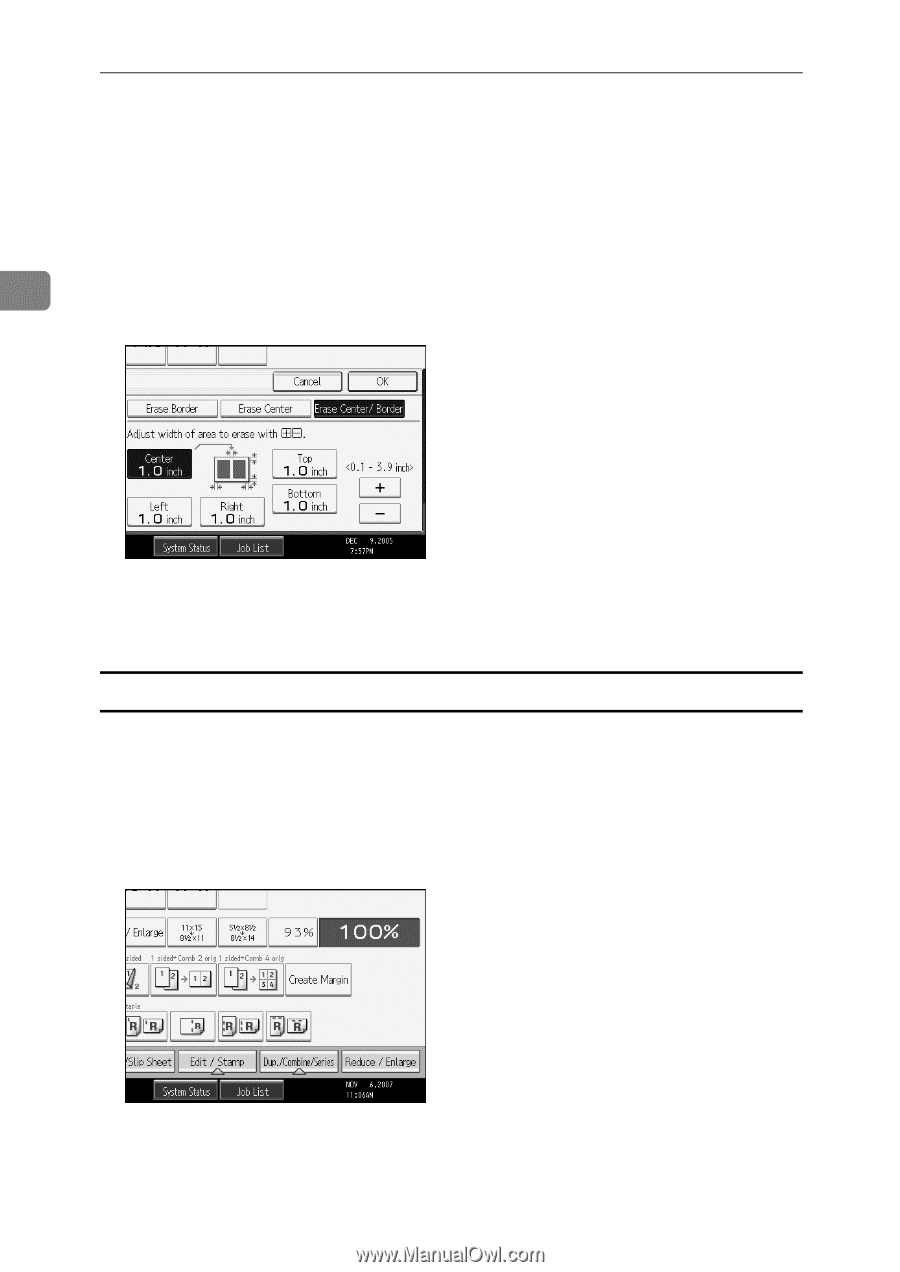
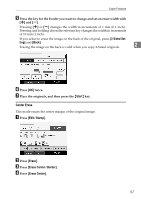
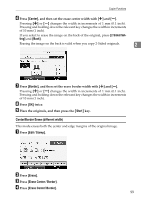
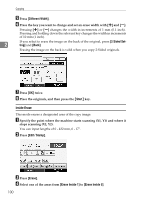
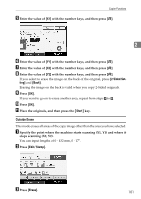
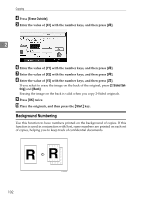
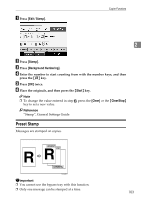
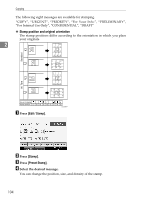
Copying E Press [Different Width]. F Press the key you want to change and set an erase width with [n] and [o]. Pressing [n] or [o] changes the width in increments of 1 mm (0.1 inch). Pressing and holding down the relevant key changes the width in increments of 10 mm (1 inch). If you select to erase the image on the back of the original, press [2 Sided Set- 2 ting] and [Back]. Erasing the image on the back is valid when you copy 2-Sided originals. G Press [OK] twice. H Place the originals, and then press the {Start} key. Inside Erase This mode erases a designated area of the copy image. A Specify the point where the machine starts scanning (X1, Y1) and where it stops scanning (X2, Y2). You can input lengths of 0 - 432 mm, 0 - 17". B Press [Edit / Stamp]. C Press [Erase]. D Select one of the areas from [Erase Inside 1] to [Erase Inside 5]. 100
-
 1
1 -
2
-
3
-
4
-
5
-
6
-
7
-
8
-
9
-
10
-
11
-
12
-
13
-
14
-
15
-
16
-
17
-
18
-
19
-
20
-
21
-
22
-
23
-
24
-
25
-
26
-
27
-
28
-
29
-
30
-
31
-
32
-
33
-
34
-
35
-
36
-
37
-
38
-
39
-
40
-
41
-
42
-
43
-
44
-
45
-
46
-
47
-
48
-
49
-
50
-
51
-
52
-
53
-
54
-
55
-
56
-
57
-
58
-
59
-
60
-
61
-
62
-
63
-
64
-
65
-
66
-
67
-
68
-
69
-
70
-
71
-
72
-
73
-
74
-
75
-
76
-
77
-
78
-
79
-
80
-
81
-
82
-
83
-
84
-
85
-
86
-
87
-
88
-
89
-
90
-
91
-
92
-
93
-
94
-
95
-
96
-
97
-
98
-
99
-
100
-
101
-
102
-
103
-
104
-
105
-
106
-
107
-
108
-
109
-
110
-
111
-
112
-
 113
113 -
 114
114 -
 115
115 -
 116
116 -
 117
117 -
 118
118 -
 119
119 -
 120
120 -
 121
121 -
 122
122 -
 123
123 -
124
-
125
-
126
-
127
-
128
-
129
-
130
-
131
-
132
-
133
-
134
-
135
-
136
-
137
-
138
-
139
-
140
-
141
-
142
-
143
-
144
-
145
-
146
-
147
-
148
-
149
-
150
-
151
-
152
-
153
-
154
-
155
-
156
-
157
-
158
-
159
-
160
-
161
-
162
-
163
-
164
-
165
-
166
-
167
-
168
-
169
-
170
-
171
-
172
-
173
-
174
-
175
-
176
-
177
-
178
-
179
-
180
-
181
-
182
-
183
-
184
-
185
-
186
-
187
-
188
-
189
-
190
-
191
-
192
-
193
-
194
-
195
-
196
-
197
-
198
-
199
-
200
-
201
-
202
-
203
-
204
-
205
-
206
-
207
-
208
-
209
-
210
-
211
-
212
-
213
-
214
-
215
-
216
-
217
-
218
-
219
-
220
-
221
-
222
 |
 |