Ricoh Aficio MP 7000 Copy/Document Server Reference - Page 49
Auto Start, Job Preset, Start, New Job, To Copying, Screen, To Reserv.
 |
View all Ricoh Aficio MP 7000 manuals
Add to My Manuals
Save this manual to your list of manuals |
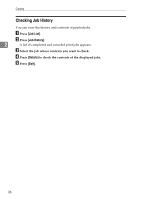
Page 49 highlights
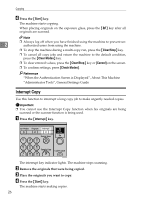
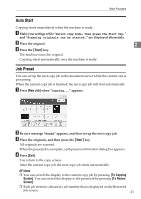
Basic Procedure Auto Start Copying starts immediately when the machine is ready. A Make your settings while "Select copy mode, then press the Start key." and "Scanning originals can be started." are displayed alternately. B Place the original. 2 C Press the {Start} key. The machine scans the original. Copying starts automatically once the machine is ready. Job Preset You can set up the next copy job in the document server while the current one is processing. When the current copy job is finished, the next copy job will start automatically. A Press [New Job] when "Copying..." appears. B Be sure message "Ready" appears, and then set up the next copy job. C Place the originals, and then press the {Start} key. All originals are scanned. When the preset job is complete, a job preset confirmation dialog box appears. D Press [Exit]. You return to the copy screen. After the current copy job, the next copy job starts automatically. Note ❒ You can switch the display to the current copy job by pressing [To Copying Screen]. You can switch the display to the preset job by pressing [To Reserv. Screen]. ❒ Each job stored is allocated a job number that is displayed on the Reserved Job screen. 31
-
 1
1 -
2
-
3
-
4
-
5
-
6
-
7
-
8
-
9
-
10
-
11
-
12
-
13
-
14
-
15
-
16
-
17
-
18
-
19
-
20
-
21
-
22
-
23
-
24
-
25
-
26
-
27
-
28
-
29
-
30
-
31
-
32
-
33
-
34
-
35
-
36
-
37
-
38
-
39
-
40
-
41
-
42
-
43
-
 44
44 -
 45
45 -
 46
46 -
 47
47 -
 48
48 -
 49
49 -
 50
50 -
 51
51 -
 52
52 -
 53
53 -
 54
54 -
55
-
56
-
57
-
58
-
59
-
60
-
61
-
62
-
63
-
64
-
65
-
66
-
67
-
68
-
69
-
70
-
71
-
72
-
73
-
74
-
75
-
76
-
77
-
78
-
79
-
80
-
81
-
82
-
83
-
84
-
85
-
86
-
87
-
88
-
89
-
90
-
91
-
92
-
93
-
94
-
95
-
96
-
97
-
98
-
99
-
100
-
101
-
102
-
103
-
104
-
105
-
106
-
107
-
108
-
109
-
110
-
111
-
112
-
113
-
114
-
115
-
116
-
117
-
118
-
119
-
120
-
121
-
122
-
123
-
124
-
125
-
126
-
127
-
128
-
129
-
130
-
131
-
132
-
133
-
134
-
135
-
136
-
137
-
138
-
139
-
140
-
141
-
142
-
143
-
144
-
145
-
146
-
147
-
148
-
149
-
150
-
151
-
152
-
153
-
154
-
155
-
156
-
157
-
158
-
159
-
160
-
161
-
162
-
163
-
164
-
165
-
166
-
167
-
168
-
169
-
170
-
171
-
172
-
173
-
174
-
175
-
176
-
177
-
178
-
179
-
180
-
181
-
182
-
183
-
184
-
185
-
186
-
187
-
188
-
189
-
190
-
191
-
192
-
193
-
194
-
195
-
196
-
197
-
198
-
199
-
200
-
201
-
202
-
203
-
204
-
205
-
206
-
207
-
208
-
209
-
210
-
211
-
212
-
213
-
214
-
215
-
216
-
217
-
218
-
219
-
220
-
221
-
222
 |
 |