Samsung SGH-I747 User Manual Ver.lem_f5 (English(north America)) - Page 109
Using Gmail, Creating Additional Email Accounts, Switching Between Email Accounts
 |
View all Samsung SGH-I747 manuals
Add to My Manuals
Save this manual to your list of manuals |
Page 109 highlights
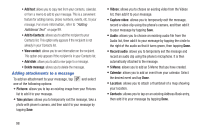
7. Enter all the Exchange server information, Domain, User name and Password, then tap Next. 8. At the Activation prompt, tap OK. The Account options screen is displayed. 9. Enter the desired information in the different fields, then tap Next. 10. Enter an Account name for this account (Optional) and tap Done. Wait for the Inbox to synchronize before use. 11. Press ➔ Settings to change the account settings. Creating Additional Email Accounts To create additional email accounts after setting up your first account, follow these steps: 1. From the Home screen, tap ➔ Email . Your Email screen displays showing your emails from the active account. 2. Press ➔ Settings. 3. Tap to add another email account. 4. Enter the information required to set up another account. For more information, refer to "Creating an Email Account" on page 102. Switching Between Email Accounts 1. From the Home screen, tap ➔ Email . Your Email screen displays showing your emails from the active account. 2. Tap the Inbox button at the top of your screen that displays the optional name you assigned to your active email account, for example, Work, Gmail, etc. Your Email accounts screen is displayed. 3. Tap the Email account you would like to switch to. You can also select Combined view which will display email messages from all accounts. 4. The new Email account is displayed. Using Gmail Gmail is Google's web-based email. When you first setup the phone, Gmail is configured. Depending on the synchronization settings, Gmail is automatically synchronized with your Gmail account. Messaging 103
-
 1
1 -
2
-
3
-
4
-
5
-
6
-
7
-
8
-
9
-
10
-
11
-
12
-
13
-
14
-
15
-
16
-
17
-
18
-
19
-
20
-
21
-
22
-
23
-
24
-
25
-
26
-
27
-
28
-
29
-
30
-
31
-
32
-
33
-
34
-
35
-
36
-
37
-
38
-
39
-
40
-
41
-
42
-
43
-
44
-
45
-
46
-
47
-
48
-
49
-
50
-
51
-
52
-
53
-
54
-
55
-
56
-
57
-
58
-
59
-
60
-
61
-
62
-
63
-
64
-
65
-
66
-
67
-
68
-
69
-
70
-
71
-
72
-
73
-
74
-
75
-
76
-
77
-
78
-
79
-
80
-
81
-
82
-
83
-
84
-
85
-
86
-
87
-
88
-
89
-
90
-
91
-
92
-
93
-
94
-
95
-
96
-
97
-
98
-
99
-
100
-
101
-
102
-
103
-
 104
104 -
 105
105 -
 106
106 -
 107
107 -
 108
108 -
 109
109 -
 110
110 -
 111
111 -
 112
112 -
 113
113 -
 114
114 -
115
-
116
-
117
-
118
-
119
-
120
-
121
-
122
-
123
-
124
-
125
-
126
-
127
-
128
-
129
-
130
-
131
-
132
-
133
-
134
-
135
-
136
-
137
-
138
-
139
-
140
-
141
-
142
-
143
-
144
-
145
-
146
-
147
-
148
-
149
-
150
-
151
-
152
-
153
-
154
-
155
-
156
-
157
-
158
-
159
-
160
-
161
-
162
-
163
-
164
-
165
-
166
-
167
-
168
-
169
-
170
-
171
-
172
-
173
-
174
-
175
-
176
-
177
-
178
-
179
-
180
-
181
-
182
-
183
-
184
-
185
-
186
-
187
-
188
-
189
-
190
-
191
-
192
-
193
-
194
-
195
-
196
-
197
-
198
-
199
-
200
-
201
-
202
-
203
-
204
-
205
-
206
-
207
-
208
-
209
-
210
-
211
-
212
-
213
-
214
-
215
-
216
-
217
-
218
-
219
-
220
-
221
-
222
-
223
-
224
-
225
-
226
-
227
-
228
-
229
-
230
-
231
-
232
 |
 |
