Sony RDR-HX900 Operating Instructions - Page 51
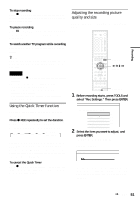
select Rec Settings. Then press ENTER., To cancel the Quick Timer
 |
UPC - 027242644328
View all Sony RDR-HX900 manuals
Add to My Manuals
Save this manual to your list of manuals |
Page 51 highlights
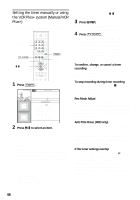
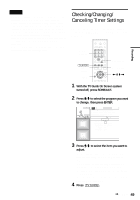
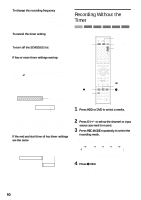
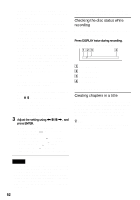
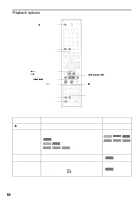
Recording To stop recording Press x REC STOP located beneath the remote control cover. Note that it may take a few seconds for recording to stop. To pause recording Press X REC PAUSE located beneath the remote control cover. To restart recording, press the button again. To watch another TV program while recording Set your TV to the TV input using the TV/VIDEO button. z Hint If you do not want to watch TV while recording, you can turn off the TV. When using a cable box, make sure to leave it on. Notes • After pressing z REC, it may take a short while to start recording. • You cannot change the recording mode while recording or during recording pause. • If there is a power failure, the program you are recording may be erased. • You cannot watch a TV program while recording another TV program. Using the Quick Timer function You can set the recorder to record in 30 minute increments. Press z REC repeatedly to set the duration. Each press advances the time in 30 minute increments. The maximum duration is six hours. 0:30 1:00 5:30 6:00 (normal recording) The time counter decreases minute by minute to 0:00, then the recorder stops recording (power does not turn off). Even if you turn off the recorder during recording, the recorder continues to record until the time counter runs out. To cancel the Quick Timer Press z REC repeatedly until the counter appears in the front panel display. The recorder returns to normal recording mode. Adjusting the recording picture quality and size You can adjust the recording picture quality and picture size. 123 456 789 0 TOOLS
-
 1
1 -
2
-
3
-
4
-
5
-
6
-
7
-
8
-
9
-
10
-
11
-
12
-
13
-
14
-
15
-
16
-
17
-
18
-
19
-
20
-
21
-
22
-
23
-
24
-
25
-
26
-
27
-
28
-
29
-
30
-
31
-
32
-
33
-
34
-
35
-
36
-
37
-
38
-
39
-
40
-
41
-
42
-
43
-
44
-
45
-
 46
46 -
 47
47 -
 48
48 -
 49
49 -
 50
50 -
 51
51 -
 52
52 -
 53
53 -
 54
54 -
 55
55 -
 56
56 -
57
-
58
-
59
-
60
-
61
-
62
-
63
-
64
-
65
-
66
-
67
-
68
-
69
-
70
-
71
-
72
-
73
-
74
-
75
-
76
-
77
-
78
-
79
-
80
-
81
-
82
-
83
-
84
-
85
-
86
-
87
-
88
-
89
-
90
-
91
-
92
-
93
-
94
-
95
-
96
-
97
-
98
-
99
-
100
-
101
-
102
-
103
-
104
-
105
-
106
-
107
-
108
-
109
-
110
-
111
-
112
-
113
-
114
-
115
-
116
-
117
-
118
-
119
-
120
 |
 |
