Sony RDR-HX900 Operating Instructions - Page 82
Select Start, and press ENTER., To stop during recording
 |
UPC - 027242644328
View all Sony RDR-HX900 manuals
Add to My Manuals
Save this manual to your list of manuals |
Page 82 highlights
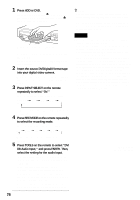
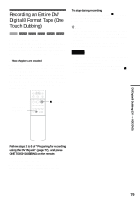
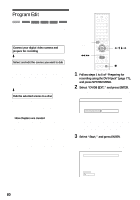
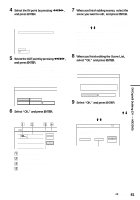
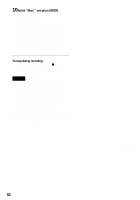
10Select "Start," and press ENTER. The recorder starts recording the tape contents as programmed. • If the recording does not fit due to the dubbing mode you selected, the display asks if you want to continue. To change the dubbing mode, select "Reset" and repeat from step 9. To have the recorder adjust the dubbing mode, select "Auto Dub Mode." • If there is not enough disc space even after changing the dubbing mode, the display asks if you want to record halfway. To continue, select "OK." To stop during recording Open the remote's cover and press x REC STOP. Note that it may take a few seconds for the recorder to stop recording. Notes • The disc may not be recorded as programmed if the tape's time code is not sequential or there are blanks between the recordings on the tape. In this case, see "Recording From a VCR or Similar Device" (page 53). • The start and end points of a program may be different from what you have set if the source DV/Digital8 format tape is in any of the following conditions: - Recording mode was changed during the recording. - There is a blank space in the recorded portion of the tape. • If you set the beginning of the tape as the IN point and the end point as the OUT point, the IN and OUT points may change slightly during dubbing. • You cannot set a scene to be shorter than one second. 82 RDR-HX900 2-187-189-11(2)
-
 1
1 -
2
-
3
-
4
-
5
-
6
-
7
-
8
-
9
-
10
-
11
-
12
-
13
-
14
-
15
-
16
-
17
-
18
-
19
-
20
-
21
-
22
-
23
-
24
-
25
-
26
-
27
-
28
-
29
-
30
-
31
-
32
-
33
-
34
-
35
-
36
-
37
-
38
-
39
-
40
-
41
-
42
-
43
-
44
-
45
-
46
-
47
-
48
-
49
-
50
-
51
-
52
-
53
-
54
-
55
-
56
-
57
-
58
-
59
-
60
-
61
-
62
-
63
-
64
-
65
-
66
-
67
-
68
-
69
-
70
-
71
-
72
-
73
-
74
-
75
-
76
-
 77
77 -
 78
78 -
 79
79 -
 80
80 -
 81
81 -
 82
82 -
 83
83 -
 84
84 -
 85
85 -
 86
86 -
 87
87 -
88
-
89
-
90
-
91
-
92
-
93
-
94
-
95
-
96
-
97
-
98
-
99
-
100
-
101
-
102
-
103
-
104
-
105
-
106
-
107
-
108
-
109
-
110
-
111
-
112
-
113
-
114
-
115
-
116
-
117
-
118
-
119
-
120
 |
 |
