Sony RDR-HX900 Operating Instructions - Page 89
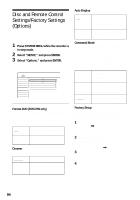
Audio Settings (Audio), Select SETUP, and press ENTER.
 |
UPC - 027242644328
View all Sony RDR-HX900 manuals
Add to My Manuals
Save this manual to your list of manuals |
Page 89 highlights
Screen Saver The screen saver image appears when you do not use the recorder for more than 10 minutes while an on-screen display, such as the System Menu, is displayed on your TV screen. The screen saver image helps prevent your display device from becoming damaged (ghosting). On Turns on the screen saver function. Off Turns off the function. Line1 Input Selects a method of inputting video signals for the LINE IN 1 jack on the rear panel of the recorder. Video Inputs video signals. S Video Inputs S video signals. Component Inputs component-video signals. Line3 Input Selects the method of inputting video signals for the LINE IN 3 jack on the rear panel of the recorder. The pictures will not be clear if this setting does not match the type of video input signal. Video S Video Inputs video signals. Inputs S-video signals. Audio Settings (Audio) The Audio Setup allows you to adjust the sound according to the playback and connection conditions. 1 Press SYSTEM MENU while the recorder is in stop mode. 2 Select "SETUP," and press ENTER. 3 Select "Audio," and press ENTER. The Audio Setup appears with the following options. The default settings are underlined. SETUP Settings Video Audio Features Options Easy Setup Auto Stereo : Tuner Audio : Audio ATT : Audio DRC : Downmix : Digital Out : Dolby Digital : DTS : On Main Off Standard Dolby Surround On D-PCM Off Auto Stereo This function is effective only when "Tuner Audio" is set to "Main." On Receives stereo programs. Normally select this. Off Select this to reduce noise. The sound changes to monaural. Tuner Audio Selects the sound to be recorded. Main SAP Records only the main sound. Records only the SAP (Second Audio Program) sound. Note If no SAP sound is received, the main sound is recorded regardless of the setting. Settings and Adjustments ,continued 89
-
 1
1 -
2
-
3
-
4
-
5
-
6
-
7
-
8
-
9
-
10
-
11
-
12
-
13
-
14
-
15
-
16
-
17
-
18
-
19
-
20
-
21
-
22
-
23
-
24
-
25
-
26
-
27
-
28
-
29
-
30
-
31
-
32
-
33
-
34
-
35
-
36
-
37
-
38
-
39
-
40
-
41
-
42
-
43
-
44
-
45
-
46
-
47
-
48
-
49
-
50
-
51
-
52
-
53
-
54
-
55
-
56
-
57
-
58
-
59
-
60
-
61
-
62
-
63
-
64
-
65
-
66
-
67
-
68
-
69
-
70
-
71
-
72
-
73
-
74
-
75
-
76
-
77
-
78
-
79
-
80
-
81
-
82
-
83
-
 84
84 -
 85
85 -
 86
86 -
 87
87 -
 88
88 -
 89
89 -
 90
90 -
 91
91 -
 92
92 -
 93
93 -
 94
94 -
95
-
96
-
97
-
98
-
99
-
100
-
101
-
102
-
103
-
104
-
105
-
106
-
107
-
108
-
109
-
110
-
111
-
112
-
113
-
114
-
115
-
116
-
117
-
118
-
119
-
120
 |
 |
