Sony RDR-HX900 Operating Instructions - Page 76
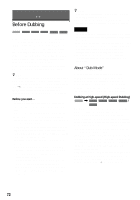
Auto Dub Mode
 |
UPC - 027242644328
View all Sony RDR-HX900 manuals
Add to My Manuals
Save this manual to your list of manuals |
Page 76 highlights
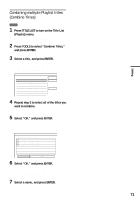
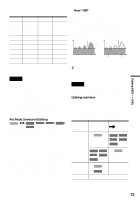
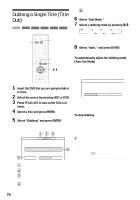
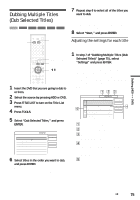
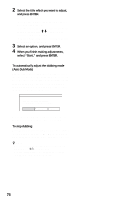
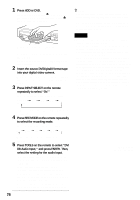
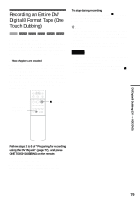
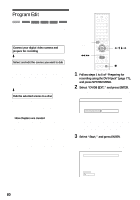
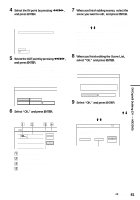
2 Select the title which you want to adjust, and press ENTER. The sub-menu appears. "Dub Mode": Selects the dubbing mode for each title (see page 72). "Change Order": Moves the title to change the dubbing order. Press M/m to select a new location, and press ENTER. "Cancel": Cancels the title selection. The title is excluded from dubbing. 3 Select an option, and press ENTER. 4 When you finish making adjustments, select "Start," and press ENTER. To automatically adjust the dubbing mode (Auto Dub Mode) The recorder adjusts the dubbing mode so all of the titles fit in. The same dubbing mode is set for all of the titles. If disc space is insufficient for the selected dubbing mode, the following display appears after step 8 of "Dubbing Multiple Titles (Dub Selected Titles)" (page 75). Dub Selected Titles There is not enough memory. Select "Auto Dub Mode" or change the selection. Auto Dub Mode Change Cancel Select "Auto Dub Mode" and press ENTER. If you have selected only one title, select "OK." To stop dubbing Press TOOLS to turn on the TOOLS menu. Select "Stop Dubbing" and press ENTER. When asked for confirmation, select "Yes," and press ENTER. z Hints • You can turn off the recorder without affecting the dubbing. Press "/1 during dubbing. • You can start Multiple Title Dubbing by selecting "DUBBING" from the System Menu. 76
-
 1
1 -
2
-
3
-
4
-
5
-
6
-
7
-
8
-
9
-
10
-
11
-
12
-
13
-
14
-
15
-
16
-
17
-
18
-
19
-
20
-
21
-
22
-
23
-
24
-
25
-
26
-
27
-
28
-
29
-
30
-
31
-
32
-
33
-
34
-
35
-
36
-
37
-
38
-
39
-
40
-
41
-
42
-
43
-
44
-
45
-
46
-
47
-
48
-
49
-
50
-
51
-
52
-
53
-
54
-
55
-
56
-
57
-
58
-
59
-
60
-
61
-
62
-
63
-
64
-
65
-
66
-
67
-
68
-
69
-
70
-
 71
71 -
 72
72 -
 73
73 -
 74
74 -
 75
75 -
 76
76 -
 77
77 -
 78
78 -
 79
79 -
 80
80 -
 81
81 -
82
-
83
-
84
-
85
-
86
-
87
-
88
-
89
-
90
-
91
-
92
-
93
-
94
-
95
-
96
-
97
-
98
-
99
-
100
-
101
-
102
-
103
-
104
-
105
-
106
-
107
-
108
-
109
-
110
-
111
-
112
-
113
-
114
-
115
-
116
-
117
-
118
-
119
-
120
 |
 |
