Sony STR-DN1030 Operating Instructions (Large File - 11.51 MB) - Page 42
to select START., The measurement starts in five - no sound
 |
View all Sony STR-DN1030 manuals
Add to My Manuals
Save this manual to your list of manuals |
Page 42 highlights
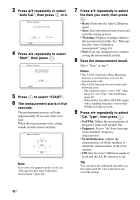
3 Press V/v repeatedly to select "Auto Cal.", then press or b. 4 Press B/b repeatedly to select "Start", then press . 5 Press to select "START". 6 The measurement starts in five seconds. The measurement process will take approximately 30 seconds with a test tone. When the measurement ends, a beep sounds and the screen switches. Note If an error code appears on the screen, see "Message list after Auto Calibration measurement" (page 44). 7 Press V/v repeatedly to select the item you want, then press . • Retry: Performs the Auto Calibration again. • Save: Save the measurement results and exits the setting process. • Warning: Displays warning related to the measurement results. See "Message list after Auto Calibration measurement" (page 44). • Exit: Exits the setting process without saving the measurement results. 8 Save the measurement result. Select "Save" in step 7. Notes • The A.P.M. (Automatic Phase Matching) function is activated after you save the measurement result. • The A.P.M. function does not work in the following cases. - The calibration type is set to "Off" when using the "Cal. Type" Auto Calibration (page 42). - When Dolby TrueHD or DTS-HD signals with a sampling frequency of more than 48 kHz are being received. 9 Press B/b repeatedly to select "Cal. Type", then press . • Full Flat: Makes the measurement of frequency from each speaker flat. • Engineer: Sets to "the Sony listening room standard" frequency characteristics. • Front Reference: Adjusts the characteristics of all the speakers to match the characteristics of the front speaker. • Off: Sets the Auto Calibration equalizer level and the A.P.M. function to off. Tip You can select the calibration type after you have performed the Auto Calibration and saved the settings. 42US
-
 1
1 -
2
-
3
-
4
-
5
-
6
-
7
-
8
-
9
-
10
-
11
-
12
-
13
-
14
-
15
-
16
-
17
-
18
-
19
-
20
-
21
-
22
-
23
-
24
-
25
-
26
-
27
-
28
-
29
-
30
-
31
-
32
-
33
-
34
-
35
-
36
-
 37
37 -
 38
38 -
 39
39 -
 40
40 -
 41
41 -
 42
42 -
 43
43 -
 44
44 -
 45
45 -
 46
46 -
 47
47 -
48
-
49
-
50
-
51
-
52
-
53
-
54
-
55
-
56
-
57
-
58
-
59
-
60
-
61
-
62
-
63
-
64
-
65
-
66
-
67
-
68
-
69
-
70
-
71
-
72
-
73
-
74
-
75
-
76
-
77
-
78
-
79
-
80
-
81
-
82
-
83
-
84
-
85
-
86
-
87
-
88
-
89
-
90
-
91
-
92
-
93
-
94
-
95
-
96
-
97
-
98
-
99
-
100
-
101
-
102
-
103
-
104
-
105
-
106
-
107
-
108
-
109
-
110
-
111
-
112
-
113
-
114
-
115
-
116
-
117
-
118
-
119
-
120
-
121
-
122
-
123
-
124
-
125
-
126
-
127
-
128
-
129
-
130
-
131
-
132
 |
 |
