Sony STR-DN1030 Operating Instructions (Large File - 11.51 MB) - Page 43
To cancel Auto Calibration, When Error Code appears, Checking the Auto Calibration, results - remote code
 |
View all Sony STR-DN1030 manuals
Add to My Manuals
Save this manual to your list of manuals |
Page 43 highlights
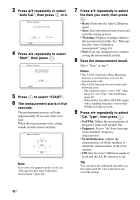
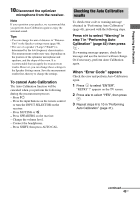
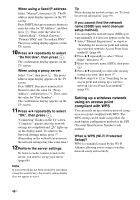
Preparing the Receiver 10Disconnect the optimizer microphone from the receiver. Note If you reposition your speaker, we recommend that you perform Auto Calibration again to enjoy the surround sound. Tips • You can change the unit of distance in "Distance Unit" in the Speaker settings menu (page 96). • The size of a speaker ("Large"/"Small") is determined by the low frequency characteristics. The measurement results may vary, depending on the position of the optimizer microphone and speakers, and the shape of the room. It is recommended that you apply the measurement results. However, you can change those settings in the Speaker Settings menu. Save the measurement results first, then try to change the settings. To cancel Auto Calibration The Auto Calibration function will be canceled when you perform the following during the measurement process: - Press ?/1. - Press the input buttons on the remote control or turn the INPUT SELECTOR on the receiver. - Press MUTING or . - Press SPEAKERS on the receiver. - Change the volume level. - Connect the headphones. - Press SHIFT, then press AUTO CAL. Checking the Auto Calibration results To check error code or warning message obtained in "Performing Auto Calibration" (page 41), proceed with the following steps. Press V/v to select "Warning" in step 7 in "Performing Auto Calibration" (page 42) then press . If a warning message appears, check the message and use the receiver without change. Or if necessary, perform Auto Calibration again. When "Error Code" appears Check the error and perform Auto Calibration again. 1 Press to select "ENTER". "RETRY ?" appears on the TV screen. 2 Press B/b to select "YES", then press . 3 Repeat steps 6 to 10 in "Performing Auto Calibration" (page 41). continued 43US
-
 1
1 -
2
-
3
-
4
-
5
-
6
-
7
-
8
-
9
-
10
-
11
-
12
-
13
-
14
-
15
-
16
-
17
-
18
-
19
-
20
-
21
-
22
-
23
-
24
-
25
-
26
-
27
-
28
-
29
-
30
-
31
-
32
-
33
-
34
-
35
-
36
-
37
-
 38
38 -
 39
39 -
 40
40 -
 41
41 -
 42
42 -
 43
43 -
 44
44 -
 45
45 -
 46
46 -
 47
47 -
 48
48 -
49
-
50
-
51
-
52
-
53
-
54
-
55
-
56
-
57
-
58
-
59
-
60
-
61
-
62
-
63
-
64
-
65
-
66
-
67
-
68
-
69
-
70
-
71
-
72
-
73
-
74
-
75
-
76
-
77
-
78
-
79
-
80
-
81
-
82
-
83
-
84
-
85
-
86
-
87
-
88
-
89
-
90
-
91
-
92
-
93
-
94
-
95
-
96
-
97
-
98
-
99
-
100
-
101
-
102
-
103
-
104
-
105
-
106
-
107
-
108
-
109
-
110
-
111
-
112
-
113
-
114
-
115
-
116
-
117
-
118
-
119
-
120
-
121
-
122
-
123
-
124
-
125
-
126
-
127
-
128
-
129
-
130
-
131
-
132
 |
 |
