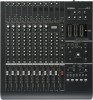
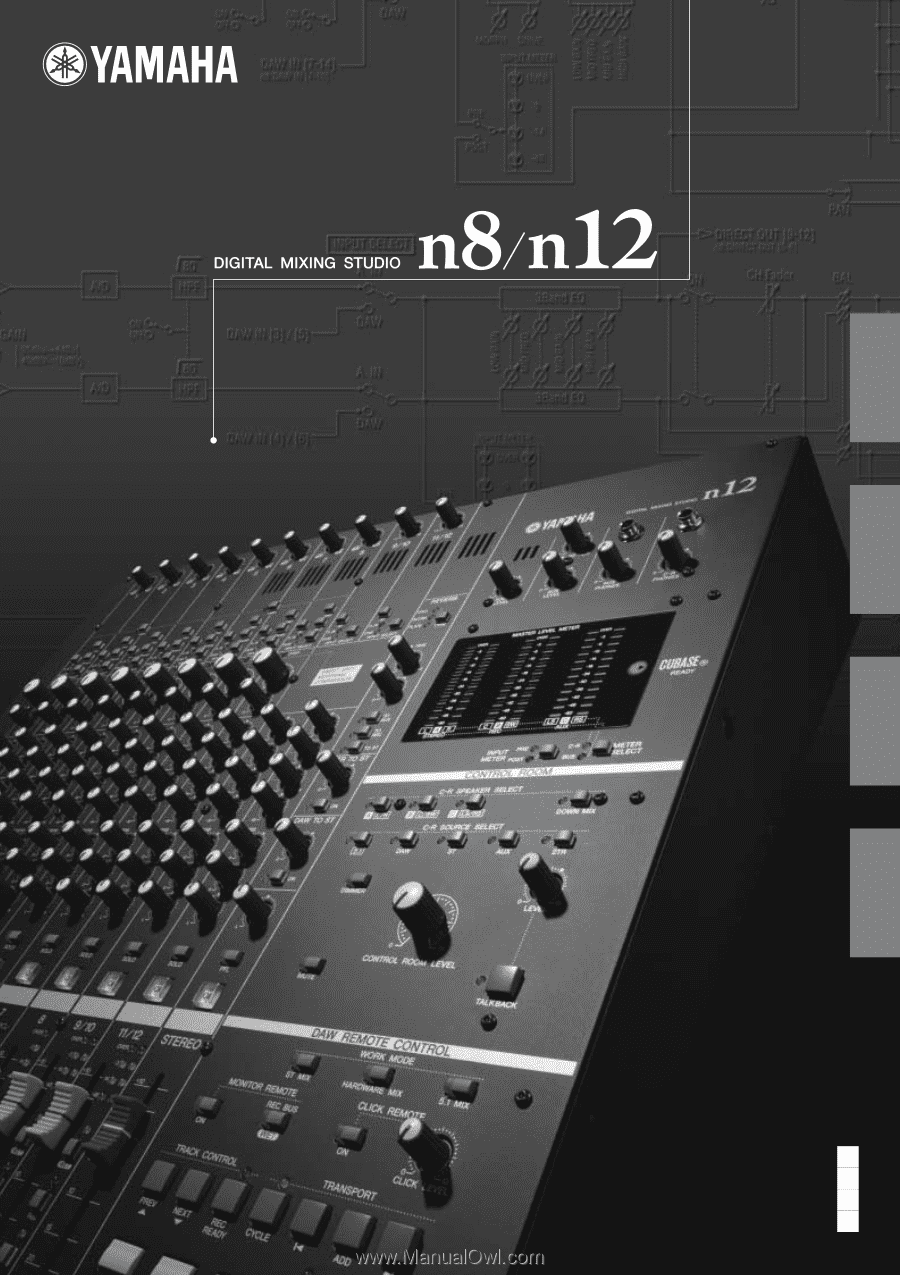
Yamaha N12 Owners Manual
Yamaha N12 - n12 Digital Mixing Studio Manual
 |
UPC - 086792859866
View all Yamaha N12 manuals
Add to My Manuals
Save this manual to your list of manuals |
Yamaha N12 manual content summary:
- Yamaha N12 | Owners Manual - Page 1
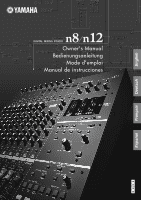
English Deutsch Français Owner's Manual Bedienungsanleitung Mode d'emploi Manual de instrucciones EN DE FR ES Español - Yamaha N12 | Owners Manual - Page 2
service personnel. Servicing is required when the apparatus has been damaged in any way, such as power-supply cord or plug is damaged, liquid has been spilled or objects have fallen into the apparatus, the apparatus has been exposed to rain or moisture, does not operate normally, or has been dropped - Yamaha N12 | Owners Manual - Page 3
generates/uses radio frequencies and, if not installed and used according to the instructions found in the users manual, may Yamaha Corporation of America Address : 6600 Orangethorpe Ave., Buena Park, Calif. 90620 Telephone : 714-522-9011 Type of Equipment : Digital Mixing Studio Model Name : n8/n12 - Yamaha N12 | Owners Manual - Page 4
use of the device, or if any unusual smells or smoke should appear to be caused by it, immediately turn off the power switch, disconnect the electric plug from the outlet, and have the device inspected by qualified Yamaha service personnel. • If this device or the AC power adaptor should be dropped - Yamaha N12 | Owners Manual - Page 5
or dropping foreign objects (paper, plastic, metal, etc.) into any gaps or openings on the device (vents, ports, etc.) If this happens, turn off the power immediately and unplug the power cord from the AC outlet. Then have the device inspected by qualified Yamaha service personnel. • Do not use the - Yamaha N12 | Owners Manual - Page 6
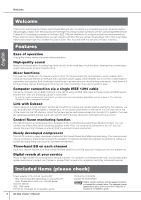
Welcome Thank you for purchasing the Yamaha n8/n12 Digital Mixing Studio. The n8/n12 is a comprehensive music production system that packages a digital mixer featuring easy yet full-fledged recording/mixdown operations with the cutting-edge DAW software Cubase AI 4. Connecting a computer to the - Yamaha N12 | Owners Manual - Page 7
EQ 29 Panning and balancing 30 Mixing into stereo 30 Applying reverb 31 Soloing a channel 32 Using the n8/n12 with Cubase 4/ Cubase Studio 4/Cubase AI 4 ........ 33 What you can do using the n8/n12 with Cubase ... 33 Computer setup for the Link function 34 Using the Link Function 37 Remotely - Yamaha N12 | Owners Manual - Page 8
that the mixer's power switch is in the STANDBY position. Warning Use only the included power adaptor (*PA-30 for the n12, PA20 for the n8 or an equivalent recommended by Yamaha). Use of a different adaptor may result in equipment damage, overheating, or fire. In such cases, the product warranty - Yamaha N12 | Owners Manual - Page 9
use too many digits to express the level. This is very inconvenient. So, we use mixer or a power amplifier, features line inputs and outputs with a nominal level of +4 dBu. Keyboards and other line instruments have line inputs and outputs with a nominal level of -10 cases, shielded cables are used - Yamaha N12 | Owners Manual - Page 10
white red This type of unbalanced pin jack has been widely used on home audio/video equipment for many years. The plugs are color coded according to the signals they carry. A white plug is used for the left audio channel, and a red plug is used for the right audio channel. 10 Owner's Manual - Yamaha N12 | Owners Manual - Page 11
fied mixer block diagram input channel master bus section Recording Basics 4 Channel fader A channel fader enables you to adjust the level of the corresponding input channel signal that is going to be routed to the buses (excluding a pre-fader signal). This control is most often used during mixing - Yamaha N12 | Owners Manual - Page 12
be sent to the AUX buses. On the n8/n12, a pre-fader signal is sent to the AUX bus. Thus the bus signal is not affected by the channel fader. channel fader PRE ON stereo fader OUT AUX send level OUT • Using AUX buses to create a monitor mix for players For players, it is easier to listen - Yamaha N12 | Owners Manual - Page 13
and +10 dB. power on and off for four channels simultaneously. (Channels 1-4 and channels 5-8 on the n12, and channels 1-4 on the n8). NOTE When the switch is turned on, phantom power DC +48V will be supplied to Pin 2 and Pin 3 of the corresponding XLR-type INPUT A jacks. % n12 Owner's Manual - Yamaha N12 | Owners Manual - Page 14
If you use a balanced cable, the mixer will not work correctly. 7 [INPUT SELECT] switch This switch determines whether the input jack signal (A.IN) or the DAW signal (the output from Cubase or another DAW) will be routed to the input channels. 8 Compressor controls These compressor controls enable - Yamaha N12 | Owners Manual - Page 15
on (the LED lights up) while Cubase and the mixer are linked and operating together, you can using multiple microphones, the position and the distance between the instrument and microphones may cause the phase of each recorded signal to be offset against each other (out of phase). If you try to mix - Yamaha N12 | Owners Manual - Page 16
If you want to monitor pre-fader input channel signals when you are using the Solo function, turn this switch on ( ). NOTE Only While this switch is turned on, if you also turn the [SOLO] switch on, the monitor signal volume may become very loud. In this case, use the [SOLO LEVEL] control (page - Yamaha N12 | Owners Manual - Page 17
4/Cubase Studio 4/Cubase AI 4; that is, when the computer is connected to the n8/ n12 and Cubase is linked to the mixer correctly. ) MASTER LEVEL METER ■ n12 This meter indicates the level of the STEREO/REC/AUX bus signals, or the output level at the C-R OUT jack. To switch the meter view, use the - Yamaha N12 | Owners Manual - Page 18
's Manual NOTE • Only In order to monitor in a surround environment, you will need Cubase 4. The included Cubase AI 4 does not support surround. • You can turn on the [5.1] switch and [ST] switch simultaneously. In this case, the 5.1-ch L/R signal and STEREO bus L/R channel signals will be mixed - Yamaha N12 | Owners Manual - Page 19
I/O settings and bus assignments. ST MIX Enables you to monitor on the n8/n12 the stereo signal mixed in the Cubase mixer and output from the DAW. HARDWARE MIX Enables you to output Cubase audio tracks individually to the n8/n12, then mix them on the n8/n12. 5.1 MIX Only Enables you to create - Yamaha N12 | Owners Manual - Page 20
devices directly to these input channels. NOTE These are TRS phone jacks that support bidirectional operation. Connection to an INSERT I/O jack requires a special insertion cable as illustrated below. Use a separately-sold Yamaha insertion cable (YIC025/050/070). To the input jack of the external - Yamaha N12 | Owners Manual - Page 21
to external MIDI devices. 9 DAW I/O jacks These 6-pin IEEE 1394 (S400) jacks are used to connect a computer to the mixer via a IEEE 1394 cable. Both jacks feature the same functionality. You can use one of them to connect a computer, and the other connector to connect daisy-chained devices. If - Yamaha N12 | Owners Manual - Page 22
devices → n8/n12 → power amps (or powered speakers). Turn off the power to the devices in the reverse order: power amps (powered speakers) → n8/n12 → peripheral devices). n12 Setup Example (Home recording) synthesizer, rhythm machine microphones guitar, bass (Hi-Z) MIDI cable MIDI cable sound - Yamaha N12 | Owners Manual - Page 23
Setup Example (Home recording) microphones synthesizer, rhythm machine Setting Up the Mixer guitar, bass (Hi-Z) MIDI cable MIDI cable sound source (CD, MD, DAT, etc.) guitar, bass effects unit (DI) English IEEE 1394 cable external recorder low range during the mix. ■ Distance and Manual 23 - Yamaha N12 | Owners Manual - Page 24
LEVEL] control, and other output level controls to the minimum levels. 24 Owner's Manual 2. Set all faders on the mixer to minimum. 3. Turn on the power to all the devices in the following order: connected instruments and microphones → n12/n8 → monitor speakers. Make sure that you turn on the - Yamaha N12 | Owners Manual - Page 25
fader signal meters. A Hands-On Guide to the n8/n12 order to record the sound use the [C-R PHONES] control. To avoid damages to your hearing ability and/or speakers during monitoring, set the monitoring level rather low, then re-adjust the level later to suit your taste during mixing. Owner's Manual - Yamaha N12 | Owners Manual - Page 26
Hands-On Guide to the n8/n12 3. Players want to hear what is going on. Use the [ mix that is separate from the main mix and that can be used by players in a recording booth or on the stage, and 2) to process the signal via an external effect unit, such as reverb and delay. On the n8/n12, a pre-fader - Yamaha N12 | Owners Manual - Page 27
[ST] switch of the input channels to which your instruments or microphones are connected. Use a channel [ST] switch or [REC] switch to select the bus to which CHANNEL INPUT METER INPUT METER INPUT A INPUT B PRE POST PAN CHANNEL FADER A Hands-On Guide to the n8/n12 Owner's Manual 27 English - Yamaha N12 | Owners Manual - Page 28
A Hands-On Guide to the n8/n12 Making Great Mixes English LEVEL Manipulating compression The n8/n12 features a high-quality compressor inherited from Yamaha's cutting-edge digital mixers, acclaimed by engineers all over the world. A compressor is an effect that restrains the peak levels of an - Yamaha N12 | Owners Manual - Page 29
between instruments' frequency ranges in a mix. Remember: less is more. Modest use of equalization will lead to a great, natural sounding mix. LOW boost (amplify) MID boost (amplify) MID flat HIGH boost (amplify) LOW flat HIGH flat A Hands-On Guide to the n8/n12 ■ Adjusting the mid-band center - Yamaha N12 | Owners Manual - Page 30
/n12 as a live SR mixer, if you pan the signals or set the stereo balance hard left or hard right, the mix may not sound wellbalanced to an audience sitting close to the left or right speakers. Use pan and balance with caution because mixes will sound different in live SR environments and recording - Yamaha N12 | Owners Manual - Page 31
used for reverb and other ambient effects. 1. Press the REVERB [TYPE] switch in the Master Control section repeatedly to select the desired reverb type. Select a type. A Hands-On Guide to the n8/n12 The internal digital the stereo mix without reverb. For example, even if you are recording a vocal - Yamaha N12 | Owners Manual - Page 32
function. This function is useful when you want to listen to the performance or check the sound of only certain input channel signals selected from the stereo mix. The n8/n12 features a dedicated solo bus (L/R), through which you can monitor pre-fader or post-fader input channels. ■ Soloing a post - Yamaha N12 | Owners Manual - Page 33
Using the n8/n12 with Cubase 4/Cubase Studio 4/Cubase AI 4 Using the n8/n12 with Cubase 4/Cubase Studio 4/Cubase AI 4 The n8/n12 features a special function that enables you to link the n8/n12 with Cubase. Using this function, you can seamlessly synchronize mixer operation with Cubase, and record - Yamaha N12 | Owners Manual - Page 34
English Using the n8/n12 with Cubase 4/Cubase Studio 4/Cubase AI 4 Computer setup for the Link function Follow the steps below to set up your computer so that you can use the Link function. NOTE Before using the Cubase Link function, you must install special drivers and software, and then make - Yamaha N12 | Owners Manual - Page 35
Using the n8/n12 with Cubase 4/Cubase Studio 4/Cubase AI 4 6. In the left column "Devices", select MIDI, then MIDI Port Setup. Then, exclude the MIDI port for remote control from the MIDI data inputs. It is important to exclude the MIDI port for remote control from the MIDI inputs. With the - Yamaha N12 | Owners Manual - Page 36
Using the n8/n12 with Cubase 4/Cubase Studio 4/Cubase AI 4 ■ Yamaha n12 stereo recording ■ Yamaha n8 stereo recording The REC bus signals on the n8/n12 will be routed to the Cubase audio tracks. NOTE • If an n8/n12 project template is not displayed, the n8/n12 Extension software may not be - Yamaha N12 | Owners Manual - Page 37
select ST MIX for recording, then change to HARDWARE MIX for mixdown. To select a Work mode, use the WORK MODE switches in the DAW Remote Control section. You can press a desired WORK MODE switch to change the Work mode in Cubase while Cubase is linked to the mixer. ST MIX mode 5.1 MIX mode Only - Yamaha N12 | Owners Manual - Page 38
English STEREO BUS Using the n8/n12 with Cubase 4/Cubase Studio 4/Cubase AI 4 ■ HARDWARE MIX In this Work mode, the output signal from each Cubase audio track is individually input to each n8/n12 input channel, then mixed and processed via the compressor or equalizer. When this mode is selected, - Yamaha N12 | Owners Manual - Page 39
following two ways: Mixing signals on the n8/n12, then recording The n8/n12 has a dedicated bus (REC bus) that can be used to record the mixer signals to a DAW, such as Cubase. Using this bus enables you to mix any input channel signals on the n8/n12, then record them in Cubase. This example here - Yamaha N12 | Owners Manual - Page 40
English Using the n8/n12 with Cubase 4/Cubase Studio 4/Cubase AI 4 5. Make sure that the Record Enable button is on (red) for the recording destination audio track in Cubase. If it is off, press the [REC READY] switch in the DAW Remote Control section to turn on the Record Enable button. The REC - Yamaha N12 | Owners Manual - Page 41
will be sent to the audio track. When using this method of recording (n8/n12 input channel signals directly to Cubase), the channel fader and other channel controls will be disabled. NOTE If you select the "Yamaha n12 (n8) multi channel recording" project template, the direct output from the input - Yamaha N12 | Owners Manual - Page 42
the VST effect (the "wet" sound). 8. Turn the DAW TO ST [ON] switch on ( ). While the Record Enable button and monitoring button are turned on, the monitoring signal will be returned to the n8/n12 via the Cubase mixer. When you turn the DAW TO ST [ON] switch on, the monitoring signal returned from - Yamaha N12 | Owners Manual - Page 43
the n8/n12 with Cubase 4/Cubase Studio 4/Cubase AI 4 Mixing recorded tracks You can easily monitor tracks recorded in Cubase by mixing them on Cubase and setting the n8/n12's C-R SOURCE SELECT switch to DAW. If you wish to use the n8/n12's compressor and reverb, you can mix tracks using the n8/n12 - Yamaha N12 | Owners Manual - Page 44
to the same input channel In this case, multiple audio tracks will be mixed in the Cubase mixer, then routed to the n8/n12 input channel. This method is useful when you want to first create a mix from multiple tracks, such as drums recorded on multiple tracks. Cubase AUDIO TRACK AUDIO TRACK n8 - Yamaha N12 | Owners Manual - Page 45
STEREO BUS English Using the n8/n12 with Cubase 4/Cubase Studio 4/Cubase AI 4 Mixing down Finally, mixdown time! Now you can record the completed mix onto stereo tracks. This section explains how to do so. Cubase AUDIO TRACK AUDIO TRACK AUDIO TRACK AUDIO TRACK n8/n12 INPUT CHANNEL INPUT CHANNEL - Yamaha N12 | Owners Manual - Page 46
mix in Cubase 4 5.1-channel surround sound. This section describes how to use the Surround Monitor function. NOTE Cubase 4 is required in order to use the surround monitor functionality. The included Cubase AI 4 does not support surround monitoring, and cannot use 46 Owner's Manual L/R channel - Yamaha N12 | Owners Manual - Page 47
section (the switch LED lights up). The n12 switches Work mode to 5.1-ch surround. Cubase 4 selects "n12-5.1" as the destination of its audio tracks. NOTE For more information on surround mixing using Cubase 4, please refer to the Cubase 4 Owner's Manual. 2. Turn on the [5.1] switch in the - Yamaha N12 | Owners Manual - Page 48
Spot Data You can replace the n8/n12's compressor settings (Sweet Spot Data) by using a dedicated software application called Sweet Spot while the n8/n12 is operating. For example, you can apply compression using the preset data while recording, and use other data while mixing. Download the Sweet - Yamaha N12 | Owners Manual - Page 49
when using Cubase, the signals input to the n8/n12 can be recorded on the audio tracks of your DAW, and the audio track playback signals can be mixed on the n8/n12. SONAR 5 displays the n8/n12 audio I/O ports as follows. ● SONAR 5 (with ASIO driver) DAW → n8/n12 n12 ASIO mLAN mLAN01- ASIO mLAN - Yamaha N12 | Owners Manual - Page 50
Click the Audio tab in the dialog, then select "mLAN Audio Out" as the default device in the Sound manual or on-line help for the software application. 6. Turn on the C-R SOURCE SELECT [5.1] switch on the n12 to adjust the monitoring level for the control room. NOTE If you are using Windows - Yamaha N12 | Owners Manual - Page 51
for Steinberg DAW software has been installed properly. • Make sure that the n8/n12 is connected to the computer via an IEEE 1394 cable. • You must use Cubase 4, Cubase Studio 4, or Cubase AI 4. Cubase SX3 and Cubase versions older than version 4 do not support the Link function. Owner's Manual 51 - Yamaha N12 | Owners Manual - Page 52
\Cubase Studio 4\templates C:\Program Files\Steinberg\Cubase AI 4\templates ■ Audio and MIDI signals fail to transfer between computer and mixer. • The driver may not have been installed or set up correctly. • Make sure that the IEEE 1394 cable is connected properly, and that the power to the n8/n12 - Yamaha N12 | Owners Manual - Page 53
17, 27 Power 8 PRE 17, 24 Preamp 14, 24 R REC 15, 19 Recording 39 Reverb 14, 16 REVERB (LEVEL 16 REVERB (TIME 16 REVERB (TYPE 16 S Sample Rate 34 Solo 15, 32 SOLO LEVEL 17, 32 ST 15, 18 ST MIX 19 ST OUT 16, 21 STANDBY 8, 21 STEREO BAL 16 STEREO fader 16 STEREO - Yamaha N12 | Owners Manual - Page 54
fader: Minimum -95 dB (99 dB SN), STEREO OUT STEREO fader: Nominal level, All channel faders: Minimum -60 dB (64 dB SN), STEREO OUT STEREO fader: Nominal level, One channel fader: Nominal level n12 Hi-Z = ON) 10 kΩ 10 kΩ 10 kΩ 10 kΩ Analog Output ST OUT C-R OUT AUX OUT (Only n12) INSERT OUT C-R - Yamaha N12 | Owners Manual - Page 55
Appendix English Deutsch Français General Specifications Faders n12 n8 Power Requirements n12 n8 Dimensions (H × D × W) n12 n8 Net Weight n12 n8 Operating Free-air Temperature Range Included Accessories 100 mm × 11 (Non-motorized) 60 mm × 7 (Non-motorized) 51 W (PA-30) 33 W (PA-20 - Yamaha N12 | Owners Manual - Page 56
ST OUT STEREO Fader n12 -∞ to +10 dB Outputs CH1-12 MIDI I/F 2-port input/2-port output (DAW remote control, Input/Output via MIDI IN/OUT jacks) MIDI IN/OUT 1 port input/1port output Output Level Meter MASTER LEVEL METER n12 MIX/HARDWARE MIX/5.1 MIX (5.1 MIX is only for n12.) Recording - Yamaha N12 | Owners Manual - Page 57
/n12 and DAW Cubase 4/Cubase Studio 4/Cubase AI 4 "Extensions for Steinberg DAW" needs to be installed for the input/output bus assignment to the device ports in Cubase. Cubase Output Output Bus Device Port n12-L/R n12-5.1 n12 Monitor L n12 Monitor R n12-9/10 n12 Monitor 9/C n12 Monitor 10 - Yamaha N12 | Owners Manual - Page 58
5/Windows Media Player) ASIO Driver Output Device Port ASIO mLAN mLAN01 ASIO mLAN mLAN02 ASIO mLAN mLAN03 ASIO mLAN mLAN04 ASIO mLAN mLAN05 ASIO mLAN mLAN06 ASIO mLAN mLAN07 ASIO mLAN mLAN08 ASIO mLAN mLAN09 ASIO mLAN mLAN10 ASIO mLAN mLAN11 ASIO mLAN mLAN12 ASIO mLAN mLAN13 ASIO mLAN mLAN14 ASIO - Yamaha N12 | Owners Manual - Page 59
Dimensional Diagrams [n12] 515.0 Appendix 145.8 English 560.8 Deutsch Français Español [n8] 368 145.31 517.14 Owner's Manual 209 - Yamaha N12 | Owners Manual - Page 60
DAW IN [7-10] COMP (Gain Reduction) COMP 3Band EQ MORPH DRIVE INPUT METER n12 PRE POST OVER -3 -14 -48 n8 Fixed to pre-fader LOW GAIN MID TIME DIGITAL EFFECT (REVERB) LEVEL TO REC TO STEREO TO AUX DAW L DAW R LEVEL DAW TO STEREO DAW AUX L DAW AUX R DAW TO AUX LEVEL DOWN MIX ATT - Yamaha N12 | Owners Manual - Page 61
Implementation Chart YAMAHA [ DIGITAL MIXING STUDIO ] Model n8/12 MIDI Implementation Chart Function... Transmitted Basic x x : Active Sense x x : Reset x x Notes: *1 Used only for the communication with DAW. The MIDI Port is used as an extended port for DAW. Mode 1 : OMNI ON, POLY - Yamaha N12 | Owners Manual - Page 62
, Japan 430-8650 Tel: +81-53-460-2312 SY40 Yamaha Web Site (English only) http://www.yamahasynth.com/ Yamaha Manual Library http://www.yamaha.co.jp/manual/ HEAD OFFICE Yamaha Corporation, Pro Audio & Digital Musical Instrument Division Nakazawa-cho 10-1, Hamamatsu, Japan 430-8650 Tel: +81-53-460
-
 1
1 -
 2
2 -
 3
3 -
 4
4 -
 5
5 -
 6
6 -
 7
7 -
8
-
9
-
10
-
11
-
12
-
13
-
14
-
15
-
16
-
17
-
18
-
19
-
20
-
21
-
22
-
23
-
24
-
25
-
26
-
27
-
28
-
29
-
30
-
31
-
32
-
33
-
34
-
35
-
36
-
37
-
38
-
39
-
40
-
41
-
42
-
43
-
44
-
45
-
46
-
47
-
48
-
49
-
50
-
51
-
52
-
53
-
54
-
55
-
56
-
57
-
58
-
59
-
60
-
61
-
62
 |
 |
ES
FR
DE
EN
Owner's Manual
Bedienungsanleitung
Mode d'emploi
Manual de instrucciones
English
Deutsch
Français
Español