Yamaha PSR-S650 Reference Manual - Page 38
Recording part, Rhythm Part recording
 |
View all Yamaha PSR-S650 manuals
Add to My Manuals
Save this manual to your list of manuals |
Page 38 highlights
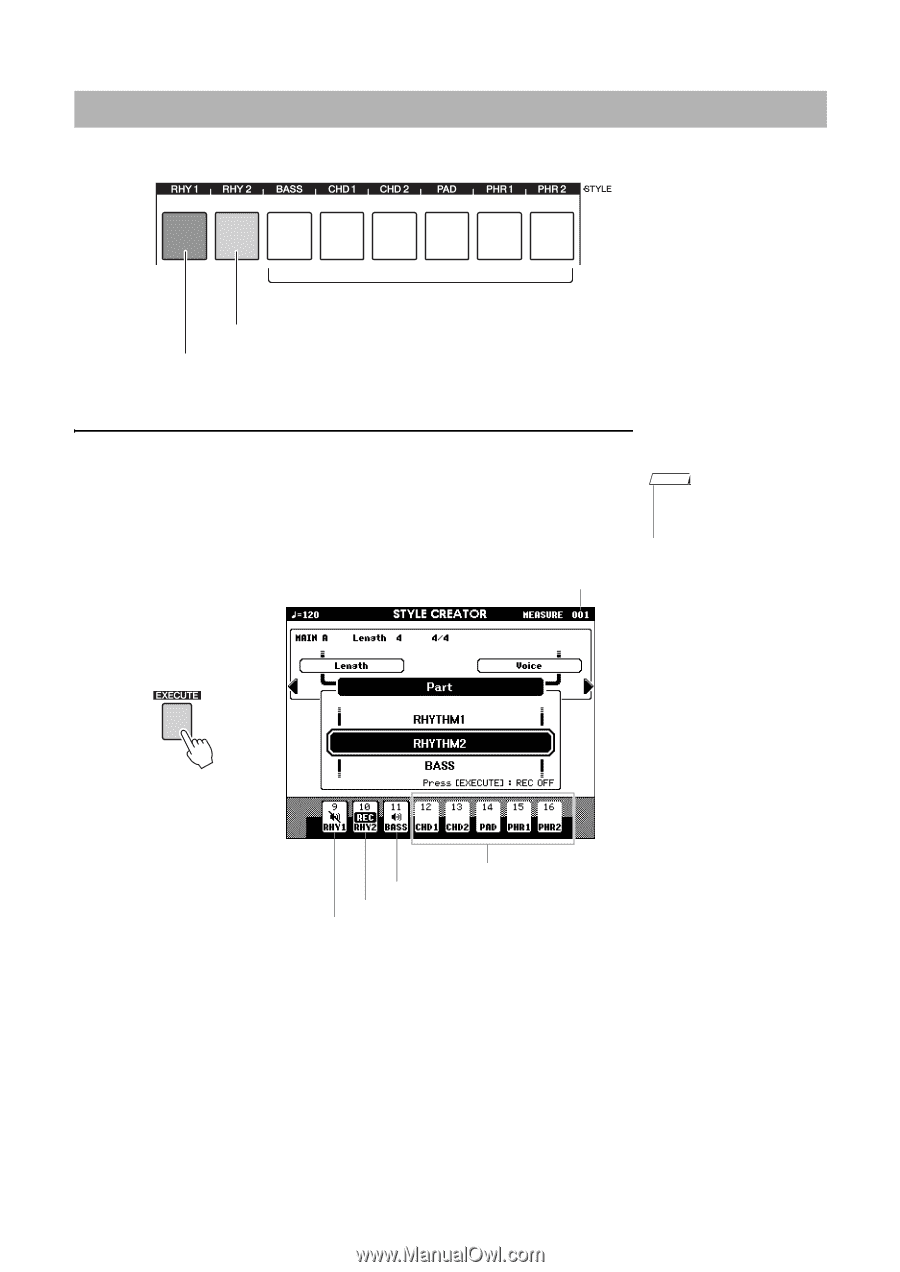
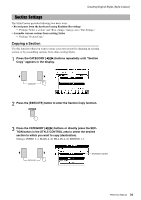
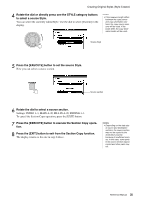
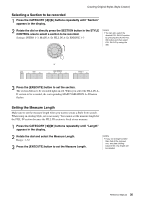
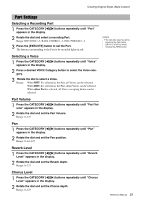
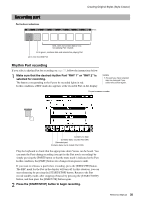
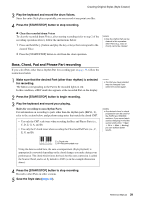
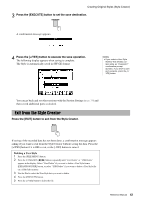
Recording part Part buttons indications Creating Original Styles (Style Creator) Unlit, does not contain data or is a non-playing Part (muted) Lit in green, contains data and selected as playing Part Lit in red, recorded Part Rhythm Part recording If you select a rhythm Part for recording on page 37, follow the instructions below. 1 Make sure that the desired rhythm Part "RHY 1" or "RHY 2" is selected for recording. The button corresponding to the Part to be recorded lights in red. In this condition, a REC mark also appears at the recorded Part on the display. NOTE • The part you have selected may be changed if you select the section again. Current measure number Contains no data Contains data, sounds (Part ON) Recorded part Contains data, but is muted (Part OFF) Play the keyboard to check that the appropriate drum Voices can be heard. You can mute the Parts during recording (except for the Part you're recording) by simply pressing the [PART] button so that the mute mark is indicated at the Part. In this condition, the [PART] button also changes from green to unlit. If you want to rehearse a part before recording, press the [EXECUTE] button. The REC mark for the Part in the display will turn off. In this situation, you can start rehearsing by pressing the [START/STOP] button. Return to the Part record standby mode, after stopping rehearsal by pressing the [START/ STOP] button, and then press the [EXECUTE] button again. 2 Press the [START/STOP] button to begin recording. Reference Manual 38
-
 1
1 -
2
-
3
-
4
-
5
-
6
-
7
-
8
-
9
-
10
-
11
-
12
-
13
-
14
-
15
-
16
-
17
-
18
-
19
-
20
-
21
-
22
-
23
-
24
-
25
-
26
-
27
-
28
-
29
-
30
-
31
-
32
-
 33
33 -
 34
34 -
 35
35 -
 36
36 -
 37
37 -
 38
38 -
 39
39 -
 40
40 -
 41
41 -
 42
42 -
 43
43 -
44
-
45
-
46
-
47
-
48
-
49
-
50
-
51
-
52
-
53
 |
 |