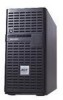
Acer G540-E5405 Altos G540 User's Guide EN - Page 60
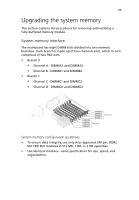
Upgrading the processor - server specifications
 |
UPC - 750519186893
View all Acer G540-E5405 manuals
Add to My Manuals
Save this manual to your list of manuals |
Page 60 highlights
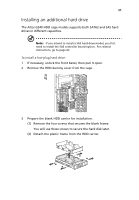
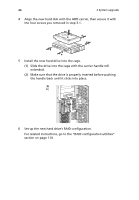
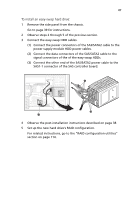
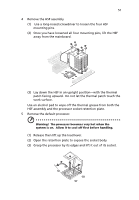
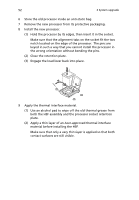
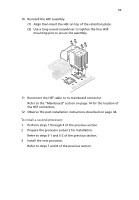
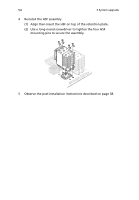
50 3 System upgrade Upgrading the processor This section explains the procedures for removing and installing the processor and heat sink fan (HSF) assembly. Processor configuration guidelines The mainboard has two LGA771 processor sockets supporting Dual-Core Intel Xeon processors. You have the option to upgrade the default processor or install a second one for a dual-processor configuration. Observe the following guidelines when replacing or installing a processor. • The CPU 1 socket must always be populated. If no processor is installed in this socket, the system will fail to boot. • Before removing a processor, make sure to back up all important system files. • When installing a second processor, make sure it has same stepping and frequency specifications as the default processor. • Handle the processor and the HSF assembly carefully. Damage to either may prevent the system from functioning properly. Note: A long-nosed screwdriver is needed to remove/install the HSF assembly. To upgrade the default processor: 1 Perform the pre-installation instructions described on page 37. 2 Lay the server on its side (components showing). 3 Disconnect the processor 1 HSF cable from its mainboard connector.
-
 1
1 -
2
-
3
-
4
-
5
-
6
-
7
-
8
-
9
-
10
-
11
-
12
-
13
-
14
-
15
-
16
-
17
-
18
-
19
-
20
-
21
-
22
-
23
-
24
-
25
-
26
-
27
-
28
-
29
-
30
-
31
-
32
-
33
-
34
-
35
-
36
-
37
-
38
-
39
-
40
-
41
-
42
-
43
-
44
-
45
-
46
-
47
-
48
-
49
-
50
-
51
-
52
-
53
-
54
-
 55
55 -
 56
56 -
 57
57 -
 58
58 -
 59
59 -
 60
60 -
 61
61 -
 62
62 -
 63
63 -
 64
64 -
 65
65 -
66
-
67
-
68
-
69
-
70
-
71
-
72
-
73
-
74
-
75
-
76
-
77
-
78
-
79
-
80
-
81
-
82
-
83
-
84
-
85
-
86
-
87
-
88
-
89
-
90
-
91
-
92
-
93
-
94
-
95
-
96
-
97
-
98
-
99
-
100
-
101
-
102
-
103
-
104
-
105
-
106
-
107
-
108
-
109
-
110
-
111
-
112
-
113
-
114
-
115
-
116
-
117
-
118
-
119
-
120
-
121
-
122
-
123
-
124
-
125
-
126
-
127
-
128
-
129
-
130
-
131
-
132
-
133
-
134
-
135
-
136
-
137
-
138
-
139
-
140
-
141
-
142
-
143
-
144
-
145
-
146
 |
 |
