Belkin F1DP216G User Manual
Belkin F1DP216G Manual
 |
View all Belkin F1DP216G manuals
Add to My Manuals
Save this manual to your list of manuals |
Belkin F1DP216G manual content summary:
- Belkin F1DP216G | User Manual - Page 1
OmniViewIP* 5216K/5232K User Manual PM00020 - F1DP2XXG *OmniView is a registered trademark of Belkin International, Inc. - Belkin F1DP216G | User Manual - Page 2
Guidelines 7 Avoiding general rack-mounting problems 7 Rack-mounting the SMB 216 IP KVM Switch 8 Connecting the System 9 The Configuring the System 17 Network > Configuration 17 LAN 18 OmniView IP Central Access Appliance 5000HQ 18 Administration > User Settings - Belkin F1DP216G | User Manual - Page 3
toolbar 29 Switching to a different server 29 Changing the performance settings 29 Adjusting the video settings 30 Refresh 30 Manual video adjust 31 Auto video adjust 32 Keyboard key sequences 32 Synchronizing mouse pointers 34 Aligning the mice pointers 34 - Belkin F1DP216G | User Manual - Page 4
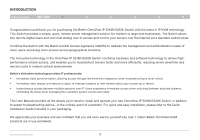
troubleshooting advice-in the unlikely event of a problem. For quick and easy installation, please refer to the Quick Installation Guide included in your packaging. We appreciate your business and are confident that you will soon see for yourself why over 1 million Belkin OmniView KVM products - Belkin F1DP216G | User Manual - Page 5
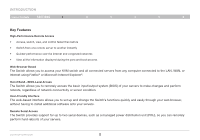
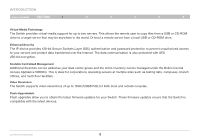
and boot process Web-Browser Based The Switch allows you to access your KVM switch and all connected servers from any computer connected to the LAN, install additional software onto your servers. Remote Serial Access The Switch provides support for up to two serial devices, such as a managed power - Belkin F1DP216G | User Manual - Page 6
Virtual-Media Technology The Switch provides virtual-media support for up to two servers. This allows entire inventory can be managed under the Belkin Central Access Appliance 5000HQ. This is ideal multi-floor facilities. Video Resolution The Switch supports video resolutions of up to 1600x1200@75Hz - Belkin F1DP216G | User Manual - Page 7
(major distributions only) • Firefox 3.0 and above** **Firefox support may require a firmware upgrade. Visit www.belkin.com/support for more information. Server Interface Modules Connecting the Switch to a server requires a custom Belkin OmniView SMB Server Interface Module and a standard CAT5 patch - Belkin F1DP216G | User Manual - Page 8
style) F1DP101A-AP-8PK (PS/2 style, 8-pack) F1DP101A-AU-8PK (USB style, 8-pack) CAT5 Cables Belkin highly recommends you use Belkin Category 5e, FastCAT™ 5e, or Category 6 Patch Cables for your OmniView IP 5216K/5232K Switch to help ensure the superior performance of your video. These Cables offer - Belkin F1DP216G | User Manual - Page 9
upgrades. Allow approximately 45 seconds for boot up. GFN - Belkin F1DP216G | User Manual - Page 10
• Ensure that the maximum distance between each computer and the Switch does not exceed 100 ft. for SIMs. Avoiding general rack-mounting problems Elevated operating ambient temperature The operating ambient temperature of the rack environment may be greater than the room ambient when installing into - Belkin F1DP216G | User Manual - Page 11
INSTALLATION Table of Contents sections 1 2 3 4 5 6 Rack-mounting the SMB IP KVM Switch Rack-mount the Switch using the supplied rack-mount kit. The brackets can be placed in two possible positions (see Figure 3). Place the brackets - Belkin F1DP216G | User Manual - Page 12
INSTALLATION Table of Contents sections 1 2 3 4 5 6 Connecting the System CAT5 Cables Server Interface Modules OmniView IP 5216K/5232K Switch PS/2, USB, and Sun Servers LAN/WAN Local User TCP/IP Remote User 2 Remote User 1 Figure 5 Switch's system overview OmniViewIP 5216K/5232K 9 - Belkin F1DP216G | User Manual - Page 13
INSTALLATION Table of Contents sections 1 2 3 4 5 6 The Server Interface Modules (SIMs) Each computer/server is directly connected to the Switch via the appropriate SIM using CAT5 cables in a star configuration. No external power is needed at the remote SIMs. The SIMs draw their power from - Belkin F1DP216G | User Manual - Page 14
the computer's keyboard port. 4. Connect the video connector to the computer's VGA port. 5. Power on the server. Connecting a USB SIM The USB SIM supports Windows 2000 and later, Sun, SGI, and all modern Linux distributions. The connections for USB SIM are exactly the same. Figure 9 illustrates the - Belkin F1DP216G | User Manual - Page 15
INSTALLATION Table of Contents sections 1 2 3 4 5 6 Connecting to the network Connect the network cable to the LAN port of the Switch. This must be done before powering on the Switch. Connecting the CAT5 cables 1. Connect one connector to the SIM's RJ45 port. 2. Connect the other connector - Belkin F1DP216G | User Manual - Page 16
INSTALLATION Table of Contents sections 1 2 3 4 5 6 Setting the IP Address By default, the Switch boots with an automatically assigned IP address from a DHCP (Dynamic Host Configuration Protocol) server on the network. The DHCP server provides a valid IP address, gateway address, and subnet - Belkin F1DP216G | User Manual - Page 17
INSTALLATION Table of Contents sections 1 2 3 4 5 6 Changing the network parameters Enable DHCP - When a DHCP server is active on the same network to which the Switch is connected, DHCP provides automatic IP assignment. When DHCP is disabled (Recommended) - You can assign a fixed IP address - Belkin F1DP216G | User Manual - Page 18
or higher, with Internet Explorer 6.0 or later version. 128-bit encryption support is required. Windows Vista Note! To log in to the web first Switch client installation, when Belkin's root certificate is installed. On first connection, install the Belkin certificate and ActiveX control. You must - Belkin F1DP216G | User Manual - Page 19
WEB INTERFACE Table of Contents sections 1 2 3 4 5 6 Logging in To complete the initial setup via the web configuration interface: 1. Open your web browser (Internet Explorer version 6.0 or higher). 2. Type the Switch's system IP address-http or https://IP address/ - and press "Enter". The - Belkin F1DP216G | User Manual - Page 20
WEB INTERFACE Table of Contents sections 1 2 3 4 5 6 Connecting to a target server To connect to a target, click the desired target in the Server Name column. The screen of the target appears inside the remote console window. The "Accessing a Target Server" section on page 28 explains how - Belkin F1DP216G | User Manual - Page 21
in the datacenter environment. The 5000HQ combines out-of-band, KVM-via-IP access with modern IT standards and requirements. It is the most comprehensive remote server maintenance solution available in the market today. Enable OmniView IP 5000HQ - Check this option to allow the Switch to - Belkin F1DP216G | User Manual - Page 22
WEB INTERFACE Table of Contents sections 1 2 Administration > User Settings From the menu, click "User Settings" and Figure 16 appears. Figure 16 User Settings On this page, an administrator creates and edits users. There are three levels of user access: • Administrator • User • View only 3 - Belkin F1DP216G | User Manual - Page 23
WEB INTERFACE Table of Contents sections 1 2 3 4 5 6 Adding a user To add a user: 1. Click and type a name and a password. The password must be at least six characters (letters or numbers), and must not include the user name, even if other characters are added. Note! The following " - Belkin F1DP216G | User Manual - Page 24
WEB INTERFACE Table of Contents sections 1 2 3 4 5 6 Administration > Server Name Edit Give the servers connected to the Switch unique names, so that users accessing the system can identify the servers easily. To do so: 1. From the menu, click "Server Name Edit". The Switch Configuration - Belkin F1DP216G | User Manual - Page 25
WEB INTERFACE Table of Contents sections 1 2 3 4 5 6 Administration > Server Access List By default, access is allowed to all servers for administrators. For other users, define the access rights of each user separately. To do so: 1. From the menu, click "Server Access List". The Access - Belkin F1DP216G | User Manual - Page 26
WEB INTERFACE Table of Contents sections 1 2 3 4 5 6 Security > Settings Configure the security features, such as Account Blocking, Password Policy, and Idle Timeout, as explained below. From the Security section, click "Settings". The "Security > Settings" page appears (see Figure 20). - Belkin F1DP216G | User Manual - Page 27
The Install SSL Certificate page appears (see Figure 21). Upgrade the Switch firmware to take advantage of new features. Download the firmware from the support section of Belkin's website at www.belkin.com/support. Save the firmware file on the client computer. From the menu, select "Switch Upgrade - Belkin F1DP216G | User Manual - Page 28
of Contents sections 1 2 3 4 5 6 Maintenance > SIM Upgrade Upgrade the SIM firmware to take advantage of new features. Download the firmware from the support section of the Belkin website at www. belkin.com/support. Save the firmware file on the client computer. 1. From the menu, select - Belkin F1DP216G | User Manual - Page 29
WEB INTERFACE Table of Contents sections 1 2 3 4 5 6 Set Time and Date The time and date set feature is used when recording log events. To set the time and date: From the menu, select "Time & Date" and Figure 25 appears. Back Up and Restore You can back up all configuration data to restore - Belkin F1DP216G | User Manual - Page 30
WEB INTERFACE Table of Contents sections 1 2 3 4 5 6 Saving Changes and Logging Out To save any configuration changes, click the relevant button on the current page. This could be or just . To restart the Switch, press . To exit the Configuration menu and close the session, click . - Belkin F1DP216G | User Manual - Page 31
Remote Access Table of Contents sections 1 2 3 4 5 6 Accessing a Target Server Log in to the web interface, as explained on page 16. The web interface opens at the Targets page (see Figure 14 on page 16). To connect to a target or serial device, click the desired target/device in the Server - Belkin F1DP216G | User Manual - Page 32
REmote AcCESS Table of Contents sections 1 2 3 4 5 6 The Toolbar Changing the performance settings To maximize the toolbar: Click the arrow . Click again to minimize the toolbar. When maximized, the toolbar can be dragged and dropped to anywhere on the screen, by dragging the icon . When - Belkin F1DP216G | User Manual - Page 33
target server appears. Adjusting the video settings To change the video settings: From the toolbar, click . You have the following options: • Refresh • Manual Video Adjust • Auto Video Adjust Each option is explained below. Refresh Select "Refresh" to refresh the video image. Refresh may be needed - Belkin F1DP216G | User Manual - Page 34
adapting to a noisy environment, a non-standard VGA signal, or when in full-screen DOS/CLI mode. To adjust the video manually: Click "Manual Video Adjust". The manual controls appear (see Figure 29). A red frame also appears around the screen. This represents the screen area according to the server - Belkin F1DP216G | User Manual - Page 35
REmote AcCESS Table of Contents sections 1 2 3 4 5 6 Auto video adjust To adjust the video automatically: Click "Auto Video Adjust". The process takes a few seconds. If the process runs for more than three times, there is an abnormal noise level. Check the video cable and verify that no - Belkin F1DP216G | User Manual - Page 36
REmote AcCESS Table of Contents sections 1 2 3 4 5 6 To record a key sequence: 1. From the Special Key Manager box, press "Record New". The Add Special Key dialog box appears (see Figure 31). To edit a key sequence: 1. From the Special Key Manager Dialog box, select the desired key. 2. - Belkin F1DP216G | User Manual - Page 37
REmote AcCESS Table of Contents sections 1 2 3 4 5 6 Synchronizing mouse pointers When working at the client computer, two mouse pointers appear: the client computer's is on top of the target server's. The mouse pointers should be synchronized. The following explains what to do if they are - Belkin F1DP216G | User Manual - Page 38
REmote AcCESS Table of Contents sections 1 2 Red Hat®, Fedora, and other Linux distributions 1. Go to "Mouse Preferences". 2. Then navigate to the "Motion" tab. 3 4 5 6 When accessing the target server, the mice may appear at a distance to each other. To align the mouse pointers: From - Belkin F1DP216G | User Manual - Page 39
Solaris, you must configure the mouse manually. To manually configure the mouse: 1. From the toolbar, click " / Manual Settings". The "Mouse Settings" dialog box appears (see Figure 32). 2. Select the target server's operating system and click "OK". Instructions and sliders appear. Note: You must - Belkin F1DP216G | User Manual - Page 40
trackballs, or integrated keyboards with mice used in most of the rack drawers) is connected to the local KVM port of the Switch, set the "Mouse Emulation" to "Standard Mouse" (see Figure 34). Figure Solaris, the default value is 20 in order to support older Sun versions. OmniViewIP 5216K/5232K 37 - Belkin F1DP216G | User Manual - Page 41
the noise by pressing "Auto video adjust" and/or adjusting the bars in manual video adjust. Then perform the mouse calibration. Note! If the mouse settings target server were ever changed, you must synchronize mouse pointers manually, as explained below. Adjustments in general The above adjustments, - Belkin F1DP216G | User Manual - Page 42
have the following features: Disconnect - You can disconnect the session by clicking "Disconnect". About - Click "About to verify the Client, Firmware and Switch" file versions installed on your Switch. Local Settings - Click "Local settings" and the "Client Configuration" dialog box appears (see - Belkin F1DP216G | User Manual - Page 43
the "Virtual Media" dialog box appears (see Figure 36). All connected mass storage devices appear in the "Local Drives" section. Setup Virtual media is only supported by server ports 1 and 2. You must connect a separate USB cable to VM ports 1 and 2 located on the back of the Switch and match to - Belkin F1DP216G | User Manual - Page 44
disk drives and can't be used for virtual-media mounting. • Booting from a mounted virtual-media drive is possible only if the target server supports booting from USB-attached storage. • Currently, it is not possible to boot a target server from Linux distribution mounted as virtual media. • Windows - Belkin F1DP216G | User Manual - Page 45
REmote AcCESS Table of Contents sections 1 2 3 4 5 6 Full-screen mode Work on the target server as if you are working on a local computer with full-screen mode. To work in full-screen mode: 1. Ensure that the client's computer has the same screen resolution as the target server. 2. Press - Belkin F1DP216G | User Manual - Page 46
REmote AcCESS Table of Contents sections 1 2 3 4 5 6 Changing the password To change the password, click "Password" from the menu and the following appears. Figure 36 Password Type a new password according to the password policy set (see page 19). Event log To see a log of all system - Belkin F1DP216G | User Manual - Page 47
LOCAL ACCESS Table of Contents sections 1 2 3 4 5 6 This section explains how to operate the Switch locally via the OSD. The OSD To display the OSD: 1. From the local keyboard, press the left "Scroll Lock" key twice. The OSD Main window appears (see Figure 38). The "Pwr" column indicates - Belkin F1DP216G | User Manual - Page 48
LOCAL ACCESS Table of Contents sections 1 2 3 4 5 6 Moving the Confirmation label - F1 The confirmation OSD label that appears briefly showing which computer is currently accessed can be positioned anywhere on the screen. To position the label from the Main window: 1. Navigate to a - Belkin F1DP216G | User Manual - Page 49
5000HQ MNG - Press the space bar to toggle between enabling and disabling management by the 5000HQ. When enabled, the Switch is remotely managed by OmniView IP Central Management Appliance 5000HQ. 5000HQ ADD - Here you can change the static IP address of the 5000HQ. HOT KEY - Pressing "Scroll Lock - Belkin F1DP216G | User Manual - Page 50
LOCAL ACCESS Table of Contents sections 1 2 3 4 5 6 DDC - F10 Display Data Channel (DDC) is a VESA standard for communication between a monitor and a video adapter. From the Settings window, input the DDC information of the monitor connected to the Switch into the memories of all connected - Belkin F1DP216G | User Manual - Page 51
to 30m/99 ft. Video and Mouse Synchronization Both auto and manual modes Security Connections Weight 128-bit SSL encryption, 256-bit AES encryption Ethernet - RJ45 - 10/100bps auto-sensing Serial - RJ45 x 2 Local KVM Connection - Screen HDD15, Keyboard/ Mouse - 2 USB Servers - RJ45 2.343kg./5.165 - Belkin F1DP216G | User Manual - Page 52
Additional information Table of Contents sections 1 2 3 4 5 6 Video Resolution and Refresh Rates Hz 56 60 65 66 70 72 73 75 76 85 86 640x480 x x x x x x 720x400 x x 800x600 x x x x x x 1024x768 x x x x x x x 1152x864 x 1152x900 x x 1280x720 x - Belkin F1DP216G | User Manual - Page 53
Additional information Table of Contents sections 1 2 3 4 5 6 Safety This device contains no serviceable parts. Any servicing of the device must be performed by Belkin International, Inc. User Manual Feedback Your feedback is very important to help us improve our documentation. Please email - Belkin F1DP216G | User Manual - Page 54
and, if not installed and used in accordance with the instruction manual, may cause harmful interference to radio communications. Operation of CE Declaration of Conformity We, Belkin International, Inc., declare under our sole responsibility that the products F1DP216G, F1DP232G, to which this - Belkin F1DP216G | User Manual - Page 55
information: a. The part number of the Belkin product. b. Where you purchased the product. c. When you purchased the product. d. Copy of original receipt. 2. Your Belkin Customer Service Representative will then instruct you on how to forward your receipt and Belkin product and how to proceed with - Belkin F1DP216G | User Manual - Page 56
Additional information Table of Contents sections 1 2 3 4 5 6 Belkin reserves the right to review the damaged Belkin product. All costs of shipping the Belkin product to Belkin for inspection shall be borne solely by the purchaser. If Belkin determines, in its sole discretion, that it is - Belkin F1DP216G | User Manual - Page 57
: 1800 235 546 New Zealand: 0800 235 546 Singapore: 65 64857620 Europe: www.belkin.com/support Belkin International, Inc. 501 West Walnut Street Los Angeles, CA 90220, USA 310-898-1100 310-898-1111 fax Belkin Ltd. Express Business Park, Shipton Way Rushden, NN10 6GL United Kingdom +44 (0) 1933
-
 1
1 -
 2
2 -
 3
3 -
 4
4 -
 5
5 -
 6
6 -
 7
7 -
8
-
9
-
10
-
11
-
12
-
13
-
14
-
15
-
16
-
17
-
18
-
19
-
20
-
21
-
22
-
23
-
24
-
25
-
26
-
27
-
28
-
29
-
30
-
31
-
32
-
33
-
34
-
35
-
36
-
37
-
38
-
39
-
40
-
41
-
42
-
43
-
44
-
45
-
46
-
47
-
48
-
49
-
50
-
51
-
52
-
53
-
54
-
55
-
56
-
57
 |
 |
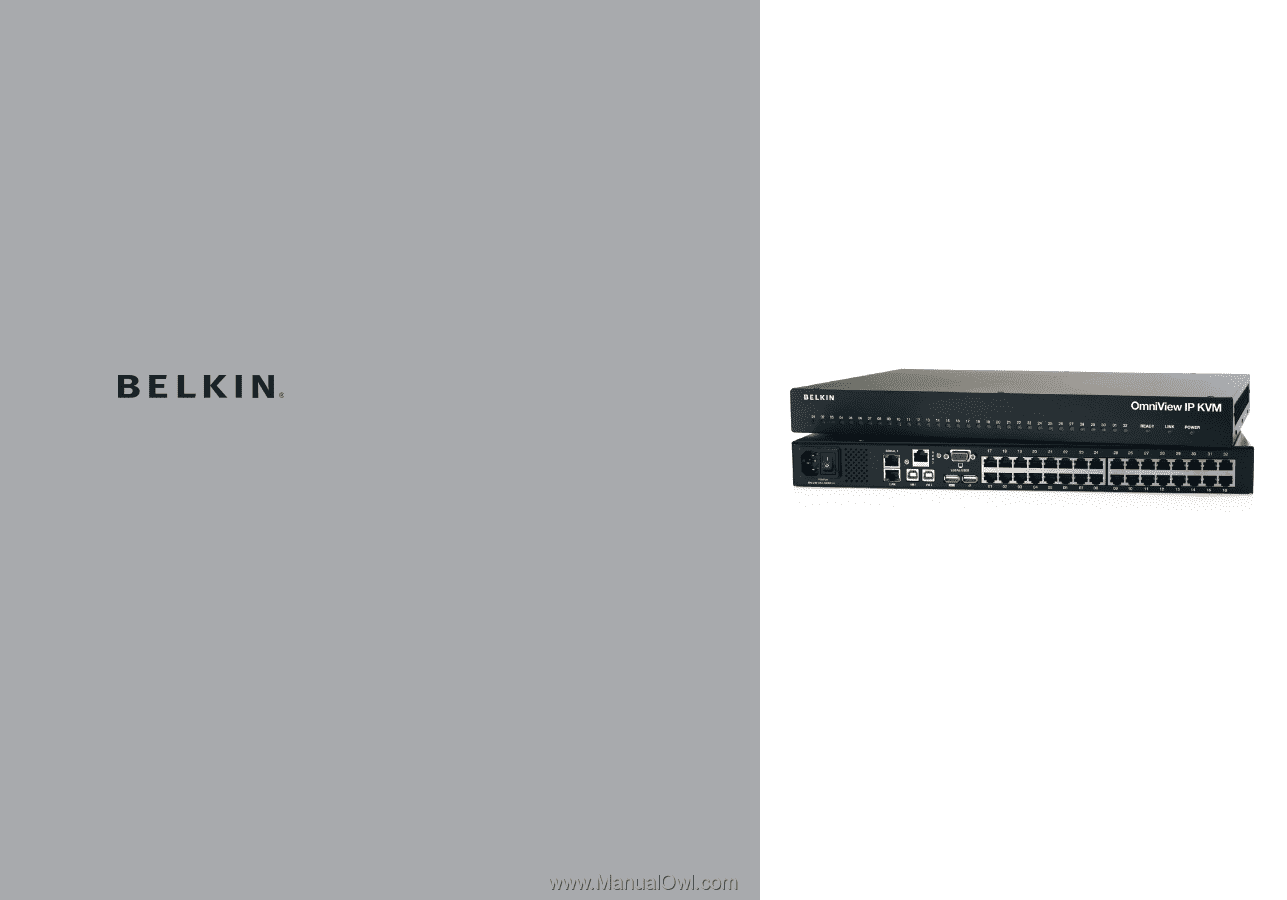
OmniView
IP*
5216K/5232K
User Manual
PM00020 - F1DP2XXG
*OmniView is a registered trademark of Belkin International, Inc.