Belkin F1DP216G User Manual - Page 19
Web Interface
 |
View all Belkin F1DP216G manuals
Add to My Manuals
Save this manual to your list of manuals |
Page 19 highlights
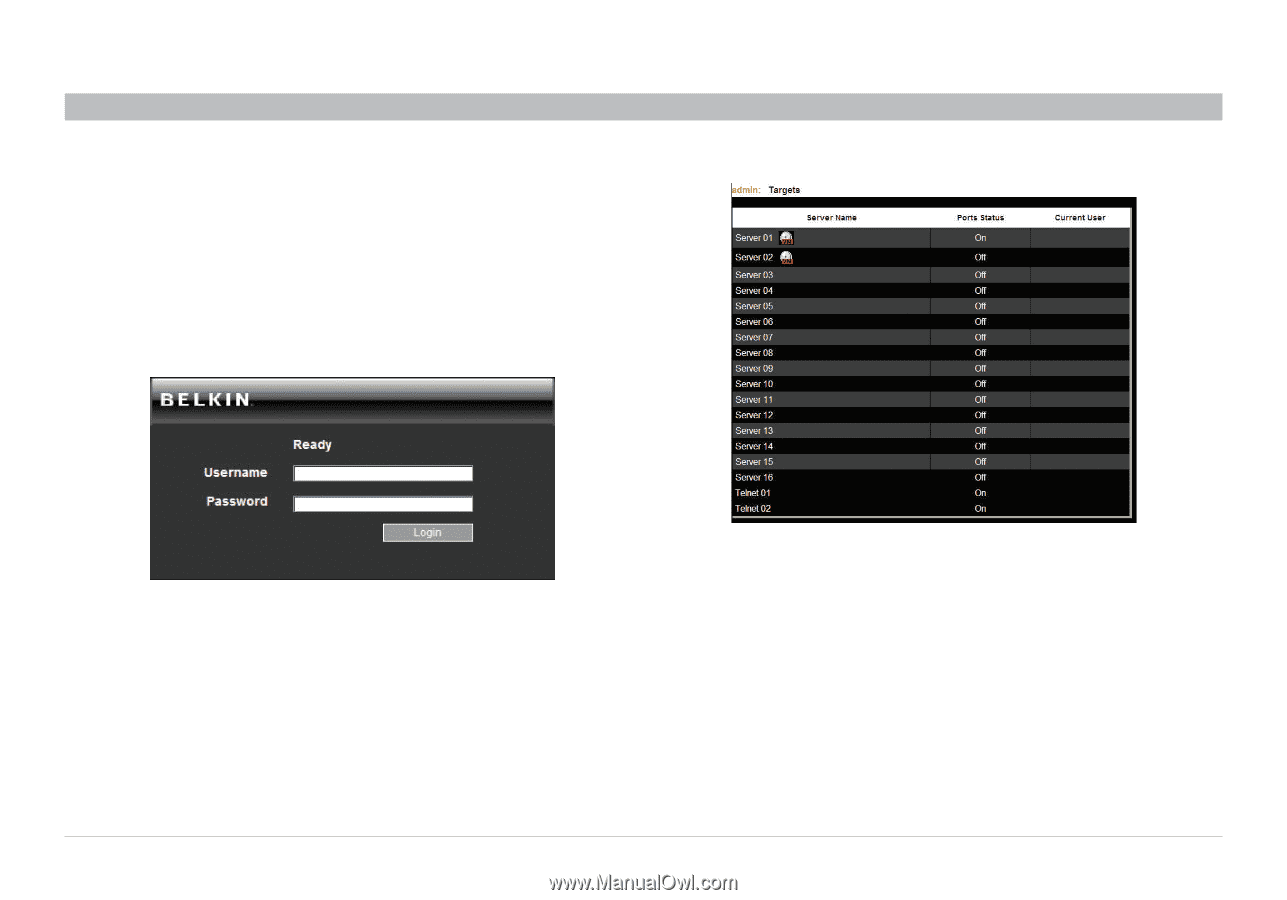
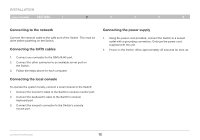
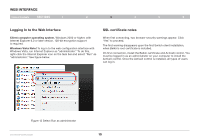
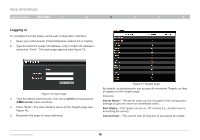
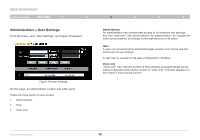
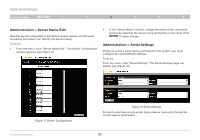
WEB INTERFACE Table of Contents sections 1 2 3 4 5 6 Logging in To complete the initial setup via the web configuration interface: 1. Open your web browser (Internet Explorer version 6.0 or higher). 2. Type the Switch's system IP address-http or https://IP address/ - and press "Enter". The login page appears (see Figure 13). Figure 13 Login page 3. Type the default administrator user name (admin) and password (SMBremote) (case-sensitive). 4. Press "Enter". The web interface opens at the Targets page (see Figure 14). 5. Bookmark the page for easy reference. Figure 14 Targets page By default, an administrator can access all connected Targets, so they all appear on the Targets page. Columns: Server Name - The server name can be changed in the configuration settings to give the server an identifiable name. Port Status - Port status can be on, off, or busy (i.e., another user is accessing the server). Current User - The current user (if any) who is accessing the target. OmniViewIP 5216K/5232K 16
-
 1
1 -
2
-
3
-
4
-
5
-
6
-
7
-
8
-
9
-
10
-
11
-
12
-
13
-
 14
14 -
 15
15 -
 16
16 -
 17
17 -
 18
18 -
 19
19 -
 20
20 -
 21
21 -
 22
22 -
 23
23 -
 24
24 -
25
-
26
-
27
-
28
-
29
-
30
-
31
-
32
-
33
-
34
-
35
-
36
-
37
-
38
-
39
-
40
-
41
-
42
-
43
-
44
-
45
-
46
-
47
-
48
-
49
-
50
-
51
-
52
-
53
-
54
-
55
-
56
-
57
 |
 |