Belkin F1DP216G User Manual - Page 47
LOCAL ACCESS, The OSD, Navigating the OSD Main window, Selecting a computer
 |
View all Belkin F1DP216G manuals
Add to My Manuals
Save this manual to your list of manuals |
Page 47 highlights
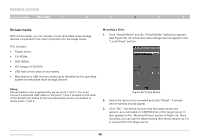
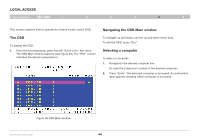
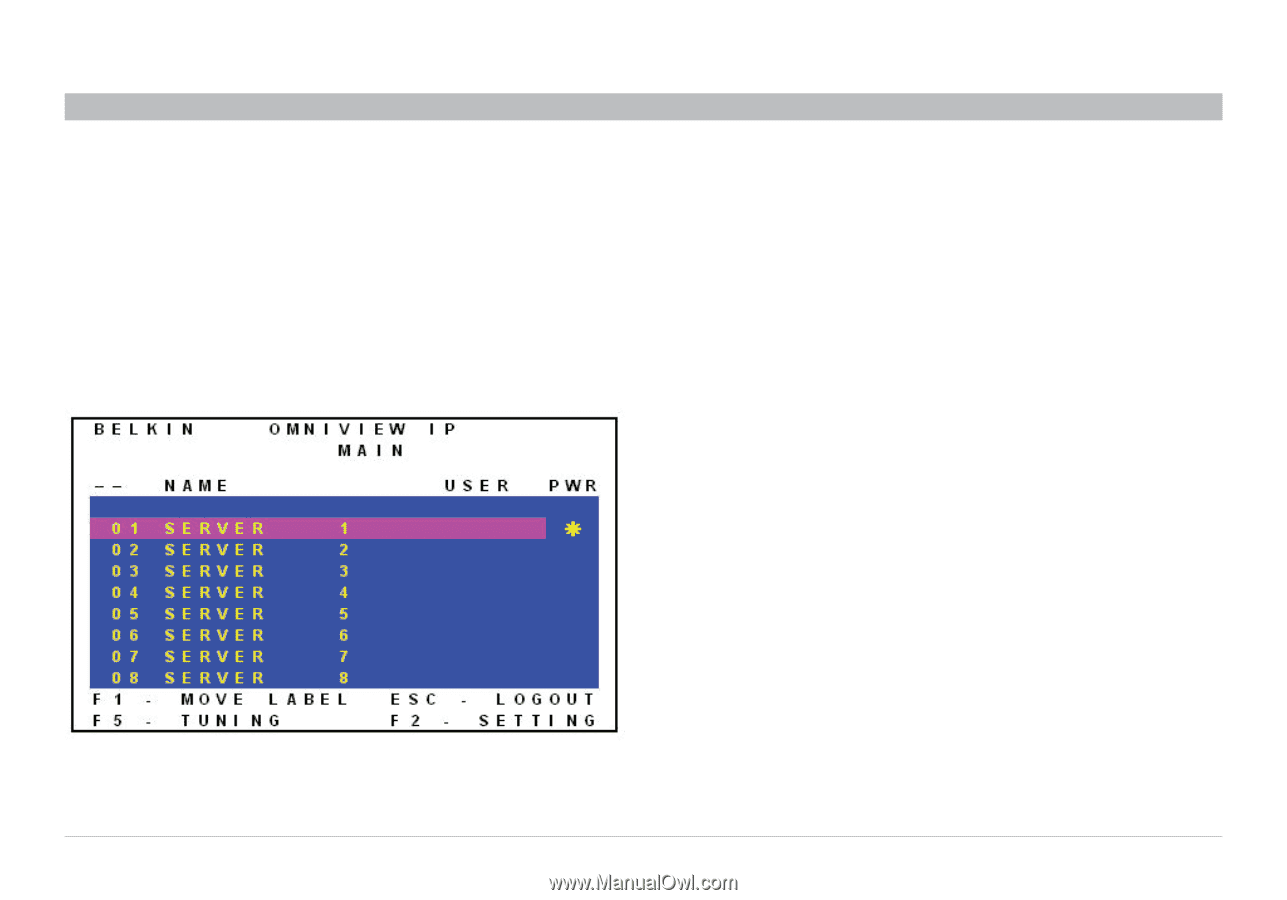
LOCAL ACCESS Table of Contents sections 1 2 3 4 5 6 This section explains how to operate the Switch locally via the OSD. The OSD To display the OSD: 1. From the local keyboard, press the left "Scroll Lock" key twice. The OSD Main window appears (see Figure 38). The "Pwr" column indicates the server is powered on. Navigating the OSD Main window To navigate up and down, use the up and down arrow keys. To exit the OSD, press "Esc". Selecting a computer To select a computer:. 1. Navigate to the desired computer line. Or, type the 2-digit port number of the desired computer. 2. Press "Enter". The selected computer is accessed. A confirmation label appears showing which computer is accessed. Figure 38 OSD Main window OmniViewIP 5216K/5232K 44
-
 1
1 -
2
-
3
-
4
-
5
-
6
-
7
-
8
-
9
-
10
-
11
-
12
-
13
-
14
-
15
-
16
-
17
-
18
-
19
-
20
-
21
-
22
-
23
-
24
-
25
-
26
-
27
-
28
-
29
-
30
-
31
-
32
-
33
-
34
-
35
-
36
-
37
-
38
-
39
-
40
-
41
-
 42
42 -
 43
43 -
 44
44 -
 45
45 -
 46
46 -
 47
47 -
 48
48 -
 49
49 -
 50
50 -
 51
51 -
 52
52 -
53
-
54
-
55
-
56
-
57
 |
 |
44
OmniViewIP 5216K/5232K
SECTIONS
Table of Contents
1
2
3
4
6
LOCAL ACCESS
5
This section explains how to operate the Switch locally via the OSD.
The OSD
To display the OSD:
1°
From the local keyboard, press the left “Scroll Lock” key twice.
The OSD Main window appears (see Figure 38). The “Pwr” column
indicates the server is powered on.
Navigating the OSD Main window
To navigate up and down, use the up and down arrow keys.
To exit the OSD, press “Esc”.
Selecting a computer
To select a computer:.
1°
Navigate to the desired computer line.
Or, type the 2-digit port number of the desired computer.
2°
Press “Enter”. The selected computer is accessed. A confirmation
label appears showing which computer is accessed.
Figure 38 OSD Main window