Belkin F1DP216G User Manual - Page 34
Manual video adjust
 |
View all Belkin F1DP216G manuals
Add to My Manuals
Save this manual to your list of manuals |
Page 34 highlights
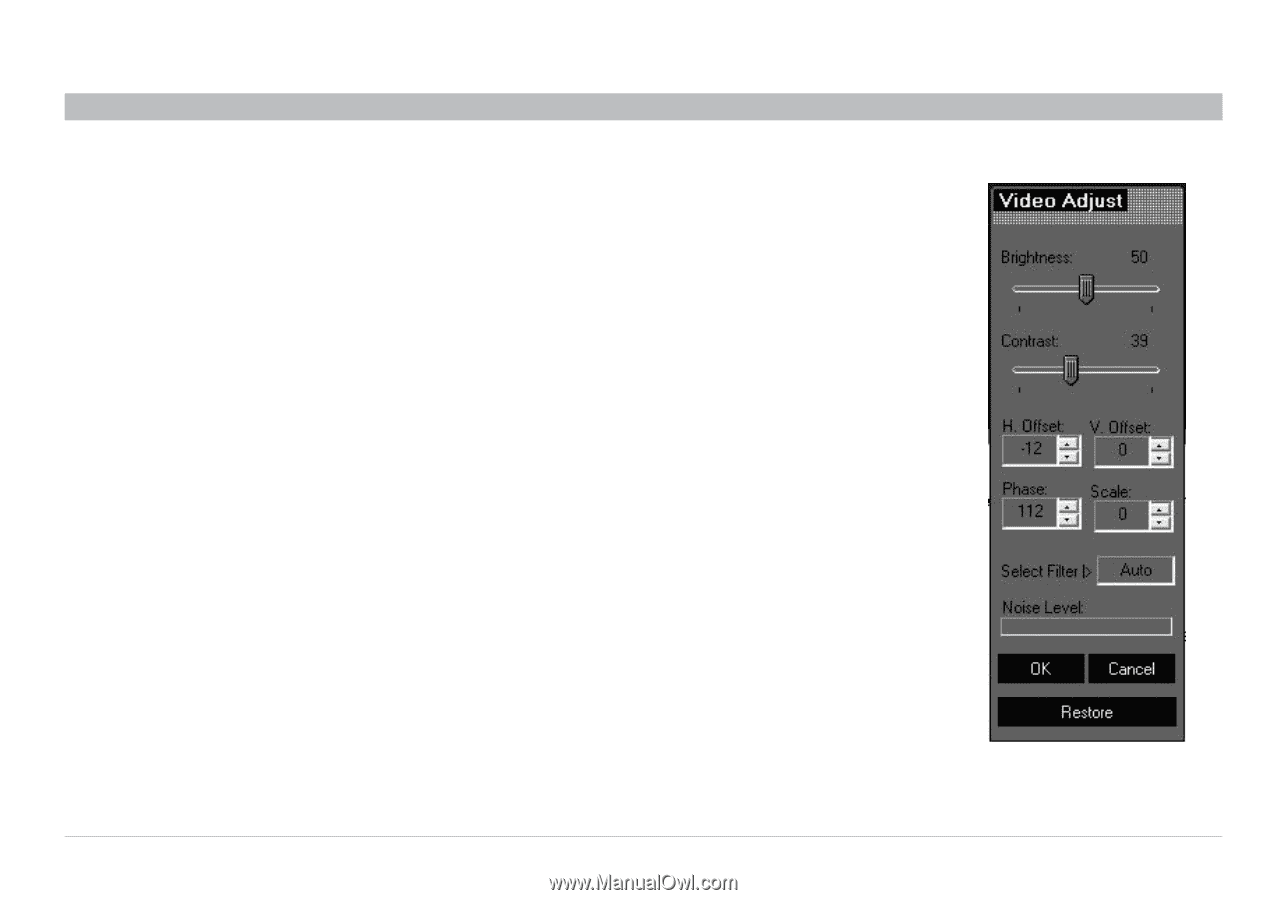
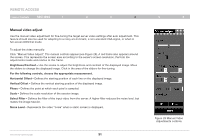
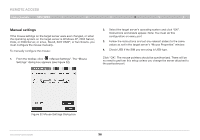
REmote AcCESS Table of Contents sections 1 2 3 4 Manual video adjust Use the manual video adjustment for fine-tuning the target server video settings after auto adjustment. This feature should also be used for adapting to a noisy environment, a non-standard VGA signal, or when in full-screen DOS/CLI mode. To adjust the video manually: Click "Manual Video Adjust". The manual controls appear (see Figure 29). A red frame also appears around the screen. This represents the screen area according to the server's screen resolution. Perform the adjustments inside and relative to this frame. Brightness/Contrast - Use the scales to adjust the brightness and contrast of the displayed image. Move the sliders to change the displayed image. Click in the area of the sliders for fine-tuning. For the following controls, choose the appropriate measurement. Horizontal Offset - Defines the starting position of each line on the displayed image. Vertical Offset - Defines the vertical starting position of the displayed image. Phase - Defines the point at which each pixel is sampled. Scale - Defines the scale resolution of the session image. Select Filter - Defines the filter of the input video from the server. A higher filter reduces the noise level, but makes the image heavier. Noise Level - Represents the video "noise" when a static screen is displayed. OmniViewIP 5216K/5232K 31 5 6 Figure 29 Manual Video Adjustments controls
-
 1
1 -
2
-
3
-
4
-
5
-
6
-
7
-
8
-
9
-
10
-
11
-
12
-
13
-
14
-
15
-
16
-
17
-
18
-
19
-
20
-
21
-
22
-
23
-
24
-
25
-
26
-
27
-
28
-
 29
29 -
 30
30 -
 31
31 -
 32
32 -
 33
33 -
 34
34 -
 35
35 -
 36
36 -
 37
37 -
 38
38 -
 39
39 -
40
-
41
-
42
-
43
-
44
-
45
-
46
-
47
-
48
-
49
-
50
-
51
-
52
-
53
-
54
-
55
-
56
-
57
 |
 |