Brother International GT-361 Instruction Manual - English
Brother International GT-361 Manual
 |
View all Brother International GT-361 manuals
Add to My Manuals
Save this manual to your list of manuals |
Brother International GT-361 manual content summary:
- Brother International GT-361 | Instruction Manual - English - Page 1
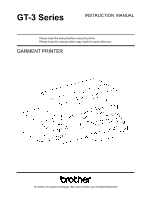
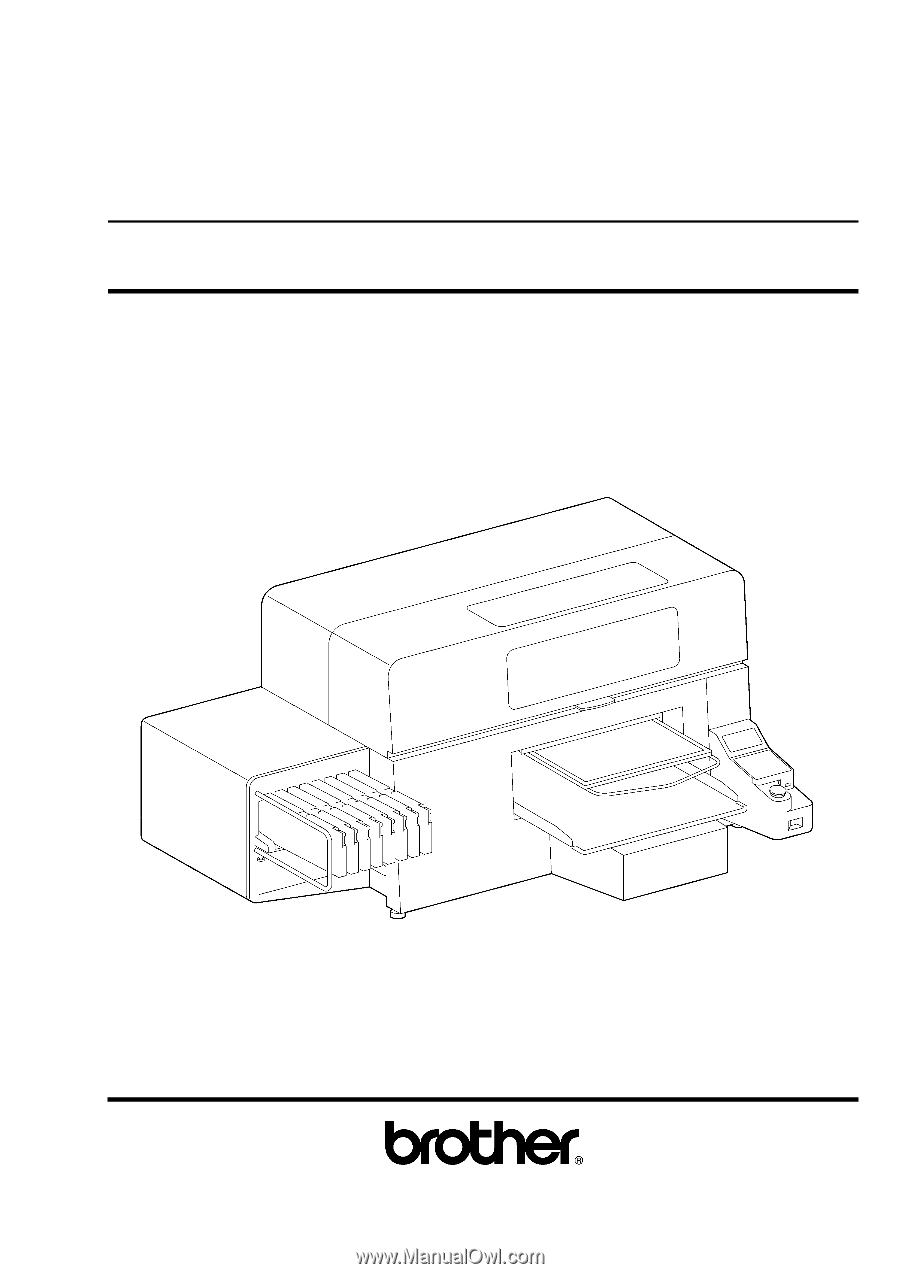
GT-3 Series INSTRUCTION MANUAL Please read this manual before using the printer. Please keep this manual within easy reach for quick reference. GARMENT PRINTER GT Series US support homepage http://www.brother-usa.com/Garmentprinters/ - Brother International GT-361 | Instruction Manual - English - Page 2
MEMO Note based on California law (USA) on the use and handling of Perchlorate This product contains a CR Coin Lithium Battery which contains Perchlorate Material - special handling may apply. See http://www.dtsc.ca.gov/hazardouswaste/perchlorate. GT-3 Series - Brother International GT-361 | Instruction Manual - English - Page 3
Thank you very much for buying a BROTHER printer. Before using your new printer, please read the safety instructions below and the explanations given in the instruction manual. SAFETY INSTRUCTIONS [1] Safety indications and their meanings This instruction manual and the indications and symbols that - Brother International GT-361 | Instruction Manual - English - Page 4
off the power switch and disconnect the power cord. Contact Brother to arrange a service call to resolve. Do not use the printer when smoke or a bad odor coming from the printer, otherwise it may cause fire or electric shocks or problems with correct operation. Immediately turn off the power switch - Brother International GT-361 | Instruction Manual - English - Page 5
Transporting and setting up of the printer should be held in proper way. The machine may fall down and cause injury. The printer must be used on a suitable stable surface, otherwise it may tip over or fall down and cause injury. Furthermore, the table that supports the printer should be at least 137 - Brother International GT-361 | Instruction Manual - English - Page 6
the printer. Please follow the instructions on the labels at all times when using the printer. If the labels have been removed or are difficult to read, please contact your nearest Brother dealer. receiving a serious electric shock, and problems with correct operation may also occur. GT-3 Series - Brother International GT-361 | Instruction Manual - English - Page 7
Wash Liquid Grease Ink Cartridge Waste Ink Tank Pretreatment (20kg) GT-3 Series Maintenance Solution (5kg) 0085Y v - Brother International GT-361 | Instruction Manual - English - Page 8
Printer ...5 1-3. Required Condition...5 1-3-1. Environment...5 1-3-2. Electrical Requirements...6 1-3-3. Software manuals ...25 3-3-7. Opening the Useful Tools...26 3-3-8. How to use Firmware Update Tools...27 3-4. Setting Up Your Printer... 4-3. Setting the Printer Driver Condition...51 GT-3 Series - Brother International GT-361 | Instruction Manual - English - Page 9
Files from GT-3 File Viewer to your Printer 80 6. Maintenance...83 6-1. Replacing Consumables ...84 6-1-1. Replacing the Ink Cartridge...84 Troubleshooting...101 7-1. Solving Printer Problems ...102 7-2. Solving Print Quality Problems...104 7-2-1. Procedure for Solving the Print Quality Problems - Brother International GT-361 | Instruction Manual - English - Page 10
...125 7-2-12. Adjusting the amount of White Ink in Daily Cleaning White 126 7-2-13. Copy Log file to USB flash drive...127 7-3. Solving Application Problems ...128 7-4. Error Messages...129 8. Specifications...137 8-1. Mechanical Specification...137 8-2. Software Specification...137 GT-3 Series - Brother International GT-361 | Instruction Manual - English - Page 11
avoid damage to your printer. z New consumables should be stored away from direct sunlight until they are required. Use up the Ink Cartridges, Pretreatment and Maintenance Solution before the expired date, and CMYK inks should be used up within six months after opening the new one. GT-3 Series 1 - Brother International GT-361 | Instruction Manual - English - Page 12
refill ink, never reconstruct ink cartridges; ink may cohere inside the cartridge bag, tube or even Print Head and may cause serious damage to your printer. We assume no responsibility for any problem caused by using them. Only genuine new ink cartridges should be used. z The ink cartridges should - Brother International GT-361 | Instruction Manual - English - Page 13
manufacture. However, in this manual, the ® marks or TM marks are not used. Brother logo is registered trademark of Brother Industries, Ltd. Microsoft and Windows trademarks of their respective owners. Screen shots used in this document are in accordance with the guidelines of Microsoft Corporation - Brother International GT-361 | Instruction Manual - English - Page 14
License Agreement (herein referred to as the "Agreement"). This software cannot be used if the customer disagrees with this agreement. 1. Ownership The ownership of this software and any reproductions belongs to Brother Industries (herein referred to as "Company") or its supplier, Wind River - Brother International GT-361 | Instruction Manual - English - Page 15
Brother Customer Service Hot Line if any of these is missing. z GT-3 Printer z Install CD z AC cord z Nozzle Cleaning Kit: 2 for GT-381 and GT-361, 1 for GT-341 z Print Heads: 8 for GT-381, 6 for GT-361, 4 for GT-341 z One Waste Ink Tank z One Encoder Cleaner z One Maintenance Cartridge for GT - Brother International GT-361 | Instruction Manual - English - Page 16
using oven instead of heat press. (320°F (160 °C), 3 and half minutes with the tunnel 2.4 meter long as a rough indication) Separator sheet: When you cure Pretreatment and ink, be sure to use this to make the surface smooth and flat. When you cure printed ink, use this for separation. 6 GT - Brother International GT-361 | Instruction Manual - English - Page 17
garment. You need to test prior to your production, especially when you print on something new and unknown materials. 1-3-5. Consumable Requirements and Options For ordering new or replacement items please use the codes below. Consumables Black Ink Cartridge 180 cc 380 cc Magenta Ink Cartridge - Brother International GT-361 | Instruction Manual - English - Page 18
of the printer. Use this to operate your printer. See "2-7. Control Panel" for the details. Turns on/off your printer. Adjusts the T-shirt position. Inserts USB flash drive. Load the Ink Cartridges of the appropriate T-shirt on the Platen". Indicates the serial number of the product. GT-3 Series - Brother International GT-361 | Instruction Manual - English - Page 19
Name 1 AC cord socket 2 USB port 3 LAN port 4 Rear Cover 5 Waste Ink Tube 6 Waste Ink Tank Description Inserts AC cord. Inserts USB cable to PC. Inserts LAN cable to PC. Covers the Platen moving area. Drains the waste ink. Holds the waste ink. Be aware of the room. GT-3 Series 0045Y 9 - Brother International GT-361 | Instruction Manual - English - Page 20
off your printer before opening Guide Shaft 0047Y Description Jets the Color Ink to the platen. From the left black, magenta, cyan, and yellow. Jets the White Ink to the platen. From the left W1, W2, W3 and W4. Absorbs ink mist inside the printer ink mist and dust. Keep Clean to move the - Brother International GT-361 | Instruction Manual - English - Page 21
Unit 2. Identifying Your Printer's Parts 0048Y No. Print Heads and absorb ink in head cleaning. From the left black ink in head cleaning. From the left W1, W2, W3, and W4. Wipe off the waste ink open the new ink cartridge or when you Wipers". Hold the flushed ink for keeping print quality. - Brother International GT-361 | Instruction Manual - English - Page 22
If you print with wider clearance, the ink mist will spread inside the printer and the printing material, and may damage the sensors. Fixes and holds the Platen. 4 Platen Positioning Plate You can use Lower-the-Platen Assy (option) when you regularly print thicker material, which can - Brother International GT-361 | Instruction Manual - English - Page 23
Menu display. Displays the Job Comment of the print data received, the status of the printer, and the menu items for various settings. Indicates the print data status and starts data is ready to print. On machine initialization these lamps have a 30-second self check time. GT-3 Series 13 - Brother International GT-361 | Instruction Manual - English - Page 24
data. Move 6 Number of Print Shows the number of prints completed of the print data. 7 Printer Status Shows the printer status. 8 Amount of Ink Shows amount of ink remained in each cartridge, from the left, W1, W2, W3, W4 , Black Remained (K), Magenta (M), Cyan (C) and Yellow (Y). It - Brother International GT-361 | Instruction Manual - English - Page 25
Direction Maintenance Printer Setting Content Ink". Reads a print data (AR3 file) in USB flash drive. The inside folder shows with [...]. Sets the print direction. This setting is prior to Printer Driver setting. Auto: Default Bi-directional, Printer Driver Ink into into the Printer Setting. LCD - Brother International GT-361 | Instruction Manual - English - Page 26
White. See "7-2-12. Adjusting the amount of White Ink in Daily Cleaning White". Auto Job Delete: Deletes the print data automatically after the print number which is set with Printer Driver is finished. Default is OFF. GT-341 mode (No White): Sets the printer to stop all the operation of White Heads - Brother International GT-361 | Instruction Manual - English - Page 27
Transporting and setting up of the printer should be held in proper way. The machine may fall down and cause injury. The printer must be used on a suitable stable surface, otherwise it may tip over or fall down and cause injury. Furthermore, the table that supports the printer should be at least 137 - Brother International GT-361 | Instruction Manual - English - Page 28
Manual , which is packed with the printer. Locate your printer taking the following into account z Environmental conditions are suitable. z Avoid direct sunlight, dust and extremes of humidity. z Never use an extension cable. z A working space must be left around the printer supports the printer - Brother International GT-361 | Instruction Manual - English - Page 29
the right space at least 20 cm (7.9 inch) for exhausting air from the Exhaust Fan for exhausting air. 3-2-1. Turning On Your Printer (1) Hold the White Ink Cartridges upside down from the inserting position and shake them back and forth beforehand (30 seconds to 1 minute for each). (2) Connect the - Brother International GT-361 | Instruction Manual - English - Page 30
power plug from the power outlet. z As for GT-381 and GT-361, do not leave the White ink inside the printer. White pigment precipitates and may cause serious damage to your printer. Before you start your job, shake the cartridges for 30 seconds to 1 minutes and execute [Daily Cleaning White - Brother International GT-361 | Instruction Manual - English - Page 31
section describes how to install the GT-3 Printer Driver (FileOutput), manuals (Basic Operation Manual/ Instruction Manual), Brother GT-3 File Viewer, and other tools PC. If you are going to use your printer without connecting it to your PC, this will be the end of PC preparation. GT-3 Series 21 - Brother International GT-361 | Instruction Manual - English - Page 32
(power OFF). We do not recommend connection via a USB hub to the printer. (2) Connect the other end of the USB 2.0 Cable to your PC. (3) Turn on your GT-3 printer. The following window appears. Select "No, not this time", and then click "Next". (4) Insert the Install CD. The following window - Brother International GT-361 | Instruction Manual - English - Page 33
"Control Panel". (8) Click either "Brother GT-3" "Brother GT-3 FileOutput" icon and select "Set as Default Printer" on "File" menu. "Brother GT-782" icon is checked and Brother GT-782 is set as the default printer. This will help to do the layout with your application software. The PC setup is now - Brother International GT-361 | Instruction Manual - English - Page 34
) Refer first to "3-3-2. PC preparation: For Windows XP (32 bit)" and confirm the process. Install the file Output Printer Driver "Brother GT-3 FileOutput" first to your PC. Tools and manuals are installed together from Install CD, and PC must be restarted. Then PC is connected to USB 2.0 cable, the - Brother International GT-361 | Instruction Manual - English - Page 35
icon and select "Set as Default Printer" on "File" menu. "Brother GT-782" icon is checked and Brother GT-782 is set as the default printer. This will help to do the layout with your application software. The PC setup is now completed. 3-3-6. Opening the installed manuals (1) Click "All Programs" on - Brother International GT-361 | Instruction Manual - English - Page 36
. You can change the printer driver menus to see how the colors change with the settings. Use PLTN 14x16. (1) Select "Useful Tools" in "Brother GT-3 Tools". (2) Open or save the files "GT_Blues.pdf"(blue-violet), "GT_Greens.pdf"(green-yellow), "GT_Oranges.pdf"(orange), "GT_Reds.pdf"(red-purple) or - Brother International GT-361 | Instruction Manual - English - Page 37
3-3-8. How to use Firmware Update Tools 3. Getting Started Download the new Firmware program from the Web site when informed. Read the Firmware program with GT-3 Firmware Update Tool in "Brother GT-3 Tools" and update the Firmware program inside the printer. (1) Select "All Programs" on "Start" - Brother International GT-361 | Instruction Manual - English - Page 38
the OK Button on your printer's Control Panel and go to the Menu. (2) Use the Up/Down Button to select [ Printer Setting ] > [ Speaker Volume printer's Control Panel and go to the Menu. (2) Use the Up/Down Button to select [ Printer Setting ] > [ Temperature ] and then press the OK Button. (3) Use - Brother International GT-361 | Instruction Manual - English - Page 39
off the power switch and disconnect the power cord. Contact Brother to arrange a service call to resolve. Do not use the printer when smoke or a bad odor coming from the printer, otherwise it may cause fire or electric shocks or problems with correct operation. Immediately turn off the power switch - Brother International GT-361 | Instruction Manual - English - Page 40
the Applications' Print Condition This section describes the settings for correct printing of garments. 4-2-1. Common Notice for All Applications Color Mode / Color Space: GT-3 Printer is RGB (Red Green Blue) printer. If you use Adobe, Corel applications, please note that some colors in CMYK (Cyan - Brother International GT-361 | Instruction Manual - English - Page 41
so causes an error and you may have to restart your printer. Print AR3 files: Use "GT-3 FileOutput" Printer Driver, which saves print data in AR3 format. With this you can see the detailed print conditions and estimated ink cost. See "5. Printing AR3 Files." for the details. Do not - Brother International GT-361 | Instruction Manual - English - Page 42
radio button. Check the left top menu: it changes [default settings] to [ Custom (Current settings not saved)]. Also click the orange arrow from [ Generic CMYK printer profile ] to [ Generic Profile ] CorelDRAW X3/X4 32 - Brother International GT-361 | Instruction Manual - English - Page 43
4. Printing Directly from Applications CorelDRAW X5: Select the menu as shown in the below and click OK. Default color settings Color Profiles: RGB: sRGB IEC61966-2.1 CMYK: U.S. Web. Coated (SWOP) v2 Primary color mode: RGB Rendering intent: Relative colorimetric CorelDRAW X5 GT-3 Series 33 - Brother International GT-361 | Instruction Manual - English - Page 44
Area: CorelDRAW 10/11/12/X13/X14 (1) Select [ File ] > [ Print Setup ] menu. (2) Select "Brother GT-3" or "Brother GT-3 FileOutput" for the printer to be used. Select either one of those as your PC's default printer then the settings will be easier. (3) Select [ Layout ] > [ Page Setup ] menu. - Brother International GT-361 | Instruction Manual - English - Page 45
conversions performed by: "Brother GT-3 File Output" or "Brother GT-3" Correct colors using color profile: " RGB IEC61966-2.1 Rendering intent: Relative colorimetric Do not check "Print to File" on Print window to make print files. Use GT-3 FileOutput Printer Driver. GT-3 Series 35 - Brother International GT-361 | Instruction Manual - English - Page 46
X3/X4: Make sure that "Color mode" is RGB and "Apply ICC Profile" is ON. CorelDRAW X3/X4 If you print the image with White Ink then make the Anti-aliasing OFF. CorelDRAW X5: Make sure that "Color mode" as RGB. CorelDRAW X5 If you print the image with White - Brother International GT-361 | Instruction Manual - English - Page 47
printer driver menu but application menu, the extension of the print data is automatically ".prn" although you added ".ar3". Before you use GT-3 File Viewer to print, change the extension to ".ar3" manually always transparent with no ink printed. When you print an image like photo, there may be RGB - Brother International GT-361 | Instruction Manual - English - Page 48
Coated FOGRA27 Conversion Options/ Intent: Relative Colorimetric GT-3 is an RGB printer. Make the artwork in RGB mode because CMYK artwork is Arrangements ] to select the proper menu. Or use Color Processing in Printer Driver (see "4-3-12. Selecting the Color Processing for increasing - Brother International GT-361 | Instruction Manual - English - Page 49
of the PC used is set either "Brother GT-3" or "Brother GT-3 FileOutput", the layout is set in this window. (2) Settings are different from the versions. Photoshop 6/7/CS: Make print options as follows, go to "Page Setup..." to do Printer Driver settings, and then click "Print". Show More Options - Brother International GT-361 | Instruction Manual - English - Page 50
4. Printing Directly from Applications Photoshop CS2/CS3 Make print options as follows, go to [Page Setup...] to do Printer Driver settings, and then click "Print". More Options: click Pull-down menu: Color Management Print: Document: Profile: sRGB IEC IEC61966-2.1 or untagged Options: Color Handing - Brother International GT-361 | Instruction Manual - English - Page 51
Intent: Relative Colorimetric Photoshop CS4/CS5 < Note> z Do not check "Print to File" on Print window to make print files. Use GT-3 FileOutput Printer Driver. z Photoshop CS2 and CS3 use lots of PC memories in executing and it may take more time to make print data compared with the former versions - Brother International GT-361 | Instruction Manual - English - Page 52
Color Chart". RGB=254 white Do not use HKS, Pantone and other licensed palettes. Those spot Colors are treated "special" for screen-printing Color separation (remember you can print each Color by print menu). GT-3 Printer Driver cannot deal with these information in color matching. 42 - Brother International GT-361 | Instruction Manual - English - Page 53
, there may be RGB=255 white spots and they will be ink holes. Normally you can select RGB=255 white directly with the Photoshop Action file to change RGB=255 to RGB=254 is available in Useful Tools. (See "3-3-7. Opening the Useful Tools"). For further information, refer to the Photoshop help - Brother International GT-361 | Instruction Manual - English - Page 54
. Check the print data by the preview by using "Brother GT-3 FileOutput". z GT-3 is an RGB printer. Make the print data in RGB Color mode to purple cannot be printed accurately. We recommend you edit the artwork or use Color Processing (see "4-3-12. Selecting the Color Processing for increasing the - Brother International GT-361 | Instruction Manual - English - Page 55
. Source Space is either "sRGB IEC61966-2.1" or "Untagged RGB". Print Space/ Profile: Same As Source Click "Properties" (Illustrator 10) or "Setup" (Illustrator CS) to do Printer Driver Settings. Illustrator CS GT-3 Series 45 - Brother International GT-361 | Instruction Manual - English - Page 56
4. Printing Directly from Applications Illustrator CS2/CS3/CS4/CS5: Make sure the following settings. Document Profile and Printer Profile are either "sRGB IEC61966-2.1" or "Untagged RGB". Color Handling: Let Illustrator determine Colors Rendering Intent: Relative Colorimetric Click "Setup" to do - Brother International GT-361 | Instruction Manual - English - Page 57
than 14 x 16 inches), the Platen Size may be set to Platen 10 x 12 automatically. Confirm the Platen Size in the Printer Driver window before you print. z Do not check "Print to File" on Print window to make print files. Use "Brother GT-3 FileOutput" printer driver. (Continued on the next page - Brother International GT-361 | Instruction Manual - English - Page 58
"File" menu. (2) Select "Artboard". (3) Check "Use Print Setup", and then click "Print Setup...". The below to solve the problem. (1) Confirm the Media Size in Print window is "Defined by Driver (it is set Preferences". (5) Change the Platen Size on Printer Driver window, and then click "OK". (6) - Brother International GT-361 | Instruction Manual - English - Page 59
Adobe Photoshop Elements Color settings and print settings are required before printing. After the printer driver is installed, set the Colors before editing the document. Color settings: (1) Screens" and then click "OK". Photoshop Elements 3 (English Version) Photoshop Elements 9 GT-3 Series 49 - Brother International GT-361 | Instruction Manual - English - Page 60
the Job Comment, it will be displayed. z Do not check "Print to File" on Print window to make print files. Use "Brother GT-3 FileOutput" printer driver. 4-2-7. Printing From Other Applications If the application does not have Color Settings, the Color space is sRGB (Windows standard). Just select - Brother International GT-361 | Instruction Manual - English - Page 61
4-3. Setting the Printer Driver Condition 4. Printing Directly from Applications RGB-255 (paper color) is transparent with no ink printed. When there be seen with GT File Viewer when you use Brother GT-3 FileOutput Printer Driver to make AR3 file. See the following pages for details - Brother International GT-361 | Instruction Manual - English - Page 62
Selecting Machine Mode GT-3 Printer Driver is common for GT-381 (four White), GT-361 (two White) and GT-341 (no White). Select the Machine Mode first for the printer to be used. The default is GT-381. z When you sent a print data made for GT-361(Machine Mode: GT-361) to GT-381, then GT-381 - Brother International GT-361 | Instruction Manual - English - Page 63
a comment (max 30 characters) to display on your printer's Control Panel. It is used to advise the operator. 4-3-3. Selecting the Platen Size occurs when you send a GT-381 print data with White Ink data to GT-361, or a GT-381/GT-361 print data with White Ink data to GT-341. Any GT-3 can print a " - Brother International GT-361 | Instruction Manual - English - Page 64
). Highlight Adjusts the RGB=254 White and whitish colors. GT-381/GT-361 print more than one layer when the White Ink is used more than the volume that is available in one layer. Adjust the White Ink Volume by referring the Print Time and Ink Volume (%), to meet the variation of print media. Color - Brother International GT-361 | Instruction Manual - English - Page 65
/ Mask. Those data are in [ All Program ] > [ Brother GT-3 Tools ] > [ Test Data ]. How to open the WhiteVolume_600.ar3 and WhiteVolume_1200.ar3 Image of WhiteVolume_1200.ar3 printed on Lavender T-shirt (R=174, G=111, B=255) 4-3-7. Print with Black Ink on black garment You do not have to print for - Brother International GT-361 | Instruction Manual - English - Page 66
(blurring). Print "InkVolume_1200.ar3" or "InkVolume_600.ar3" first and select the best ink volume by sliding the Ink Volume tab. It is in [ All Program ] > [ Brother GT-3 Tools ] > [ Test Data ]. Example 1 (50% cotton 50% polyester thin T-shirt) "7" is the best by the print result of "InkVolume_600 - Brother International GT-361 | Instruction Manual - English - Page 67
can use red T-shirt color in the print data by changing R=255 GB=0 red as transparent, instead of printing red colors with Magenta and Yellow ink combination. This menu is the same as GT-782, advanced Vivid Processing of GT-541. You can arrange the saturation (the strength of the - Brother International GT-361 | Instruction Manual - English - Page 68
as RGB info. GT-782 cannot identify and deal with this information but GT-3 can with some additional steps. Use both Photoshop and PNG file with RGB info made by Microsoft Paint and print with Brother GT-3 FileOutput Printer Driver, by importing the transparent layer info file (ARTR) with [ - Brother International GT-361 | Instruction Manual - English - Page 69
and the image is indicated as shown in the left. Save as "test_RGB.PNG". z Do not use Photoshop to extract RGB info. Open the PNG file with Microsoft Paint (Windows XP and Vista). z Microsoft Paint "test" is available in the (2) and (3) in the previous page. Channel Window GT-3 Series 59 - Brother International GT-361 | Instruction Manual - English - Page 70
opaque info as white. The Photoshop action file "TransLayer.atn" including the (2) to (9) of Step 2 is available in the Useful Tools. (see "3-3-7. Opening the Useful Tools"). See the Photoshop help for the details of action file. (10) Save the file including transparent info as RGB values as - Brother International GT-361 | Instruction Manual - English - Page 71
position and the size, and click [ Page Setup ...] (some versions: Properties) to open the Printer Driver settings. (3) Click [ Advance ] Button in the main setting of the Brother GT-3 FileOutput Printer Driver. (4) Check the Transparent Layer Checkbox and click the radio button [ Create ARTR File - Brother International GT-361 | Instruction Manual - English - Page 72
-OFF (3) Select [ File ] > [ Print ] and select Brother GT-3 FileOutput and print "test_RGB.PNG". Align the print position exactly the same as the ARTR file in (2) of Step 3.. Select [ Page Setup ...] (some versions: Properties) and open the Printer Driver settings. (Continued on the next page) 62 - Brother International GT-361 | Instruction Manual - English - Page 73
you make print data so that mis-print may be decreased in print operation. If the printer's setting is [ Always Bi- ], the printer does bi-directional print even if the Printer Driver sets in Uni-Directional printing. The printer's setting is prior to the Printer Driver's. GT-3 Series 63 - Brother International GT-361 | Instruction Manual - English - Page 74
Pantone's Color Formula Guide. It is in [ All Program ] > [ Brother GT-3 Tools ] > Useful Tools". The image data (PDF) is in Useful Tools. Print the image data when you want to know how the Printer Driver changes the colors with the settings. See "3-3-7. Opening the Useful Tools". 64 GT - Brother International GT-361 | Instruction Manual - English - Page 75
for your print material. When the option Platen e.g. Youth Platen is used, be sure to set "Platen Size" in Printer Driver menu (see "4-3-3. Selecting the Platen Size"). 4-4-1. Uninstalling the Platen 1.5 turns. Platen Fixing Lever (4) Uninstall the Platen by lifting it up straight. GT-3 Series 65 - Brother International GT-361 | Instruction Manual - English - Page 76
4. Printing Directly from Applications 4-4-2. Installing the Platen (1) Place the Platen. (2) Tighten the Platen Fixing Lever securely. Adjust the Platen Height (see "4-5. Placing the T-shirt on the Platen "). Platen Fixing Lever 66 GT-3 Series - Brother International GT-361 | Instruction Manual - English - Page 77
Fixing Lever and uninstall the Platen by lifting it up straight. (2) Loosen the two hexagon head screws that fix Bush Platen Shaft. Hexagon head screws GT-3 Series 67 - Brother International GT-361 | Instruction Manual - English - Page 78
to the machined surface while the positioning jig is inserted into the Platen Arm. (4) Install the Platen as it is and fix it. The Platen Height Adjustment Lever is in the lower hole. Original position After replacing to Platen Lowering Set, the Platen height is lowered by 13 mm. 68 GT-3 Series - Brother International GT-361 | Instruction Manual - English - Page 79
hand. The Printer may be the ink mist will spread inside the printer and the printer and use Uni-Directional print (see "7-2-4. Changing the Print Direction"). You can set a print data as Uni-Directional by the Printer Driver use force when you adjust the levers. (3) Tighten the Platen Fixing - Brother International GT-361 | Instruction Manual - English - Page 80
be applied first when you print on dark-colored T-shirts with White ink. (See "4-6-1. Applying the Pretreatment".) Print side z Pay attention ] > [ Brother GT-3 Tools ] > [ Useful Tools ]. Grid14x16.ar3 is for the standard Platen 14x16. (See "3-3-7. Opening the Useful Tools".) (5) Smooth - Brother International GT-361 | Instruction Manual - English - Page 81
steps. (9) Loosen the Platen Fixing Lever. (10) Adjust the Platen height by turning the Platen Height Adjustment Lever. The alphabets are the guide scales. (11) Tighten the Platen Fixing Lever securely. (12) Confirm the height by moving Platen with Platen Button. Repeat steps until the Plate - Brother International GT-361 | Instruction Manual - English - Page 82
. Do not apply Pretreatment when you print without using White ink. z Pretreatment on some T-shirts may be seen easier after applied and cured. Wash lightly with water. Some dyes may be decolorized by Pretreatment, we recommend you test the garment before printing. z Pretreatment mist may spread out - Brother International GT-361 | Instruction Manual - English - Page 83
the spray: (1) Put the Pretreatment into the spray. Use an spray which can produce fine mists. (2) Put a Pretreatment Pretreatment mist may spread out when you use a spray and/or pretreatment applicator. Ventilate the surface flat without wrinkles. Use glass cloth sheet or fluorine coated sheet ( - Brother International GT-361 | Instruction Manual - English - Page 84
you can see the amount of applied Pretreatment to help you acquaint. (3) Put the T-shirt on the heat press. Keep the surface flat without wrinkles. Use glass cloth sheet or fluorine coated sheet (Teflon Sheet) and press with high pressure. Curing condition is the same as - Brother International GT-361 | Instruction Manual - English - Page 85
GT-3 receives the next print data from PC in printing. Just before you press the Print Button, confirm the Job Comment (or file name) and the counter on the display of the Control Panel. (1) Make sure the Print Button has been turned on, which indicates your printer your printer has not been used for - Brother International GT-361 | Instruction Manual - English - Page 86
below. Follow the instruction manual that comes with your used in a well ventilated environment. When curing the White ink, better to use an oven with much ink After using the Heat Press, always confirm if the ink is completely use. Pretreated garment is easier to be burnt than the normal garment - Brother International GT-361 | Instruction Manual - English - Page 87
can check the detailed print conditions and ink cost before sending a print data to your printer. z Save AR3 files in a CompactFlash. You can print with Stand-alone printer without using PC. The procedure of printing AR3 files: (1) Use GT-3 FileOutput Printer Driver and save the print data in AR3 - Brother International GT-361 | Instruction Manual - English - Page 88
"Print" or "OK" again. A print data example with White data (5) "Save As" dialog appears. Select where to save the data, enter the file name, select "GT Print File (*.ar3)" as the file type, and then click "Save". The AR3 file is created and saved in the selected location. 78 - Brother International GT-361 | Instruction Manual - English - Page 89
z Use a USB flash drive: the capacity under 32 GB, FAT 32 formatted. z Your printer can button. The information (Job Name or Job Comment, Ink Consumption, Platen Sizes, etc.) of the AR3 file flash drive cannot read properly, see "7-1. Solving Printer Problems". Do not touch the USB flash drive while - Brother International GT-361 | Instruction Manual - English - Page 90
(1) Double-click the AR3 file directly or select the GT-3 File Viewer in your PC's [ All Program ] > [ Brother GT-3 Tools] and click [ Browse... ] to open the AR3 file. (2) The file's print condition by the Printer Driver and the preview (layout) appear in the following window. The information - Brother International GT-361 | Instruction Manual - English - Page 91
[ Change ] button and select the color. When [ Show White Image ] is checked, White data under the Color data is indicated. Input the RGB values directly GT-3 Series (Continued on the next page) 81 - Brother International GT-361 | Instruction Manual - English - Page 92
print data. Check [ White Data ] then only the White data without Color data is indicated. (5) Confirm the print conditions and layout, then click "Send to GT Printer". Also confirm that your printer is connected to PC with USB 2.0 Cable. The AR3 file has been sent to your - Brother International GT-361 | Instruction Manual - English - Page 93
by hand. The Printer may be seriously damaged by this. Do not disassemble the ink cartridge. Take care not to let the liquids: Ink, Wash Liquid, use only genuine Brother parts. Brother will not be held responsible for any accidents or problems resulting from the use of non-genuine parts. GT - Brother International GT-361 | Instruction Manual - English - Page 94
printer. (1) Open the new Ink Cartridge. Pigments in the White Ink are sinking little by little all the time. Hold the cartridge with both hands, upside down from the mounted position, and shake it in 1-2 minutes so that the pigments inside can be mixed enough. Do it one by one. 0054Y 84 GT - Brother International GT-361 | Instruction Manual - English - Page 95
good print quality. See "6-1-2." and the following pages. This is really important to keep your printer in good condition. z Do not repeat unnecessary uninstalling / installing the Ink Cartridge. z Dispose the used Ink Cartridge in compliance with your local regulations. GT-3 Series 85 - Brother International GT-361 | Instruction Manual - English - Page 96
the Wiper Cleaner. If not, the waste ink may drop on a T-shirt in printing or . Follow the message and turn off the printer. (3) Open the Front Cover with both bag so that you can hold the used Wiper Cleaner safe and clean. Pick the ink may drop. Keep flat and move slowly. Do not tilt - Brother International GT-361 | Instruction Manual - English - Page 97
is in the carton of White, Cyan and Magenta (380 cc only) Ink Cartridge or in the Maintenance Cleaning Kit (option*). ( * See "1-3-5. Consumable Requirements with the Wash Liquid. Use only the Wash Liquid included to wet the Clean Stick; using other liquid will cause damage to the Print Heads - Brother International GT-361 | Instruction Manual - English - Page 98
Sticks and use them to remove ink or dust from the Print Head Caps. Use one side of printer turns on with no errors, replacement of the Wiper Cleaner has been completed successfully. If something irregular occurs, e.g. abnormal noise or error "No Wiper Cleaner (CMYK/White)", turn off your printer - Brother International GT-361 | Instruction Manual - English - Page 99
printer. z Keep clean the top edge of the Flushing Plate; if it is covered with dust and clogged ink, the Print Heads may touch the surface and mis-firing may occur. z Dispose the used Waste Ink Cover by removing the Guide Holes from the projections. (1) 0068Y Pay attention not to - Brother International GT-361 | Instruction Manual - English - Page 100
6. Maintenance (3) Pick up the edge of the used Fan Filter mounted in the Filter Cover, and remove the the Fan side. (5) Move the Filter Cover from the front side of the Timing Belt, insert the Guide Holes to the projections and cover the Fan with the Filter Cover by pushing until the Lock hold the - Brother International GT-361 | Instruction Manual - English - Page 101
check if the Felt Support is aligned straight. Wipe off the ink mist on the printer. 6-1-6. Cleaning the inside of the printer and restart (1) Wipe off the front/back of the Clearance Sensor and around the Platen with a soft wet cloth with water. Use Wash Liquid to remove the clogged ink - Brother International GT-361 | Instruction Manual - English - Page 102
move down. Follow the message and turn off the printer. (4) Open the Front Cover with both hands until surface may be wet and dirty with ink. (6) Loosen the four thumbscrews with a Cover F from the printer. Pay attention not to give damage to the Carriage Guide Shaft. Tubes, Harnesses of - Brother International GT-361 | Instruction Manual - English - Page 103
to the Felt fully, app. 2 ml, of the Encoder Cleaner. 6. Maintenance Ethanol 0073Y Use ethanol of 95% or higher purity. (9) Push the position [A] shown below with your finger to give space from the Encoder Strip. Keep the level of the Encoder Cleaner in wiping. GT-3 Series 93 - Brother International GT-361 | Instruction Manual - English - Page 104
dirty with ink. (13) Ink may stain the Platen and other places ink. (16) Hold the Encoder Cover F with both hands, avoid the Tubes and insert it to the notch holes on the printer sure that the projection on the printer should fit the holes on printer. The cleaning is success when the initialization of the - Brother International GT-361 | Instruction Manual - English - Page 105
-361 for two Tubes, you can retrieve the White Ink before Tube Cleaning. It takes time but you can save the cost. If you select the Tube one by one then the White Ink will not be retrieved. Follow the indications on the Display and operate with Maintenance Cartridge. If you leave GT-3 printer - Brother International GT-361 | Instruction Manual - English - Page 106
W1 is finished successfully. Repeat the steps for other White Print Head(s). Insert White Capping Cartridges (option) in place of White Ink Cartridge when you leave the GT-3 printer unused for more than two weeks. See "6-2-5. Required Maintenance for the Long Storage" and "1-3-5. Consumable - Brother International GT-361 | Instruction Manual - English - Page 107
White Ink. Ink in the Waste Ink Tank (more than 500 ml). (3) Confirm that the printer the remained White Ink. It takes Cartridge from W1 slot and insert well-shaken White Ink Cartridge. Tube Cleaning W1 is finished successfully. 6-2-3. Waste Ink Disposal Use a polyethylene tank for additional Waste Ink - Brother International GT-361 | Instruction Manual - English - Page 108
Program ] > [ Brother GT-3 Tools ] > [ Useful Tools ]. Grid14x16.ar3 is for the standard Platen 14x16. (See "3-3-7. Opening the Useful Tools".) (1) Press the the printer for operation. 0077Y (3) Clean the surface of the Platen using a soft cloth damped with mild detergent, and then wipe it using a - Brother International GT-361 | Instruction Manual - English - Page 109
prevent ink clogging inside the Maintenance Unit. As for White, execute Tube Cleaning and insert Capping Cartridges (four for GT-381, two for GT-361) with Maintenance Solution filled. z Do not run the printer when you mount Capping Cartridge. The Print Heads may seriously damaged. z Use Wash - Brother International GT-361 | Instruction Manual - English - Page 110
printer and mount the White Ink Cartridges instead of either the Maintenance Cartridge or Maintenance Solution-mixed White Ink Cartridge on the Display and load the White Ink by replacing to the White Ink Cartridge. (2) After loading the White Ink, print Nozzle Check Pattern for both Color - Brother International GT-361 | Instruction Manual - English - Page 111
Troubleshooting 7. Troubleshooting Printer may be seriously damaged by this. Do not put your hands inside the covers while the printer disassemble the ink cartridge. Take care not to let the liquids: Ink, Wash Furthermore, do not drink the liquids: Ink, Wash Liquid, Maintenance Solution, Pretreatment - Brother International GT-361 | Instruction Manual - English - Page 112
7. Troubleshooting 7-1. Solving Printer Problems Use the table below to help solve printer problems. Problem Cannot send print data from the PC. Cause You have selected the wrong printer. Solution Confirm the selected printer, and select the correct one. USB cable not connected Disconnect and - Brother International GT-361 | Instruction Manual - English - Page 113
7. Troubleshooting Problem GT-3 does not turn on. An error occurred just after turning on GT-3. GT-3 cannot read data from files are saved. GT-3 cannot print GT-541/GT-782 print data. Make AR3 print data with Brother GT-3 File Output printer driver. That USB flash drive does not Use a USB flash - Brother International GT-361 | Instruction Manual - English - Page 114
" and modify the artwork. See "4-3. Setting the Printer Driver Condition" and select proper Color Processing to adjust saturation and contrast. Select the resolution 1200 x 1200 dpi and increase the ink amount. See "6-1-1. Replacing the Ink Cartridge". Press the Head Cleaning Button to clean the - Brother International GT-361 | Instruction Manual - English - Page 115
this 5 times does not solve the problem, see "7-2-2. Cleaning the Print Heads". Daily Cleaning White is not Do the steps in "6-2-1. Daily Cleaning White for done. White Ink Cartridges were replacing dull White Ink". Shake the White Ink not shaken enough. Cartridges well. GT-3 Series 105 - Brother International GT-361 | Instruction Manual - English - Page 116
Ink, you do not have to load Maintenance Solution, go on the Initial Cleaning with White Ink Cartridge with "Maintenance Cartridge" is indicated on the Display, and press the Stop Button to discontinue the operation after 10 seconds. If the problem is not solved, proceed to the next step. 106 GT - Brother International GT-361 | Instruction Manual - English - Page 117
printer unused using the Nozzle Cleaning Kit (see "7-2-6. Cleaning the Print Head Nozzles"). Use problem is not solved, go to the next step. Step 6: Contact Brother Customer Service or your dealer. Please tell your service how the issue has started, the present conditions, the troubleshooting - Brother International GT-361 | Instruction Manual - English - Page 118
problems (e.g. stripes/ banding appears on the printed image). Please do the "manual" head cleaning. Using the Head Cleaning Button (1) Make sure your printer in "7-2-1. Procedure for Solving the Print Quality Problems". After a long storage, or when you find ink tubes have "empty air" space inside, - Brother International GT-361 | Instruction Manual - English - Page 119
Troubleshooting (3) Place a sheet of paper (A4 or letter size) at the right corner of the Platen as shown below. Use adhesive tape to make the paper flat. You can use (7) Check the printed pattern to identify which Print Head has the problem. 05e0030Y CMYK: If there is stripes (arrow 1) or line - Brother International GT-361 | Instruction Manual - English - Page 120
page, the Print Heads of W1 W2 (GT-381: one in W1, two in W2) have the problem. The Print Heads need to be cleaned (better to execute [ All Whites] , see "7-2-2. Cleaning the Print Heads"). GT-3 has multiple White Heads (4 on GT-381, 2 on GT-361) and mis-firing is not so severe compared - Brother International GT-361 | Instruction Manual - English - Page 121
7. Troubleshooting 7-2-4. Changing the Print Direction When there are large gaps between the Print Heads and printed medium, or when printing on very high absorbent material, horizontal stripes and color graining can appear on the printed image. You can solve this problem using one-way "Uni- - Brother International GT-361 | Instruction Manual - English - Page 122
Troubleshooting 7-2-6. Cleaning the Print Head Nozzles Use "7-2-1. Procedure for Solving the Print Quality Problems". (1) Make sure your printer is in either [ Standby ] or Nozzle Cleaning Kit is available for CMYK / White inks. z Use Clean Applicators in Nozzle Cleaning Kit (white grip GT-3 Series - Brother International GT-361 | Instruction Manual - English - Page 123
7. Troubleshooting (7) Wet the surface (nozzle plate) of the Print Head with Wash Liquid. Then rub softly the nozzle plate to remove ink and debris (clogged ink) from the nozzle plate until the nozzle plate is clean. Use a soft, clean and lint-free cloth to loosen and remove the dirty ink and debris - Brother International GT-361 | Instruction Manual - English - Page 124
Troubleshooting Brother. for further information. Color Maintenance Cartridge (option) is necessary to clean the Tubes with Maintenance Solution. CMYK Print Head: (1) Make sure your printer Remove the Ink Cartridge whose Print Head will be replaced and insert Color Filter Cartridge. Select [ - Brother International GT-361 | Instruction Manual - English - Page 125
Troubleshooting (5) Select [ Maintenance ] > [ Color Tube Cleaning ] from the menu and select the Print Head to be replaced and press the OK Button. Color Tube Cleaning then starts. The Color Maintenance Cartridge Filter Cartridge turn OFF the printer. (9) Open will be used during the - Brother International GT-361 | Instruction Manual - English - Page 126
7. Troubleshooting (12) Remove the plastic cover on the Carriage PCB. Disconnect the white cable (left) and remove the four claws on the the black tabs at the both edges of Flat Cable of the Print Head to the front side of the printer, and remove the Flat Cable (the following example: Magenta). 116 - Brother International GT-361 | Instruction Manual - English - Page 127
7. Troubleshooting (15) Put hold the Knob and pull up the Print Head and remove it from the printer (right). Keep the surface of the Print Head (Nozzles) safe, do not ) Mount the new Print Head on the printer. Fit the V-shaped groove to the Positioning Pin (right). V-shaped groove Positioning Pin - Brother International GT-361 | Instruction Manual - English - Page 128
7. Troubleshooting (19) Hold the knob of the Print Head (left) and push Cable at an angle. The electric current may not be stable and increase the Print Head temperature. which causes machine errors, mis-firing, and give serious damage to the Print Head. Do not repeat the insertion, or the terminal - Brother International GT-361 | Instruction Manual - English - Page 129
7. Troubleshooting (24) Mount the Plastic Cover over the Carriage PCB. Put it both hands. (29) Turn ON the printer. (30) Remove the Filter Cartridge and insert the Ink Cartridge. (31) Select [ Maintenance ] > [ Initial Cleaning ] from the menu and load the ink. (32) Execute the Normal Cleaning for - Brother International GT-361 | Instruction Manual - English - Page 130
. If you still see the problem in print quality, contact your Brother dealer for assistance. White Print Head printer is in either [ Standby ] or [ Ready ] mode. (2) Prepare White Filter Cartridge*, White Maintenance Cartridge (option*) and Maintenance Solution*. Confirm the room of the Waste Ink - Brother International GT-361 | Instruction Manual - English - Page 131
7. Troubleshooting (6) Put on the gloves again. Rotate the Tube the Carriage (left), hold the Knob and pull up the Print Head and remove it from the printer (right). Keep the surface of the Print Head (Nozzles) safe, do not touch to other parts z Do not break or bend the Tubes. GT-3 Series 121 - Brother International GT-361 | Instruction Manual - English - Page 132
by CMYK ink) (20) If the quality is OK go on to the next section "7-2-8. Adjustment after the Print Head has been replaced" to complete the adjustment after the Print Head replacement. If you still see the problem in print quality, contact your Brother dealer for assistance. 122 GT-3 Series - Brother International GT-361 | Instruction Manual - English - Page 133
Troubleshooting Sheet, mounting the modified Platen and so on. (1) Make sure your printer is connected to your PC with USB 2.0 cable. (2) Prepare some colored T-shirt (better to be pretreated). (3) Execute [ GT-3 Maintenance ] in [ Brother GT-3 GT-Tools ]. (4) Select [ Firing Adjustment ] and click [ - Brother International GT-361 | Instruction Manual - English - Page 134
7. Troubleshooting 7-2-9. Adjusting the CR Speed Execute this menu after you clean the Carriage Shaft, or you are asked from the technical support. See "6-1-6. Cleaning the inside of the printer and restart". (1) Press either one of the Up / Down / Back / OK Button to enter the Menu. (2) Select [ - Brother International GT-361 | Instruction Manual - English - Page 135
7. Troubleshooting 7-2-11. Adjusting the Flushing Volume Flushing is very important to keep the print quality. The initial setting is decided on the assumption that the printer works under the environment of 35 % humidity. Use a humidifier to avoid the Print Heads from clogging with dried ink as - Brother International GT-361 | Instruction Manual - English - Page 136
7. Troubleshooting 7-2-12. Adjusting the amount of White Ink in Daily Cleaning White The function [ Daily Cleaning White ] is very important to print white. The necessary volume of wasting White Ink depends how the printer is used. You can save the White Ink when you use GT-3 every day, and you've - Brother International GT-361 | Instruction Manual - English - Page 137
drive You may be asked from the technical support to get the log data of the GT-3 for troubleshooting. Insert the USB flash diver to save the Button stops blinking and the printer bells. (5) Make a copy of the log file saved in the USB flash drive and send it to the technical service. Do not - Brother International GT-361 | Instruction Manual - English - Page 138
. In Adobe Illustrator 10 follow the instruction below, and then try to send the print data again: (1) Open "Print Setup" in the "File" menu. (2) Select GT-3 as the printer, and then click "OK". (3) Open "Document Setup" on "File" menu. (4) Check "Use Print Setup". (5) Confirm the "Orientation - Brother International GT-361 | Instruction Manual - English - Page 139
7. Troubleshooting 7-4. Error Messages Here is a complete list of error messages that GT-3 shows. Make contact to your dealer or Brother when mark ** is in Solution, with the information of Error Code No and the message on the Display. Error code Message 1000 (INK LOW Black) 1001 (INK LOW - Brother International GT-361 | Instruction Manual - English - Page 140
and clean the inside of the printer. See "6-1. Replacing Consumables". 1210 Exhaust Fan Stop The Fan to exhaust ink mist is stopped. ** 2000 NO INK Black Black Ink Cartridge is not installed. Install a Black Ink Cartridge. 2001 NO INK Magenta Magenta Ink Cartridge is not installed. Install - Brother International GT-361 | Instruction Manual - English - Page 141
data with 4 White Print Head data included. Confirm that the Machine Mode is GT-341 by Printer Driver. GT-341 cannot receive the print data with White print data included. Confirm that the Machine Mode is GT-361 by Printer Driver. GT-361 cannot receive the print data with four White Print Head data - Brother International GT-361 | Instruction Manual - English - Page 142
drive. Or reboot GT-3. See " 7-1. Solving Printer Problems". Error in selected language data for the Display. Error in font data for the Display. Update firmware again from the beginning if you find this error after you cancel the firmware update. Contact your dealer or Brother. Error in the - Brother International GT-361 | Instruction Manual - English - Page 143
your dealer or Brother. ** 5302 5311 5312 5313 5314 5315 5316 5317 5318 5401 5402 5403 5404 5405 Machine Error Machine Error W1 Ink Sensor malfunction W2 Ink Sensor malfunction W3 Ink Sensor malfunction W4 Ink Sensor malfunction Black Ink Sensor malfunction Magenta Ink Sensor malfunction Cyan - Brother International GT-361 | Instruction Manual - English - Page 144
5471 5472 5473 5474 5475 5476 5477 Machine Error 5478 134 Meaning Solution Communication error between Main PCB and Maintenance Unit Confirm if there is any device around GT-3 that makes strong noise. Move GT-3 from that device. Contact your dealer or Brother when the issue was not solve - Brother International GT-361 | Instruction Manual - English - Page 145
at the proper position Check whether the media is jamming in the Carriage. Clean GT-3 by referring ""6-1-7. Cleaning the Encoder Strip" and "6-1-6. Cleaning the inside of the printer and restart". Contact your dealer or Brother if the cleaning has no effect. CR time-out of the Carriage during - Brother International GT-361 | Instruction Manual - English - Page 146
Troubleshooting Error code 6114 Message Machine Error 6120 Machine Error 6121 Machine Error 6122 Machine Error 6123 Machine Error 6124 6125 Machine Error Machine Error 6126 Machine Error 6127 Machine Error 6134 6154 Machine Error Machine Error 6160 Machine Error 7000 Machine Brother - Brother International GT-361 | Instruction Manual - English - Page 147
53.9 × 41.1 × 26.0 inch ) Weight Approx. 111 Kg (245 lb) (GT-782 including Platen) Maximum print area 406.4 mm x 457.2 mm (14 x 16 85 % (no condensation) 8. Specifications 8-2. Software Specification Supported OS Supported interface Minimum system requirements Recommended Applications for - Brother International GT-361 | Instruction Manual - English - Page 148
contents of this manual may differ slightly from the actual product purchased as a result of product improvements. http://www.brother.com/ 1-5, Kitajizoyama, Noda-cho, Kariya 448-0803, Japan. © 2012 Brother Industries, Ltd. All Rights Reserved. This is the original instructions. GT-3 Series SB3151
-
 1
1 -
 2
2 -
 3
3 -
 4
4 -
 5
5 -
 6
6 -
 7
7 -
8
-
9
-
10
-
11
-
12
-
13
-
14
-
15
-
16
-
17
-
18
-
19
-
20
-
21
-
22
-
23
-
24
-
25
-
26
-
27
-
28
-
29
-
30
-
31
-
32
-
33
-
34
-
35
-
36
-
37
-
38
-
39
-
40
-
41
-
42
-
43
-
44
-
45
-
46
-
47
-
48
-
49
-
50
-
51
-
52
-
53
-
54
-
55
-
56
-
57
-
58
-
59
-
60
-
61
-
62
-
63
-
64
-
65
-
66
-
67
-
68
-
69
-
70
-
71
-
72
-
73
-
74
-
75
-
76
-
77
-
78
-
79
-
80
-
81
-
82
-
83
-
84
-
85
-
86
-
87
-
88
-
89
-
90
-
91
-
92
-
93
-
94
-
95
-
96
-
97
-
98
-
99
-
100
-
101
-
102
-
103
-
104
-
105
-
106
-
107
-
108
-
109
-
110
-
111
-
112
-
113
-
114
-
115
-
116
-
117
-
118
-
119
-
120
-
121
-
122
-
123
-
124
-
125
-
126
-
127
-
128
-
129
-
130
-
131
-
132
-
133
-
134
-
135
-
136
-
137
-
138
-
139
-
140
-
141
-
142
-
143
-
144
-
145
-
146
-
147
-
148
 |
 |
GT-3 Series
INSTRUCTION MANUAL
Please read this manual before using the printer.
Please keep this manual within easy reach for quick reference.
GARMENT PRINTER
GT Series US support homepage http://www.brother-usa.com/Garmentprinters/