Brother International GT-361 Instruction Manual - English - Page 21
Upper part of the Maintenance Unit
 |
View all Brother International GT-361 manuals
Add to My Manuals
Save this manual to your list of manuals |
Page 21 highlights
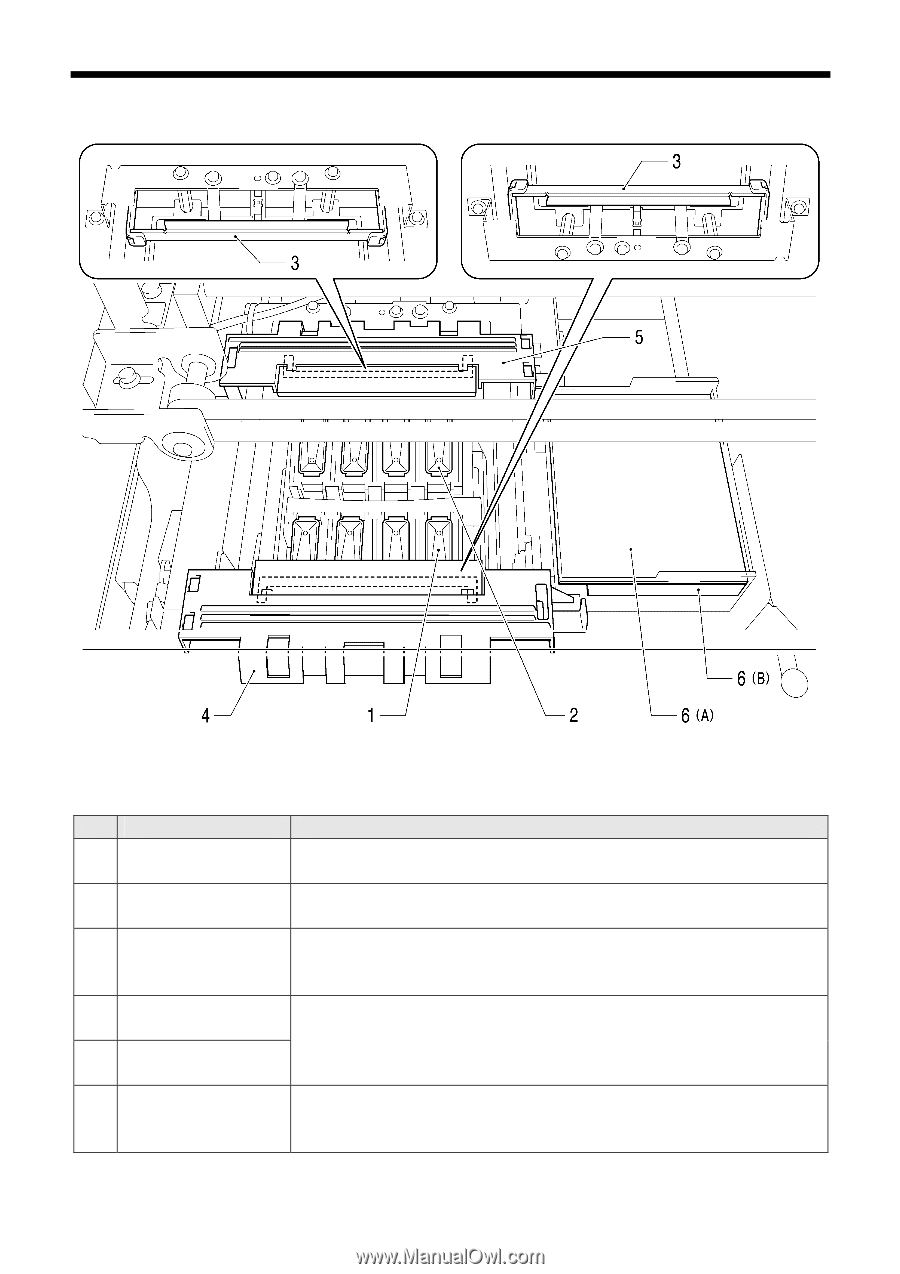
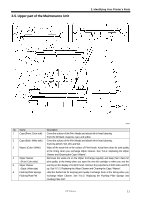
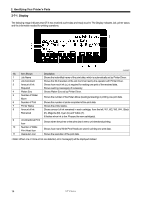
2-5. Upper part of the Maintenance Unit 2. Identifying Your Printer's Parts 0048Y No. Name 1 Caps (Front: Color side) 2 Caps (Back: White side) 3 Wipers (Color / White) 4 Wiper Cleaner (Front: Color side) 5 Wiper Cleaner (Back: White side) 6 Flushing Plate Sponge Flushing Plate Felt Description Cover the surface of the Print Heads and absorb ink in head cleaning. From the left black, magenta, cyan, and yellow. Cover the surface of the Print Heads and absorb ink in head cleaning. From the left W1, W2, W3, and W4. Wipe off the waste ink on the surface of Print Heads. Keep them clean for print quality at the timing when you exchange Wiper Cleaner. See "6-1-2. Replacing the Wiper Cleaner and Cleaning the Caps / Wipers". Removes the waste ink on the Wiper. Exchange regularly and keep them clean for print quality, at the timing when you open the new ink cartridge or when you see the warning on the display of Control Panel. Remove the projections of both sides and lift it up. See "6-1-2. Replacing the Wiper Cleaner and Cleaning the Caps / Wipers". Hold the flushed ink for keeping print quality. Exchange them at the timing when you exchange Wiper Cleaner. See "6-1-3. Replacing the Flushing Plate Sponge and Flushing Plate Felt". GT-3 Series 11
-
 1
1 -
2
-
3
-
4
-
5
-
6
-
7
-
8
-
9
-
10
-
11
-
12
-
13
-
14
-
15
-
 16
16 -
 17
17 -
 18
18 -
 19
19 -
 20
20 -
 21
21 -
 22
22 -
 23
23 -
 24
24 -
 25
25 -
 26
26 -
27
-
28
-
29
-
30
-
31
-
32
-
33
-
34
-
35
-
36
-
37
-
38
-
39
-
40
-
41
-
42
-
43
-
44
-
45
-
46
-
47
-
48
-
49
-
50
-
51
-
52
-
53
-
54
-
55
-
56
-
57
-
58
-
59
-
60
-
61
-
62
-
63
-
64
-
65
-
66
-
67
-
68
-
69
-
70
-
71
-
72
-
73
-
74
-
75
-
76
-
77
-
78
-
79
-
80
-
81
-
82
-
83
-
84
-
85
-
86
-
87
-
88
-
89
-
90
-
91
-
92
-
93
-
94
-
95
-
96
-
97
-
98
-
99
-
100
-
101
-
102
-
103
-
104
-
105
-
106
-
107
-
108
-
109
-
110
-
111
-
112
-
113
-
114
-
115
-
116
-
117
-
118
-
119
-
120
-
121
-
122
-
123
-
124
-
125
-
126
-
127
-
128
-
129
-
130
-
131
-
132
-
133
-
134
-
135
-
136
-
137
-
138
-
139
-
140
-
141
-
142
-
143
-
144
-
145
-
146
-
147
-
148
 |
 |